Page 26 of 46
You can also capture images without touching the device screen. To do that: move
the hand in a hi-five motion towards the top of the screen. You don’t need to
touch the device when doing so.
When you finish capturing images to your satisfaction, tap on the green arrow
button at the top right of the screen and you will be redirected to the image
gallery.
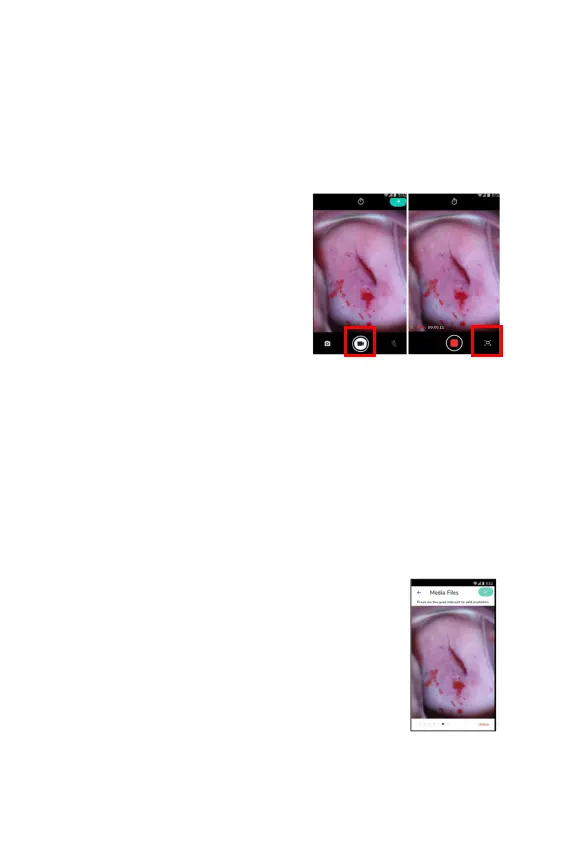
To capture video footage, tap the video
camera button on the left side of the
screen.
You can also capture images while
recording by pressing the right-
at the bottom of the screen.
If you are under a demo or distributor
account, you can take only 3 images and 1
video.
Changing settings during an exam (Camera menu)
The camera’s settings can be managed directly during an exam by accessing the
camera menu. The camera menu can be opened by clicking the settings button
found on the top of the image capture screen.
To switch a feature on or off click on the toggle button to the right of each feature.
Depending on your clinical scenario, a number of settings may be available,
● Green Filter
● Hands-free image capture
Review media files
The files that were captured are
displayed in the order in
which they were taken - from first to last.
•
Swipe with your finger to the left to see the next file
and swipe to the right to see the previous file.