11
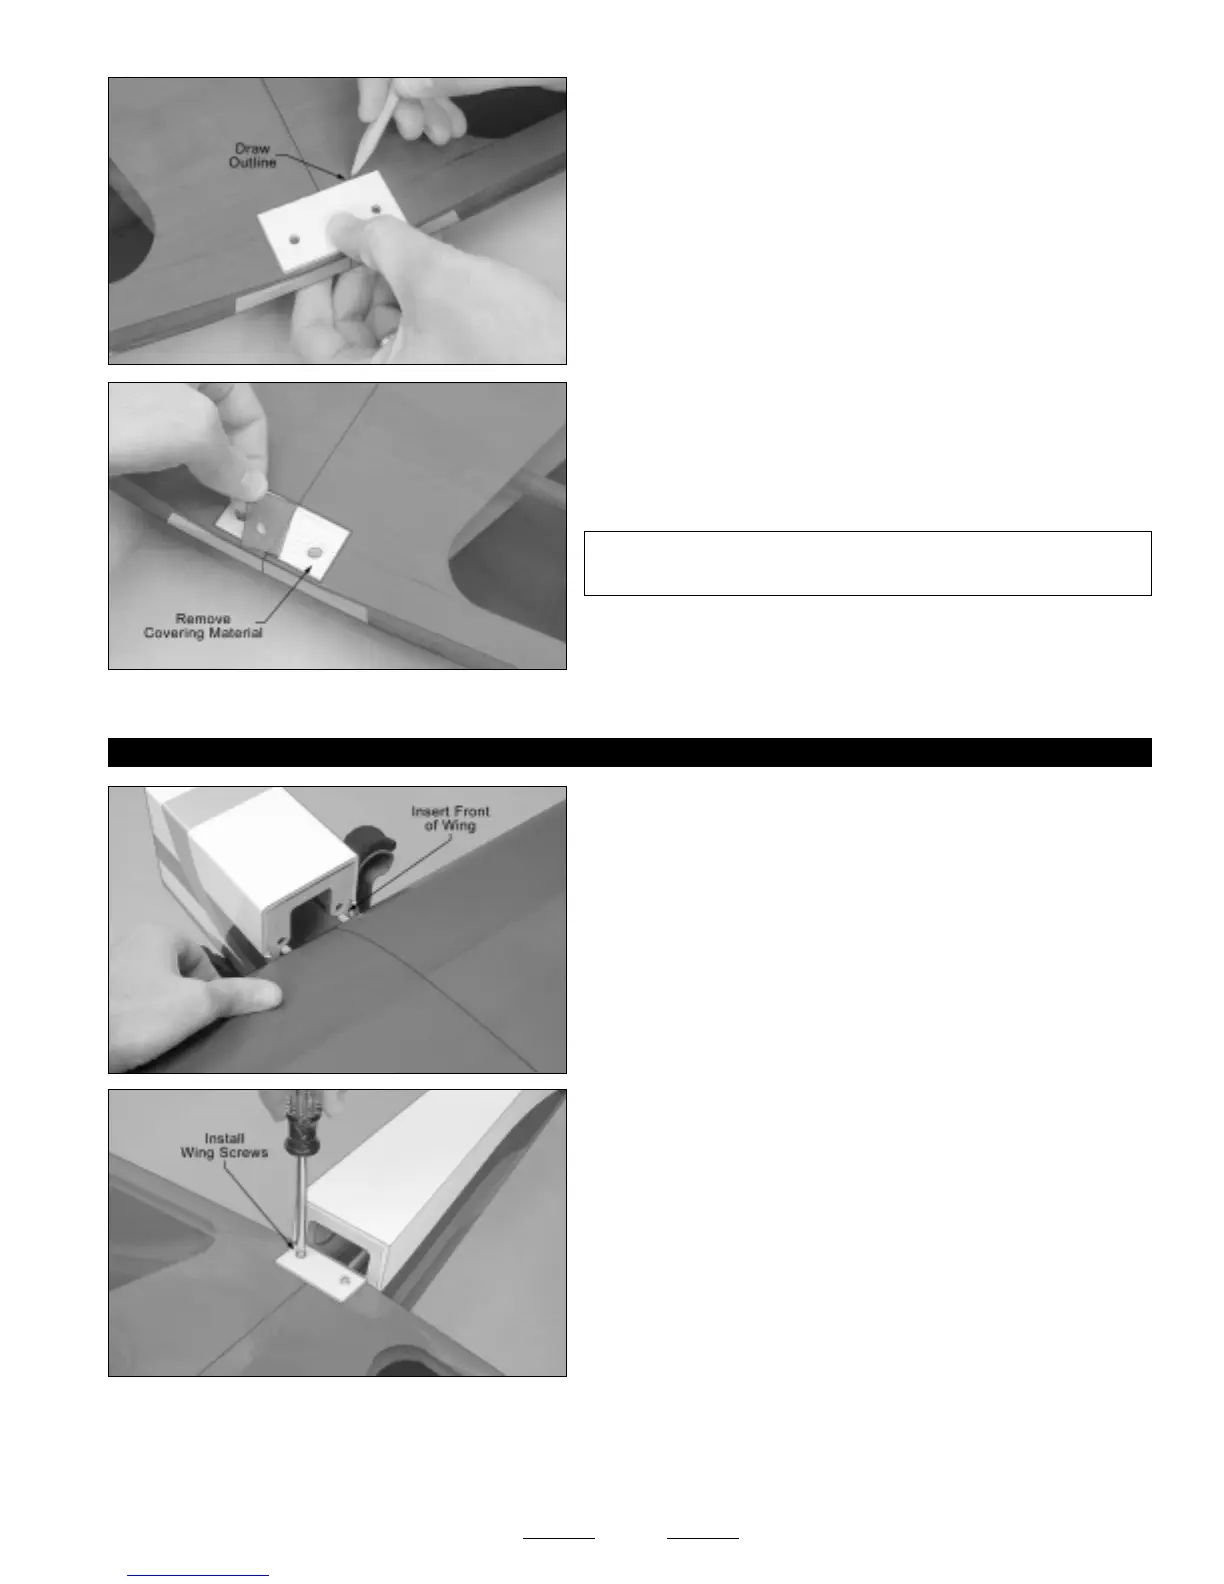
❑ Place the wing-screw doubler onto the bottom of the wing and align
the predrilled holes in the wing-screw doubler with the predrilled holes
in the wing.
❑ While holding the wing-screw doubler in place, trace an outline around
it, using a pencil.
☞
The back edge of the wing-screw doubler should be about
1/16"-3/32" in front of the trailing edge of the wing.
❑ Using a generous amount of thick C/A, glue the wing-screw doubler to the wing. Allow the C/A to fully cure before proceeding.
❑ Using a modeling knife, cut away and remove the covering material
from inside the outline you drew.
✦✦
✦✦
✦IMPORTANT
✦✦
✦✦
✦ Never glue anything directly to covering material.
Always remove the covering material first to ensure a strong glue joint.
STEP 2: MOUNTING THE WING
❑ Align the holes in the wing with the preinstalled blind nuts in the wing
mounting block inside the fuselage.
❑ Secure the wing into place, using two M4 x 40mm machine screws
and two M4 flat washers.
☞
Don't overtighten the screws. You don't want to crush the wing.
❑ Turn the fuselage over and check the fit between the wing and the wing saddle. There shouldn't be any gaps between the two.
If there are any small gaps, we suggest that you apply a strip of foam wing saddle tape (not included) to the wing saddle to seal
the gaps.
☞
Foam tape will prevent fuel from getting inside the fuselage during flight.
❑ Place the wing into the wing saddle, push it forward completely, then
push the trailing edge down into place.
☞
Two holes have been predrilled into the forward bulkhead to accept
the wing hold-down dowels in the leading edge of the wing.