12
❑ Wilhold Silicon Sealant
❑ Excel Modeling Knife
❑ Ernst Airplane Stand
❑ Pencil
❑ (1) Belly Pan
❑ 220 Grit Sandpaper w/Sanding Block
❑ Masking Tape
❑ Paper Towels
❑ Waxed Paper
YOU'LL NEED THE FOLLOWING PARTS FROM THE KIT:
YOU'LL NEED THE FOLLOWING TOOLS AND SUPPLIES:
SECTION 7: BELLY PAN INSTALLATION
STEP 1: ALIGNING THE BELLY PAN
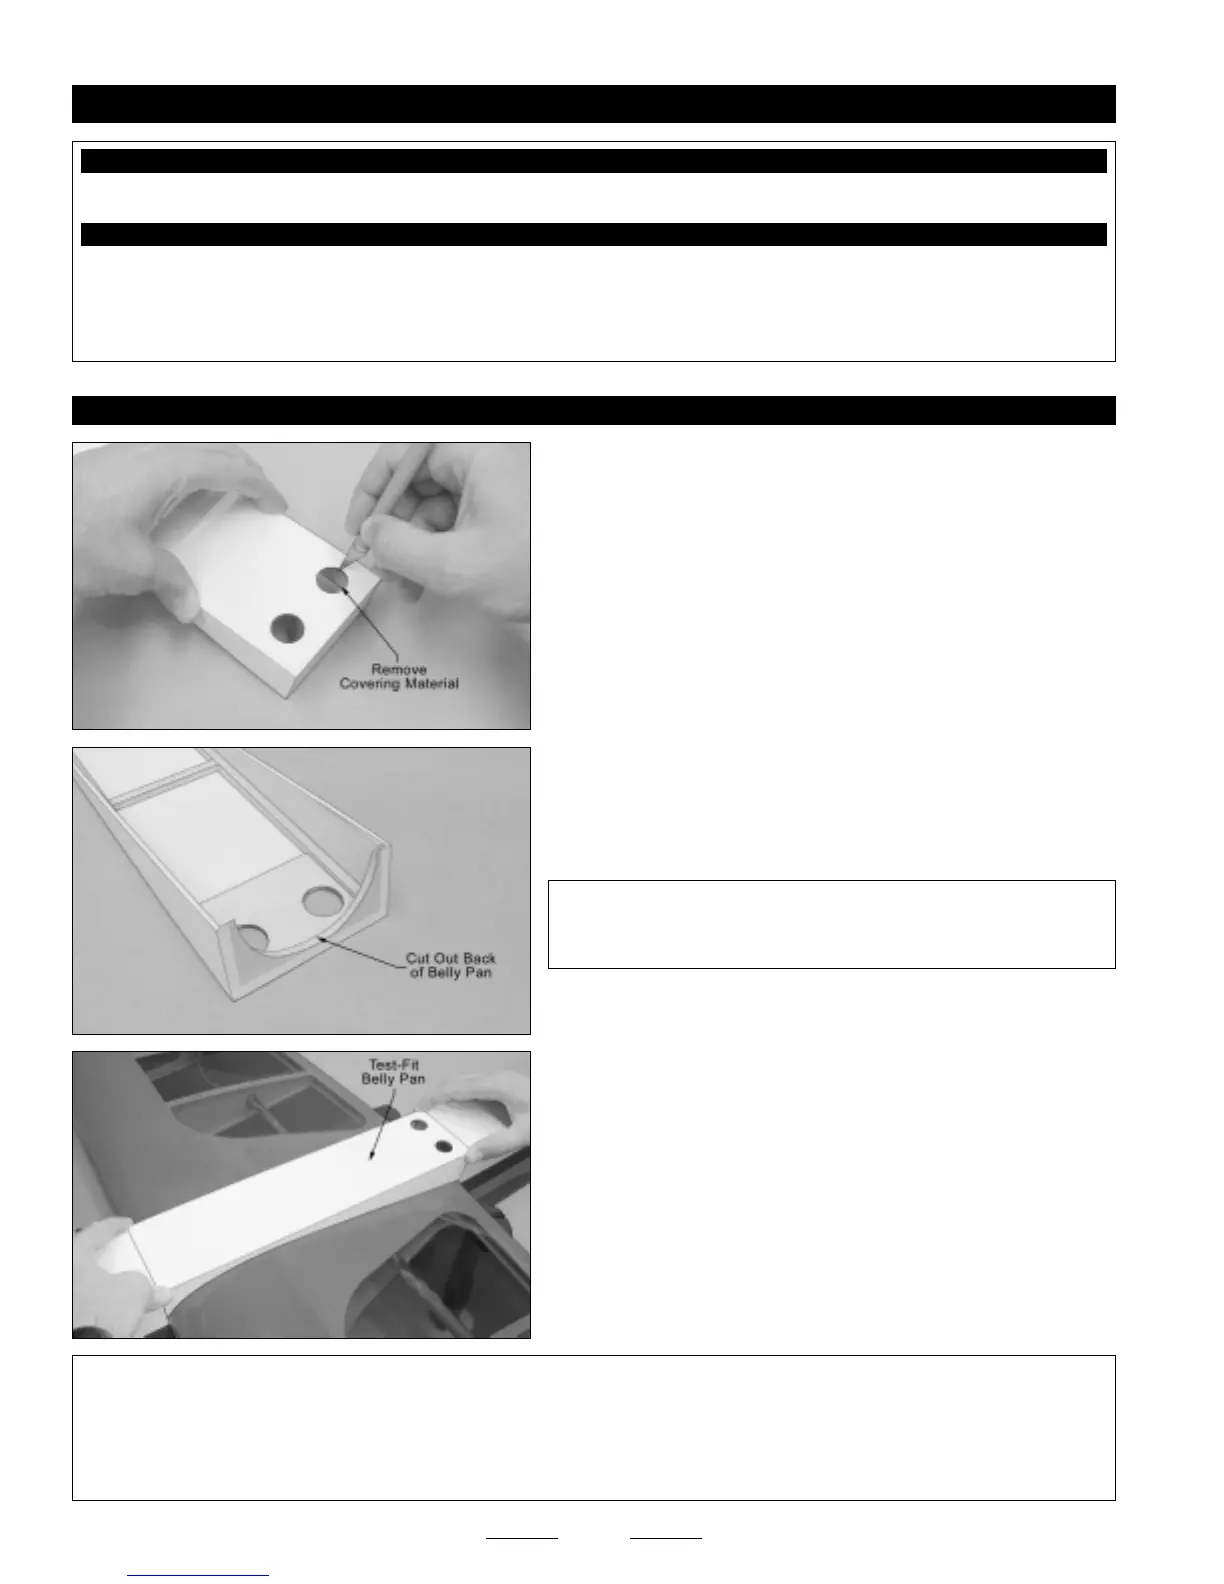
❑ Using a modeling knife, carefully cut out the back of the belly pan,
as shown.
✦✦
✦✦
✦IMPORTANT
✦✦
✦✦
✦ Cutting out the back of the belly pan will allow you
to retrieve the wing screws and washers should they fall loose into
the belly pan after it's glued to the wing.
❑ Using a modeling knife, cut away and remove the covering material
from over the two precut wing-screw access holes in the bottom of the
belly pan.
❑ With the wing installed onto the fuselage, position the belly pan onto
the wing. When lined up properly, the sides and bottom of the belly
pan should be even with the sides and bottom of the fuselage, and
there should be few or no gaps between the base of the belly pan and
the wing.
☞
Some small gaps between the belly pan and the wing are normal.
They will be filled with silicon when the belly pan is glued in place.
✦✦
✦✦
✦IMPORTANT
✦✦
✦✦
✦ So that the wing can be installed and removed, there should be about a 1/16" wide space between the fuselage
and the front and back of the belly pan.
If there are any large gaps between the base of the belly pan and the wing, use 220 grit sandpaper to sand away some material
from the base of the belly pan. Remove small amounts of material at a time and recheck the fit often until you are satisfied with
the fit.
Continued On Next Page
☛☛
☛☛
☛