13
STEP 2: INSTALLING THE BELLY PAN
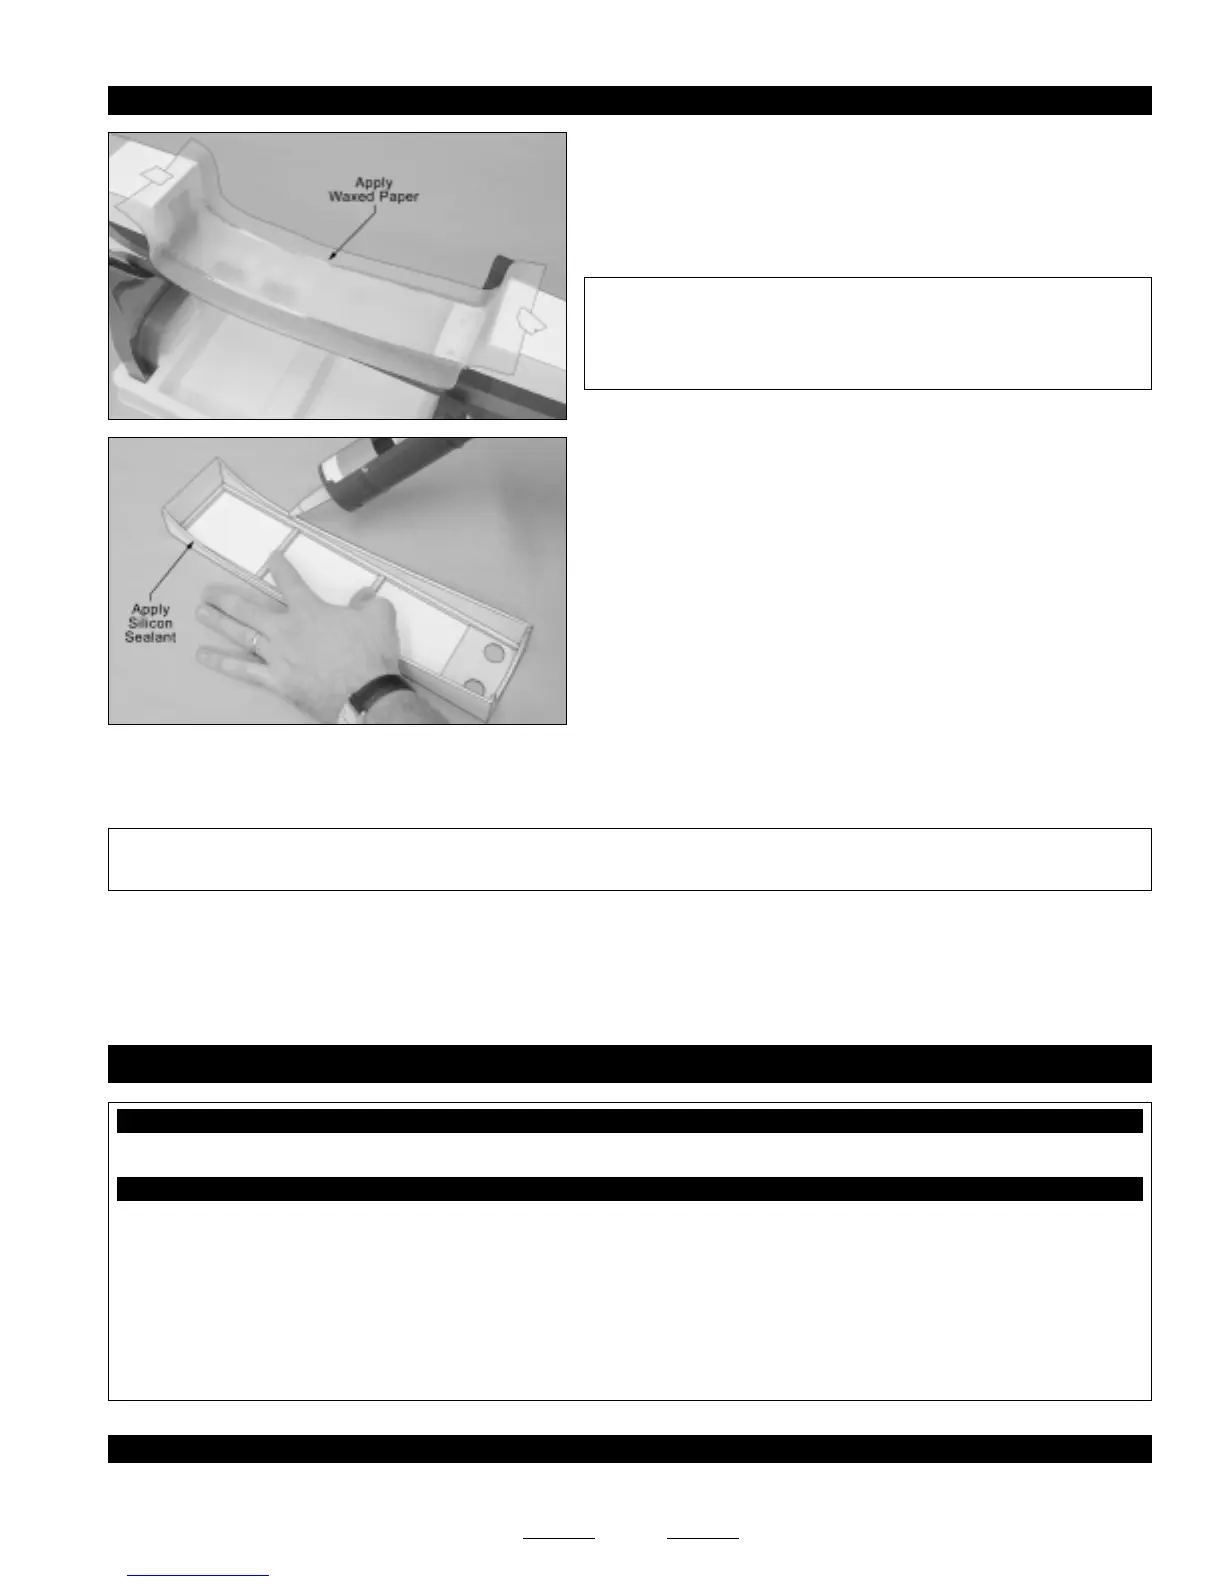
❑ Remove the wing, lay a long piece of waxed paper over the wing
saddle, then reinstall the wing, making sure that the ends of the waxed
paper are covering the joints between the fuselage and the leading and
trailing edges of the wing.
✦✦
✦✦
✦IMPORTANT
✦✦
✦✦
✦ It's important to use waxed paper or plastic wrap
when you glue the belly pan to the wing. The waxed paper will
ensure that you don't accidentally glue the wing to the fuselage when
you glue the belly pan into place.
❑ Apply a generous bead of silicon sealant to the base of the belly
pan, making sure that you cover all of the gluing surfaces. This includes
not only the sides of the belly pan, but the front and back, too.
☞
Make sure to use enough silicon sealant to fill any small gaps or
irregularities in the glue joint.
❑ Set the belly pan back into place and realign it. When satisfied with the alignment, push the belly pan down firmly and remove
any excess silicon sealant, using a paper towel and water. Hold the belly pan securely in place, using pieces of masking tape, until
the silicon sealant completely cures.
✦✦
✦✦
✦IMPORTANT
✦✦
✦✦
✦ It will take the silicon sealant about 24 hours to fully cure. We suggest not moving the assembly during this
time. You must allow sufficient time for the silicon sealant to dry.
❑ After the silicon sealant has fully cured, look carefully at the glue joint between the belly pan and the wing. If there are any gaps
in the glue joint, carefully fill them using extra silicon sealant, making sure to remove any excess before it cures, using a paper towel
and water. This will ensure the strongest possible bond.
❑ Kwik Bond 30 Minute Epoxy
❑ Excel Modeling Knife
❑ Ernst Airplane Stand
❑ Ruler
❑ Pencil
❑ Dubro T-Pins
❑ Builder's Triangle
❑ 220 Grit Sandpaper w/Sanding Block
❑ Masking Tape
❑ Paper Towels
❑ Rubbing Alcohol
❑ NHP Epoxy Mixing Sticks
❑ NHP Epoxy Mixing Cups
YOU'LL NEED THE FOLLOWING PARTS FROM THE KIT:
YOU'LL NEED THE FOLLOWING TOOLS AND SUPPLIES:
SECTION 8: STABILIZER INSTALLATION
❑ (1) Horizontal Stabilizer w/Elevator Halves
❑ (1) Vertical Stabilizer w/Rudder
Continued On Next Page
☛☛
☛☛
☛
STEP 1: ALIGNING THE HORIZONTAL STABILIZER
❑ Remove the elevator halves and hinges from the horizontal stabilizer and set them aside for now.