14
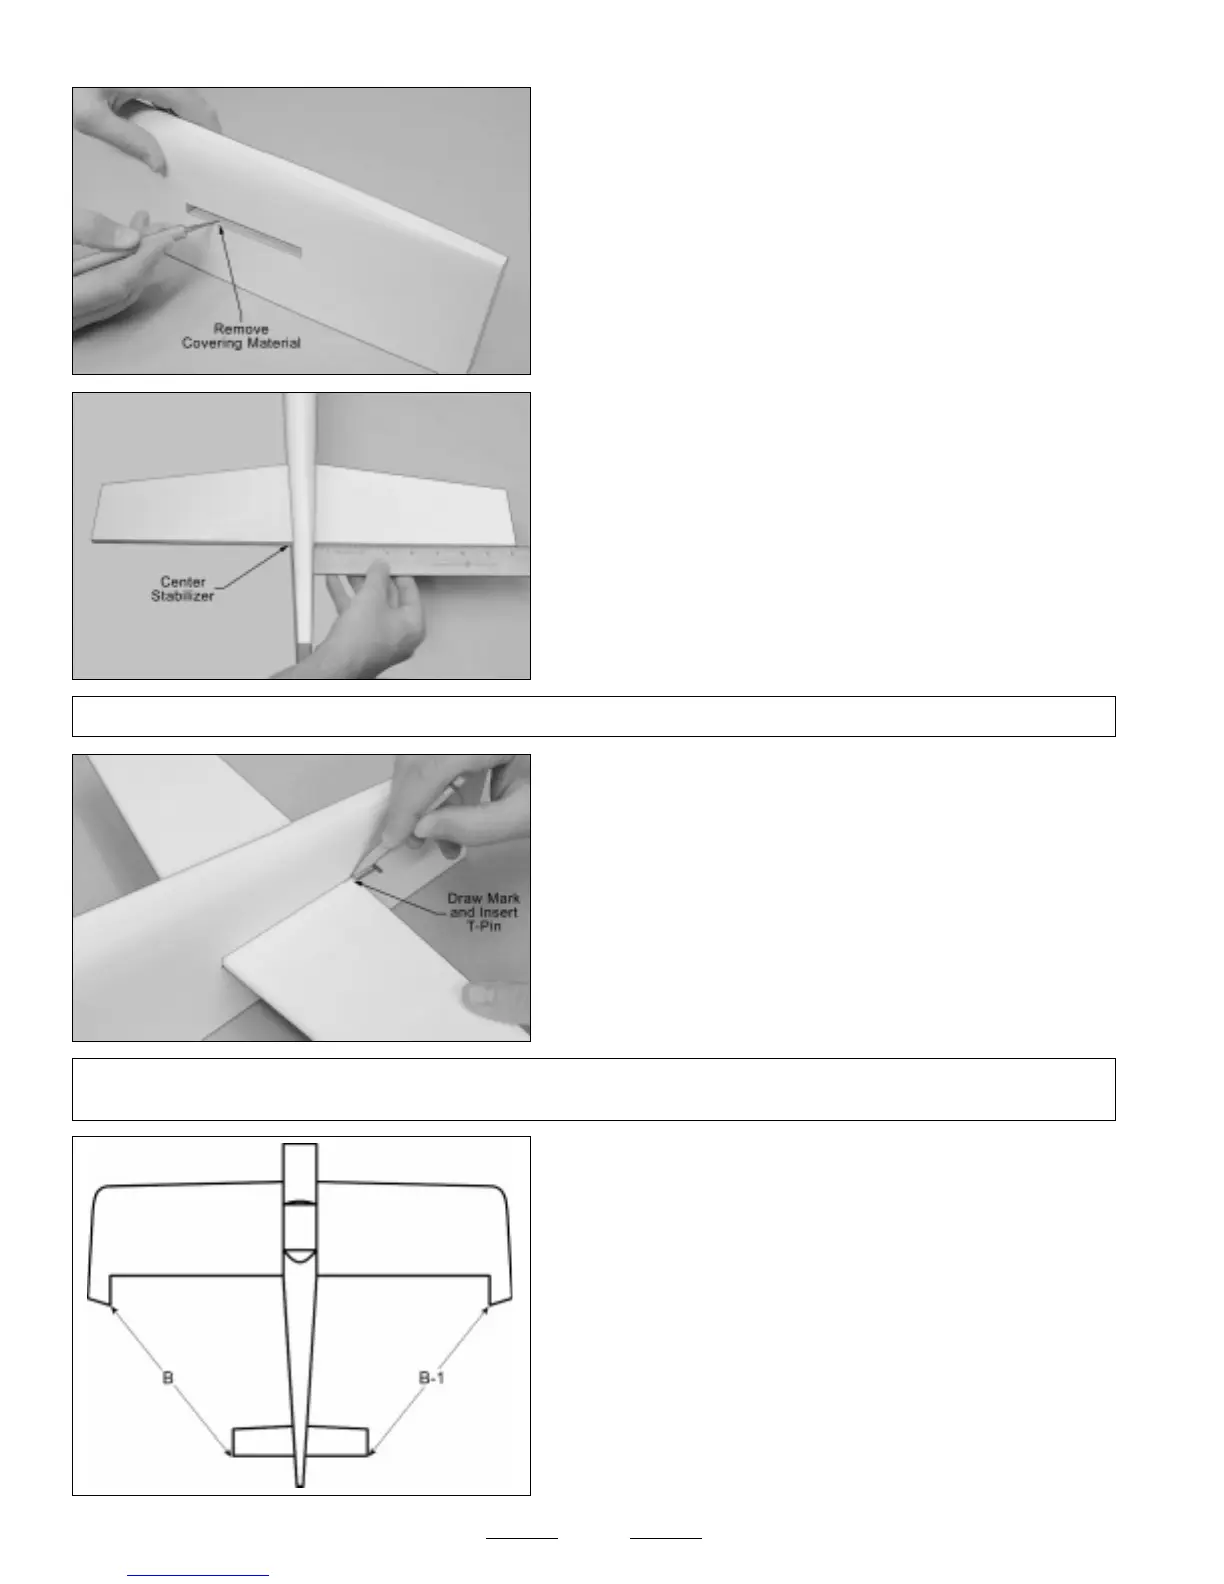
❑ Using a modeling knife, cut away and remove the covering material
from over the horizontal stabilizer mounting slot in each side of the
fuselage.
☞
The slot is located 7" in front of the back edge of the fuselage and
is 4" long and 5/16" wide.
❑ Slide the horizontal stabilizer into the mounting slot and center it by
carefully measuring out from each side of the fuselage to each end of
the stabilizer (at the trailing edge only for now). When the stabilizer is
centered, both measurements will be equal.
❑ When you're satisfied that the stabilizer is centered at the trailing
edge, draw a mark on each side of the stabilizer (at the trailing edge)
where it meets the fuselage sides.
❑ With the marks on the stabilizer lined up with the fuselage sides, hold
only the trailing edge of the stabilizer in position, using a T-Pin.
✦✦
✦✦
✦IMPORTANT
✦✦
✦✦
✦ The front of the stabilizer should be able to pivot from side to side and the back should stay firmly in place and
aligned. The trailing edge should not be allowed to move from side to side.
❑ With the wing mounted to the fuselage, use a ruler to measure the
distance between the tips of the stabilizer and the tips of the wing. Pivot
the front of the stabilizer until both of these measurements are equal.
☞
When both of these measurements are equal, you're assured
that the stabilizer is square to the wing.
B=B-1
Continued On Next Page
☛☛
☛☛
☛
✦✦
✦✦
✦IMPORTANT
✦✦
✦✦
✦ Make sure that the top of the stabilizer (the white side) is facing up when you slide it into place.