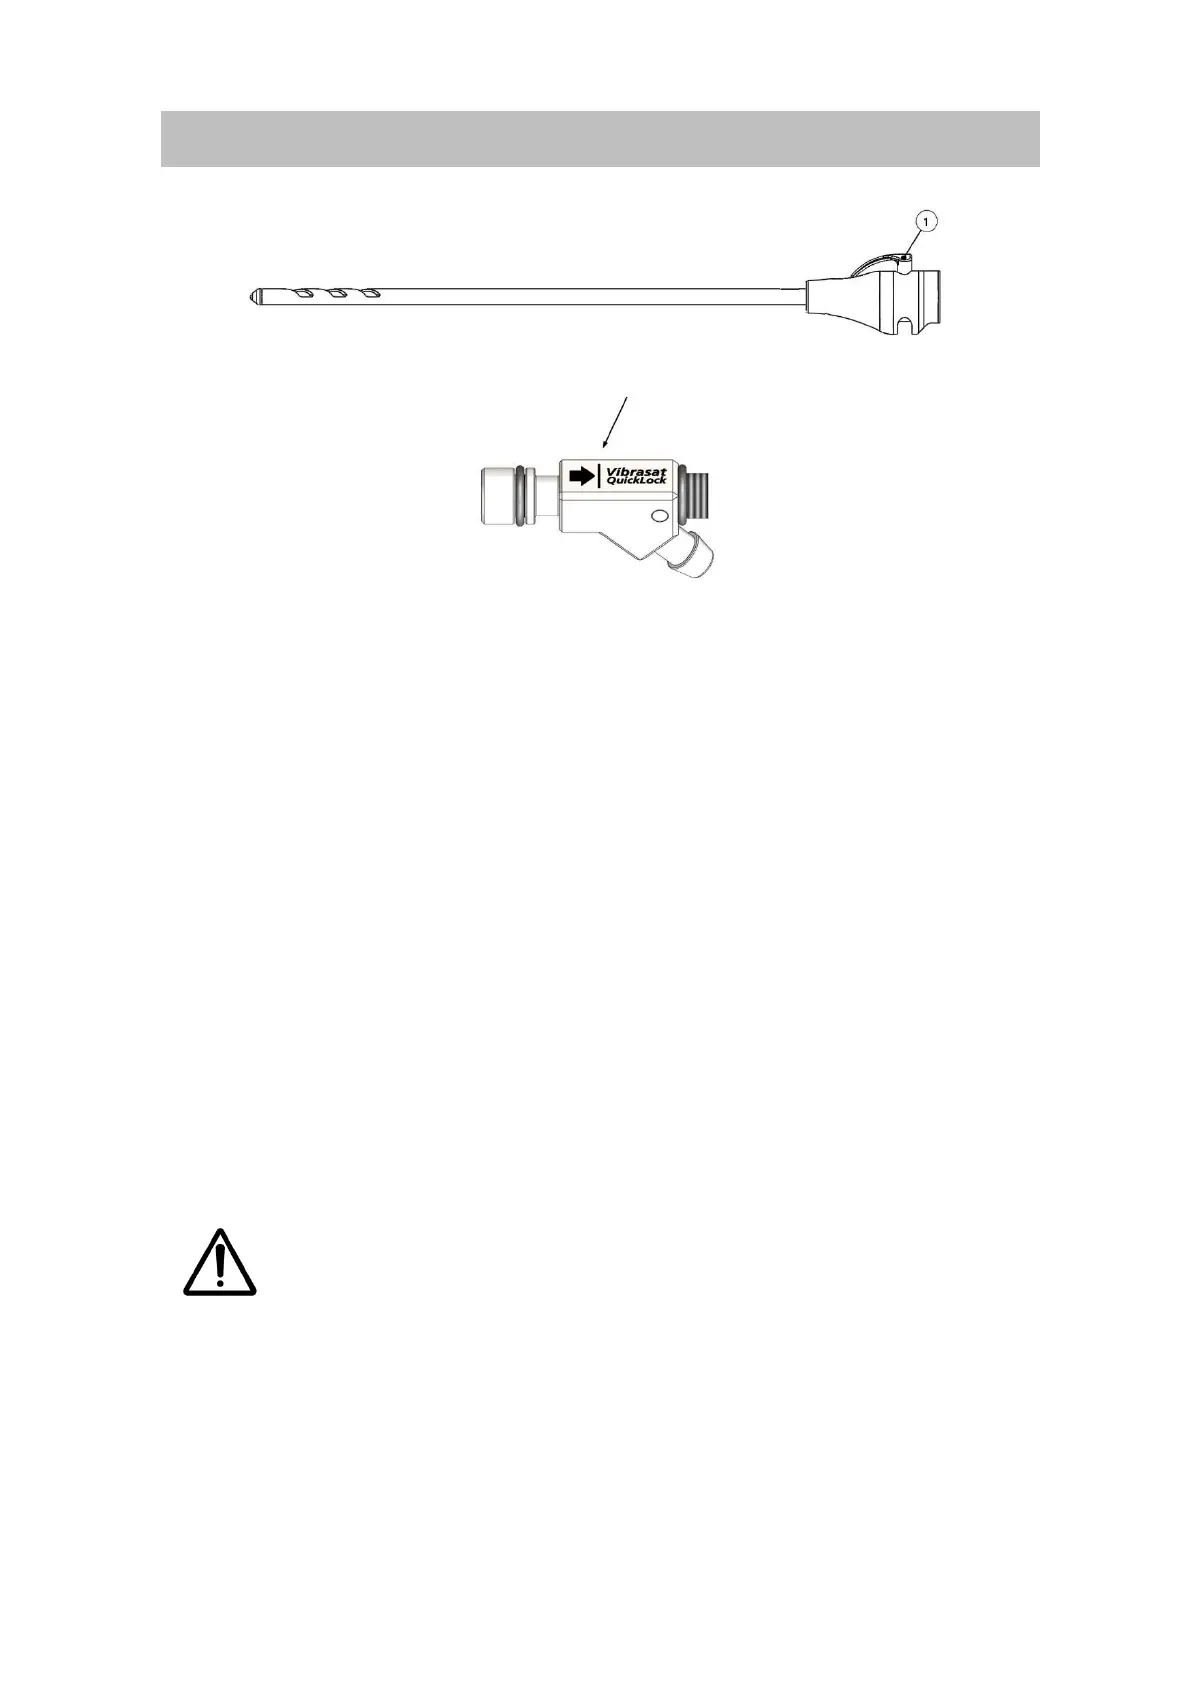
• Connect a suitable cannula for the application to the cannula holder. For this, hold the
lock (Figure 4, Point 1) pressed down whilst attaching until the square of the cannula hold
locks into place. Then push the cannula at the attachment further, beyond the marked
line (Figure 5), until it audibly clicks into place.
The Vibrasat
®
Pro is now ready for use.
4.4 Disassembly
• Press the unlocking button on the cannula attachment and pull the cannula out of the
cannula holder.
• Firstly pull the suction tube out of the cannula holder and then out of the tube holder.
• Turn the lock nut of the cannula holder anticlockwise vis-à-vis the handle
Vibrasat
®
Pro Wand and push the released nut up to the handle housing.
• Pull the cannula holder off the handle.
• Pull the connecting cable of the Vibrasat
®
Pro Wand off the Vibrasat
®
Pro Console.
After each use, the Vibrasat
®
Pro Console must be processed as per the
hygiene guidelines (see Chapter 6) and the Vibrasat
®
Pro Wand must be
processed as per the reprocessing instructions provided by the
manufacturer.
 Loading...