5. Install the stainless steel washers and nylon locknuts onto the mounting
screws underneath the boat deck. Tighten them securely with a P3
screwdriver and a 7/16 in. wrench.
IMPORTANT: If necessary, shim the rubber washers with 25 mm (1 in.)
outside diameter stainless steel washers to create a level mounting surface.
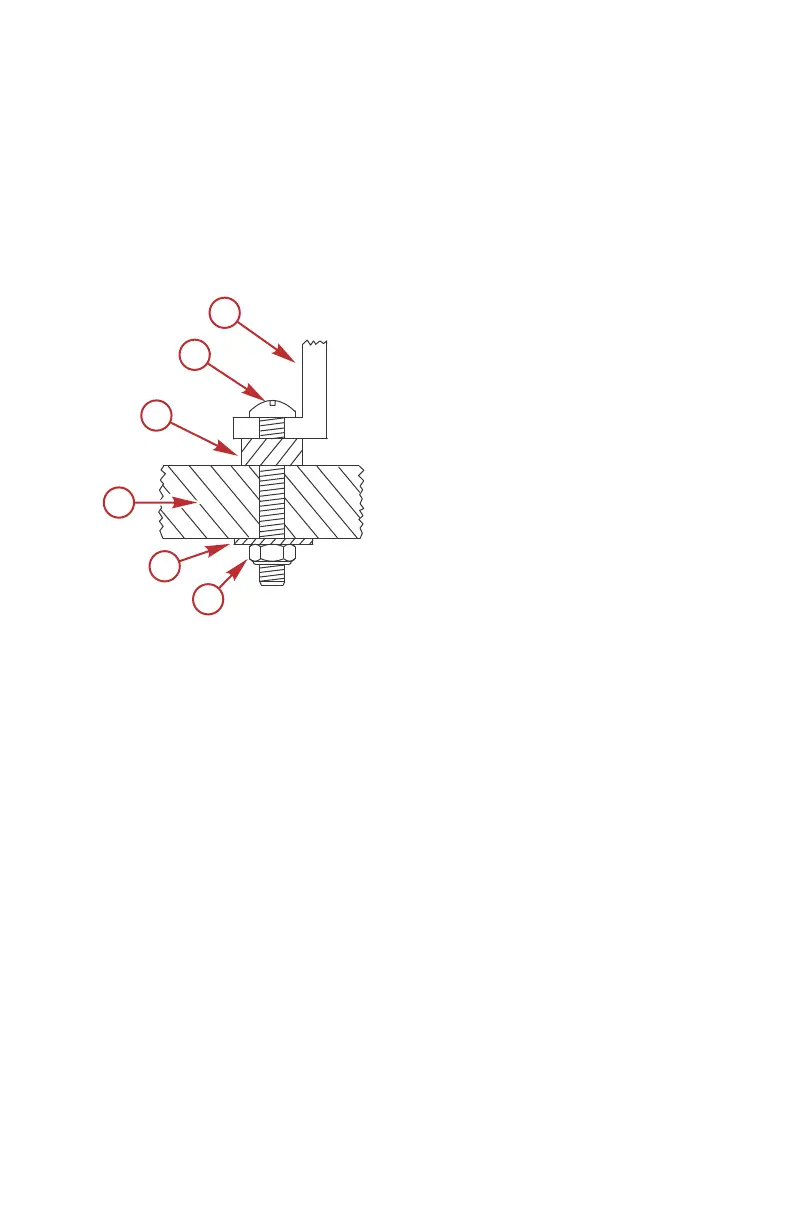
IMPORTANT: The mount bracket must lay flush against the rubber isolators
before being bolted to the deck or the mount will bind, making it difficult or
impossible to unlatch.
a - Mount bracket
b - Mounting screw
c - Rubber isolator
d - Deck
e - Washer
f - Nylon locknut
6. Once installed, the bracket should fasten securely and evenly, with the
latch pins in the slots, and release with a light, quick pull on the rope
handle.
Permanent Foot Pedal Mounting (Optional)
1. Determine a suitable location for the foot pedal with the trolling motor
deployed and in the stowed position. Ensure that there are no
obstructions beneath the boat deck that would interfere with the mounting
screws, such as bulkheads or boat wiring.
2. Once a suitable location is chosen, mark the mounting holes, using the
foot pedal as a template.
3. Use a 3 mm (7/64 in.) drill bit to drill holes through the boat deck.
TROLLING MOTOR INSTALLATION AND OPERATION
eng 17
 Loading...