Do you have a question about the Motorola ASTRO XTS 5000 I and is the answer not in the manual?
Important safety information before operating the radio.
Information on changes to the manual via FMRs.
Legal notice regarding copyrighted software.
Checking external surfaces and controls for functionality.
Recommended methods and agents for cleaning radio exteriors.
Specific handling notes for the ruggedized model.
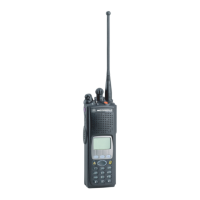
Provides a high-level description of the radio's capabilities.
Details test equipment required for radio servicing.
Lists specific kits and parts for radio servicing.
Equipment needed for field alignment and programming.
Overview of performance checks and accuracy requirements.
Describes the necessary setup for performance checks and alignment.
Instructions for entering and using test modes on specific models.
Step-by-step guide to activate the test mode.
Procedure for testing radio frequency functions.
Verifies the functionality of radio buttons and switches.
Test mode procedures for Model I radios without a display.
Steps to activate the test mode for Model I.
Testing radio functions when removed from normal environment.
Verifying operation of buttons and switches in test mode.
Requirements and overview of radio alignment procedures.
Explanation of the software-controlled potentiometer for adjustments.
Screen for viewing radio model and version details.
Critical procedure for proper radio operation and adjacent channel interference.
Adjusts transmit power across different frequencies and levels.
Balances modulation for signaling schemes and waveform integrity.
Limits baseband signal modulation for primary limiting.
Adjusts receiver filters for optimal sensitivity and selectivity.
Purpose of the front-end filter adjustment procedure.
Steps for aligning front end filters at 700 MHz.
Steps for aligning front end filters at 800 MHz.
Steps for aligning front end filters for UHF/VHF bands.
Purpose of the Bit Error Rate test screen.
Details fields for Rx Frequency, Test Pattern, and Modulation Type.
Option to repeat BER test indefinitely or for one sample.
Purpose of the transmitter test pattern screen.
Fields for Tx Frequency, Channel Spacing, and Test Pattern Type.
Steps to load encryption keys using a KVL.
Allows multiple encryption keys and algorithms on the radio.
How to select an encryption key using the menu or keypad.
Menu-driven steps for selecting an encryption key.
Keypad-based steps for selecting an encryption key.
How to select encryption key groups for automatic switching.
Menu-driven steps to select an encryption index.
Procedures for erasing encryption keys.
Erasing keys using a specific method for multikey radios.
Method for erasing all keys in single-key radios.
Overview of disassembly, reassembly, and ensuring submergibility.
Procedures for attaching and removing the radio antenna.
Steps to connect the antenna to the radio.
Steps to detach the antenna from the radio.
Procedures for handling and replacing the radio battery.
Steps to install the battery into the radio.
Steps to detach the battery from the radio.
Procedures for attaching and removing the belt clip.
Steps to secure the belt clip to the radio.
Steps to detach the belt clip from the radio.
Procedures for removing and attaching the connector cover.
Steps to detach the universal connector cover.
Steps to reattach the universal connector cover.
Procedures for removing and installing the frequency knob.
Important notes regarding frequency knob removal/installation.
Steps to detach the frequency knob.
Steps to attach the frequency knob.
Procedures for removing and installing the volume knob.
Steps to detach the volume knob.
Steps to attach the volume knob.
Detailed process for disassembling and reassembling the radio.
Step-by-step instructions for taking the radio apart.
Step-by-step instructions for putting the radio back together.
Importance of testing and specialized equipment for watertightness.
Lists equipment for vacuum and pressure testing.
Details the vacuum pump kit and its adapter.
Details the pressure pump kit and its adapter.
Lists other items needed for submersible radio testing.
Reference to detailed procedures for disassembly/reassembly.
General overview of the vacuum test procedure.
Steps for performing the vacuum test.
General overview of the pressure test procedure.
Steps for performing the pressure test.
Guidance for identifying and fixing leaks.
Procedures for addressing leaks related to the housing.
Procedures for leaks around the antenna bushing.
Procedures for leaks around control seals.
Procedures for leaks related to control switches.
Procedures for leaks related to the main seal.
Procedures for leaks at battery contacts.
Procedures for leaks related to the keypad.
Procedures for leaks at the vacuum port seal.
Procedures for leaks at the vent port seal.
Overview of troubleshooting charts and error codes.
Identifies and explains errors detected during radio startup.
Lists and explains error codes that occur during radio operation.
Detailed parts list for Model I radio with item numbers.
Detailed parts list for Models II and III radios.
Various antenna options for the radio.
Audio adapter options for enhanced connectivity.
Available battery options for the radio.
Accessories for carrying and securing the radio.
Different belt clip options.
Various belt loop accessories.
Protective cases for radio transport.
List of available battery chargers.
Line cords for enhanced or multi-unit setups.
Integrated microphone/receiver accessory.
Accessories for headsets and surveillance operations.
Various types of earpieces for audio output.
Accessories related to headsets.
Ear microphones requiring an interface module.
Modules needed for ear microphone operation.
Microphones for remote use and public safety.
Adapters for vehicle integration.
General accessories for vehicular use.
Accessories compatible with related radio models.
| Brand | Motorola |
|---|---|
| Model | ASTRO XTS 5000 I |
| Category | Portable Radio |
| Language | English |