28
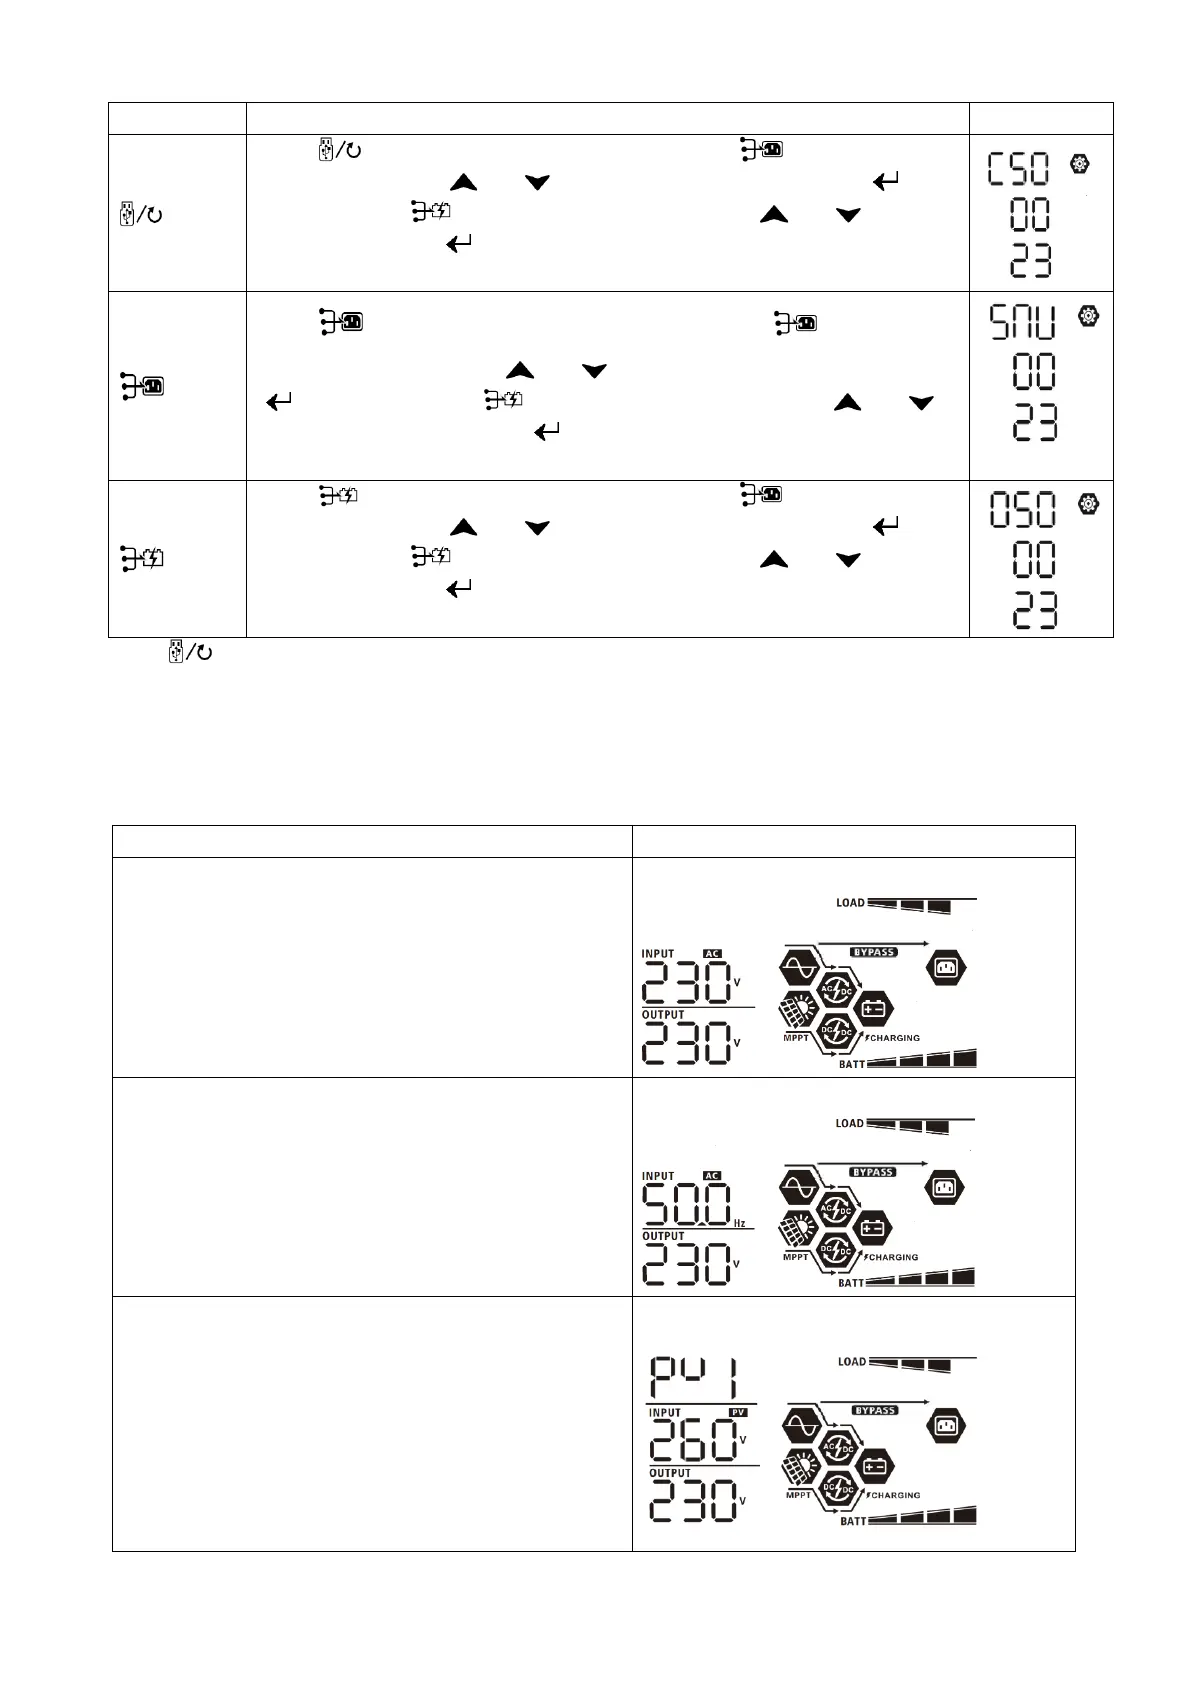
Step 3: Please select setting program by following each procedure.
Program# Operation Procedure
LCD Screen
Press “ ” button to set up Solar First Timer. Press “ ” button to select
starting time. Press “ ” or “ ” button to adjust values and press “ ” to
confirm. Press “ ” button to select end time. Press “ ” or “ ” button to
adjust values, press “ ” button to confirm. The setting values are from 00 to
23, with 1-hour increment.
Press “ ” button to set up Solar & Utility Timer. Press “ ” button to
select starting time. Press “ ” or “ ” button to adjust values and press
“ ” to confirm. Press “ ” button to select end time. Press “ ” or “ ”
button to adjust values, press “ ” button to confirm. The setting values are
from 00 to 23, with 1-hour increment.
Press “ ” button to set up Solar Only Timer. Press “ ” button to select
starting time. Press “ ” or “ ” button to adjust values and press “ ” to
confirm. Press “ ” button to select end time. Press “ ” or “ ” button to
adjust values, press “ ” button to confirm. The setting values are from 00 to
23, with 1-hour increment.
Press “ ” button to exit the Setup Mode.
LCD Display
The LCD display information will be switched in turn by pressing the “UP” or “DOWN” button. The selectable
information is switched as the following table in order.
Selectable information LCD display
Input voltage/Output voltage
(Default Display Screen)
Input Voltage=230V, output voltage=230V
Input frequency
Input frequency=50Hz
PV voltage
PV1 voltage=260V