ALL WIRING MUST BE INSTALLED STRICTLY IN
ACCORDANCE WITH THE WIRING DIAGRAM
LOCATED ON THE INSIDE OF THE ELECTRICAL
WIRING COVER OF THE OUTDOOR UNIT.
WARNING
PAY ATTENTION TO THE LIVE WIRE:
While crimping the wires, make sure you can
clearly distinguish the Live (”L”) wire from the
other wires.
2. Remove the electrical wiring cover of the outdoor
unit by removing the screws securing it in place.
3. Unscrew the cable clamp below the terminal
block and place it to the side.
4. Connect each wire to its corresponding terminal
on the outdoor unit terminal block according to
the wiring diagram. Secure the U-lug of each wire
to the terminal block by tightening the terminal
screws firmly with a screwdriver.
5. After checking to make sure every connection is
secure, loop the wires around to prevent rain
water from flowing into the terminals.
6. Using the cable clamp, fasten the cable to the
unit. Then, screw the clamp down tightly.
7. Insulate unused wires with PVC electrical tape.
Arrange the wires so that they do not touch any
electrical or metal parts.
8. Reinstall the electrical wiring cover onto the side
of the unit, using the screws you previously
removed.
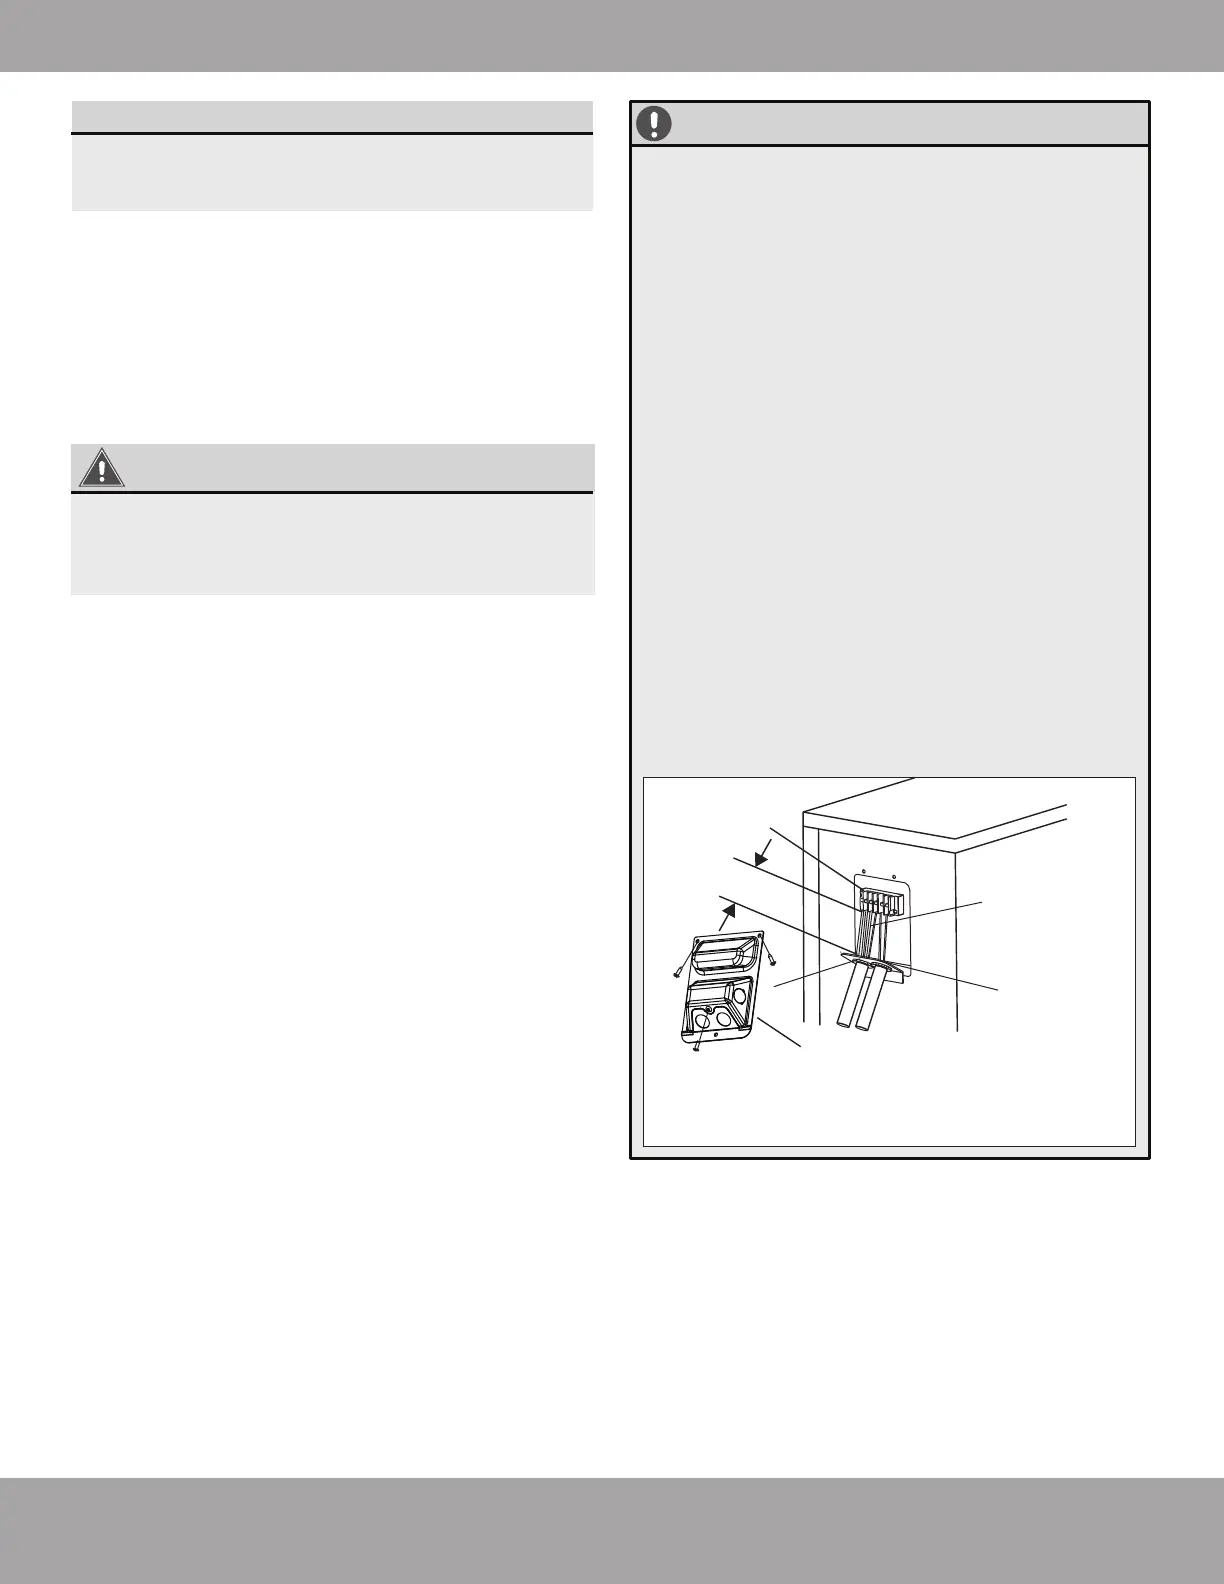
IMPORTANT
If the electrical code or region the unit is
being installed in requires the use of conduit
tubing for the wiring to run through, please
follow the steps below when wiring the unit:
1. Remove the electrical wiring cover on the
side of the unit by removing the 3 screws
securing it to the condenser.
2. Remove the caps on the conduit panel.
3. Temporarily mount the conduit tubes (not
included, sold separately) onto the
conduit panel.
4. Properly connect both the power supply
and low voltage wires to the
corresponding terminals on the terminal
block according to the wiring diagram.
5. Ensure to ground the unit in accordance
with local codes.
6. Be sure each wire is several inches longer
than the length required for wiring to
allow for slack.
7. Install the lock nuts to secure the conduit
tubes to the conduit panel.
8. Reinstall the electrical wiring cover to the
side of the unit. Secure it in place using
the 3 screws you previously removed.
Page 38mrcool.com
Outdoor Unit Installation
Wire Cover
Over 1.57 in
(40 mm)
Terminal
block
Conduit
panel
Connecting
cable
Please select the appropriate hole
according to the diameter of the wire.