Fig. 7.9
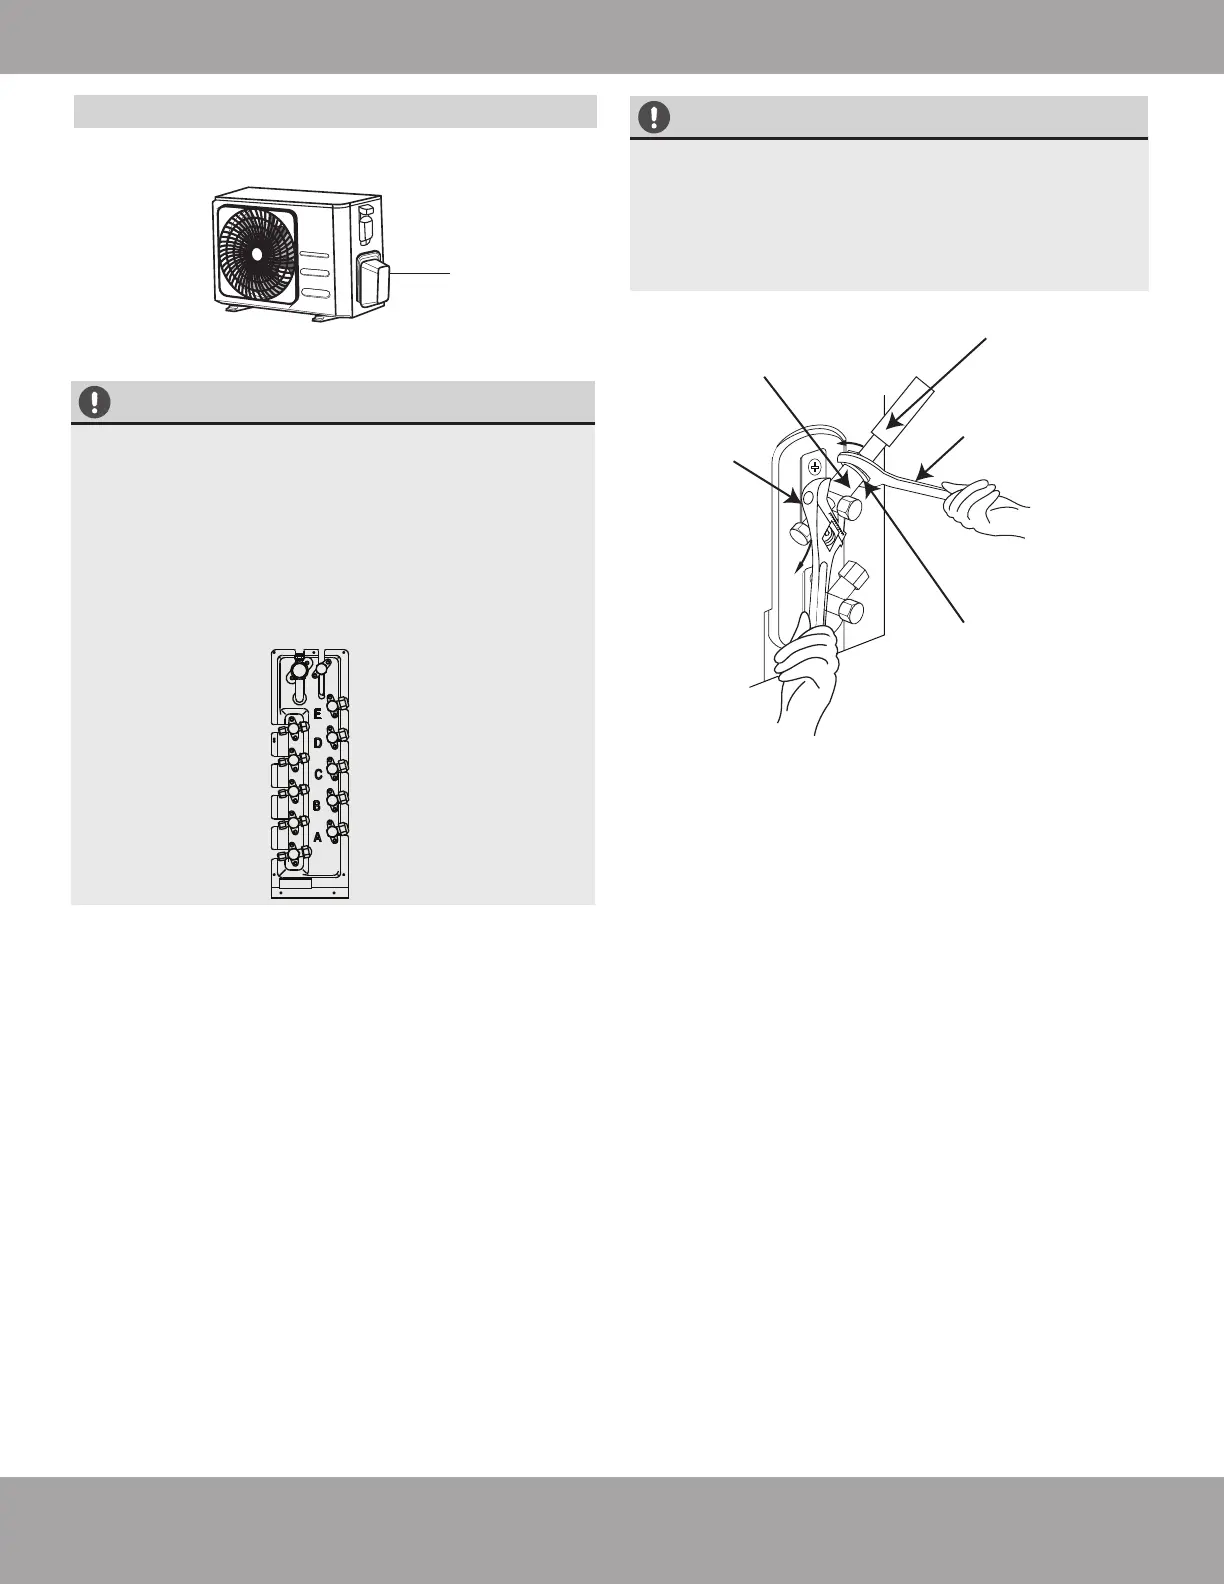
When tightening the flare nut, use the
spanner to grip the main body of the valve.
Refer to Fig. 7.10 below. Gripping in any other
location could cause damage to the unit, as
the torque from tightening the flare nut could
cause other parts of the valve to break.
Page 43 mrcool.com
Refrigerant Piping Connection
Connect Piping to Outdoor Unit
1. Remove the valve cover from the side of the
outdoor unit by unscrewing it. Refer to Fig. 7.9.
2. Remove the protective caps from the end of each
of the valves.
3. Align the flared pipe ends with the valves of the
outdoor condenser and tighten the flare nut as
tightly as possible by hand.
4. Using a spanner, grip the main body of the valve.
Do not grip the nut that seals the service valve.
Refer to Fig. 7.10.
5. While firmly gripping the body of the valve with the
spanner, use a torque wrench to tighten the flare
nut (Refer to Fig. 7.10). Continue tightening the
flare nut until the specified torque rating in the
table on the previous page (based on pipe size)
is achieved.
6. Then, loosen the flare nut slightly and tighten it
again to the specified torque rating.
7. Repeat steps 3-6 for the remaining pipe. NOTE: If
installing a multi-zone system, repeat the
entire process for each air handler being
installed until they are all connected to
the condenser.
Valve cover
NOTE ON MULTI-ZONE SYSTEMS
If you’re installing a multi-zone system, the
sets of valves on the outdoor condenser are
labeled A,B,C,D,E, etc. The capacities of the air
handlers you are installing will determine
which valves they should be connected to. The
largest capacity air handler should be
connected to the “A” port. Then, the next
largest capacity air handler should be
connected to the “B” port and so on.
IMPORTANT
Spanner
Valve Body
Torque Wrench
Refrigerant Piping
Flare Nut
Fig. 7.10