Bolt™ Jr+ Quick Start Guide
28
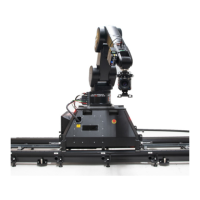
6. Once the CR800 start-up sequence is complete,
release the E-stop that is plugged into the
computer stack, by turning the button clockwise
until the red button pops up and then pressing
the Enable button.
7. Zero the axes as required in Flair. The Bolt Jr+
arm itself does not require zeroing but you need
to zero other axes such as:
The Track: To do this you use the Zero > Home Axis > Track
menu option.
Any external Lens Control Motors (LCMs) that you are using.
To zero these you first set the focus to infinity (), zoom to
wide-angle (zoomed out all the way), iris/aperture to wide
open and then use the relevant Zero > Direct Zero Axis menu
option to set those lens positions as the zero points in Flair.
Any model movers
8. In Flair, click on the Engage Robot button.
9. In Flair, move the Bolt Jr+ arm to its home position (rotated straight
forward and tucked under).
10. Set the soft limits for the rig axes in Flair as required:
Track limits
Lens Control Motor limits (if using external LCMs)
Bolt™ Jr+ start-up summary
1. Secure the area
2. Release the E-stop on the rig
3. Switch on Bolt Jr+
4. Switch on the Flair PC
5. Start Flair
Hint
You use the Track button in Flair to toggle the track on and off,
independently of the Engage Robot/Disengage Robot button
that you use to toggle the Bolt Jr+ arm on and off.
ENABLE button