Chapter 4: The Fuel System and Governor
42
Disassembly and rebuilding the carburetor
1. Clamp off the fuel line to prevent fuel spillage
and remove it.
2. Remove the carburetor by following the steps
described in Chapter 3: Air Intake and Filter.
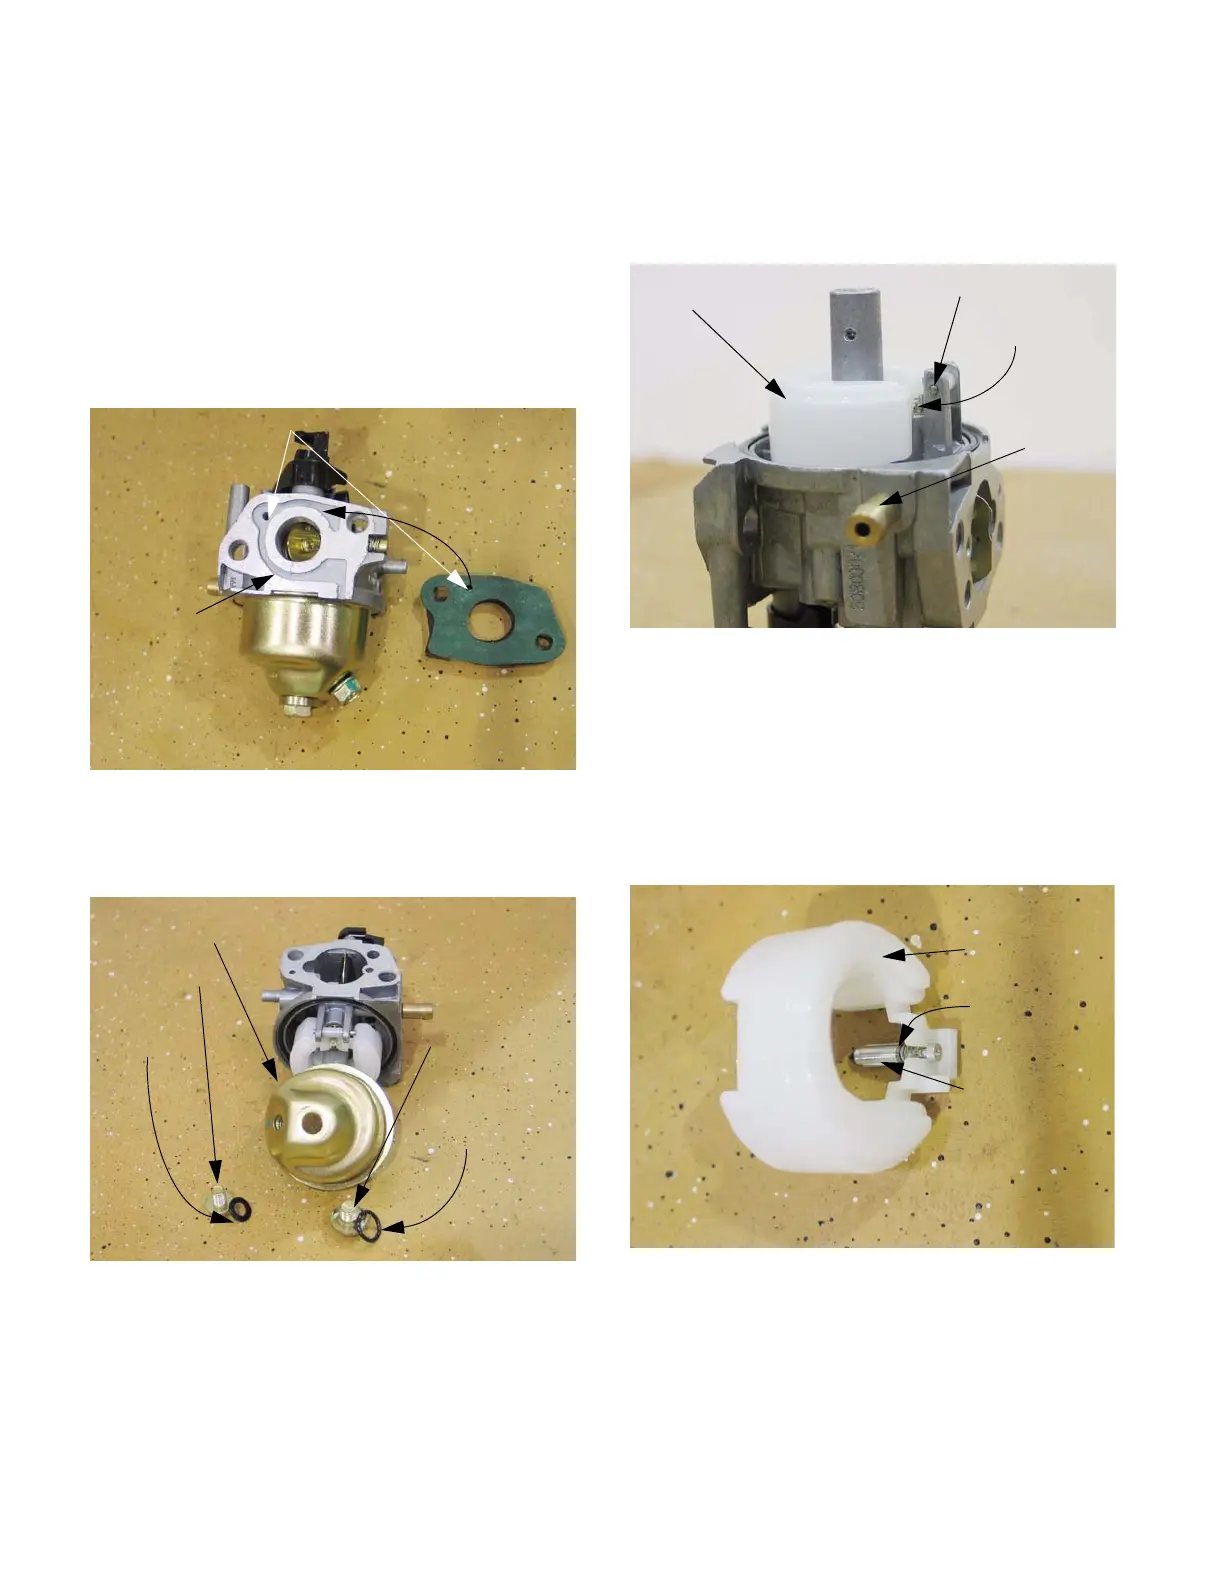
NOTE: There is a corresponding passage
recessed into the mating surface where the
throttle end of the carburetor housing meets the
gasket. See Figure 4.38.
3. Remove the bowl bolt using a 10mm wrench.
See Figure 4.39.
NOTE: From this point an assessment can be
made about the viability of rebuilding the carbu-
retor.
• If extensive corrosion is evident, replace the car-
buretor.
• If varnish build-up is too extensive to clean,
replace the carburetor.
4. When inverted, the float should rest in a level
position. See Figure 4.40.
5. Remove the pin that the float hinges on to
remove the float.
NOTE: The float is not adjustable. Spring ten-
sion against the float valve begins to build from
the horizontal position, putting progressively
more pressure between the tip of the valve and
the seat. See Figure 4.41.
NOTE: Because the float valve is crucial to the
functioning of the carburetor, and the viton tip of
the valve is subject to wear, it is suggested that
technicians replace the valve and spring any
time the carburetor is disassembled for cleaning.
Figure 4.38
Bowl vent port
Bowl vent
channel
Figure 4.39
Float bowl
Drain bolt
Flat fiber
gasket
Bowl bolt
with recess in
head for O-ring
Gasket seal
Figure 4.40
Float
Float pin
Float valve
Fuel inlet
Figure 4.41
Float
Compression
spring
Float valve
www.mymowerparts.com
For Discount White Outdoor Parts Call 606-678-9623 or 606-561-4983
 Loading...