Chapter 7: Ignition System
77
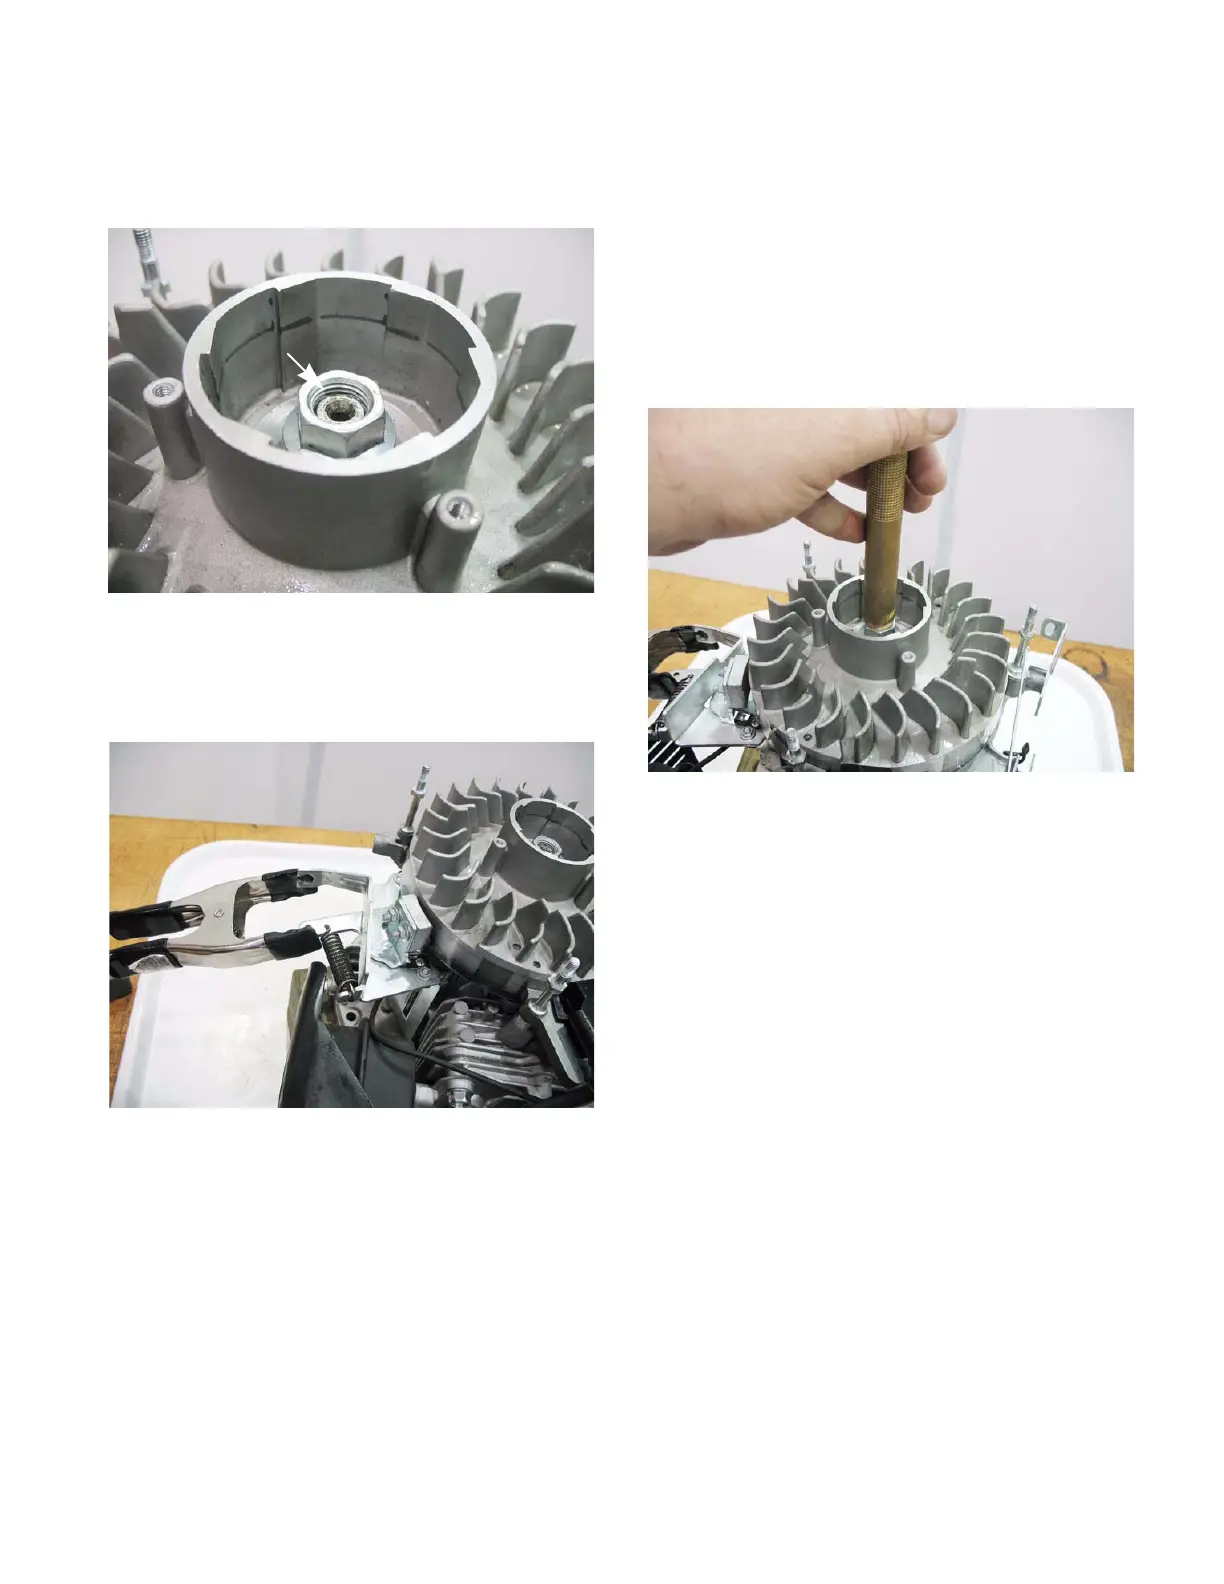
2a. Loosen the flywheel nut until it is a couple of
threads past the end of the crank shaft
using a 19mm wrench. See Figure 7.24.
NOTE: If equipped with an engine brake, clamp
off the brake using a spring clamp.
See Figure 7.25.
Figure 7.24
A couple of threads past
the end of the crank shaft
Figure 7.25
2b. Remove the flywheel by applying a sharp
blow to the crankshaft using a brass drift
punch and a hammer while gently prying
with a prybar. The flywheel will “pop” loose
then lift it off.
NOTE: Never strike the crankshaft directly with a
hammer. To prevent damage to the crankshaft
use a brass drift punch or a piece of wood
between the hammer and the crankshaft.
See Figure 7.26.
CAUTION: If the flywheel shows any signs of
physical damage such as cracks, broken vanes,
or damaged key-way, replace it. A damaged fly-
wheel poses a threat of burst failure. Burst fail-
ures are extremely hazardous to surrounding
people and property.
Figure 7.26
www.mymowerparts.com
For Discount White Outdoor Parts Call 606-678-9623 or 606-561-4983
 Loading...