9
Figure 2-8 shows a typical cylinder installation. Review the following before attempting this type of instal-
lation.
• Use a non-ferrous (plastic, brass, Teflon®, etc.) spacer [1] to provide 1/8 inch (32 mm) minimum space
between the magnet and the piston.
• An O-ring groove [2] is provided at the base of the transducer hex head for pressure sealing. MTS uses
mil-standard MS33514 for the O-ring groove. Refer to mil-standard MS33649 or SAE J514 for machining
of mating surfaces.
• The null space [3] is specified according to the installation design and cylinder dimensions. The analog
output module provides a null adjustment. Make sure that the magnet can be mounted at the proper
null position.
• The piston head [4] shown in Figure 2-8 is typical. For some installations, depending on the clearances,
it may be desired to countersink the magnet.
• A chamfered rod bushing [5] should be considered for stokes over 5 feet (1.5 meters) to prevent wear
on the magnet as the piston retracts. The bushing should be made from Teflon or similar material.
• A Nylok self locking insert [6] is provided on the transducer threads. An O-ring groove is provided at
the base of the transducer hex head for pressure sealing.
• The recommended bore for the cylinder rod is 1/2 inch (13 mm). The transducer rod includes a 0.375
inch flush (9.53 mm) end plug. Use standard industry practices for machining and mounting of all com-
ponents. Consult the cylinder manufacturer for applicable SAE or military specifications.
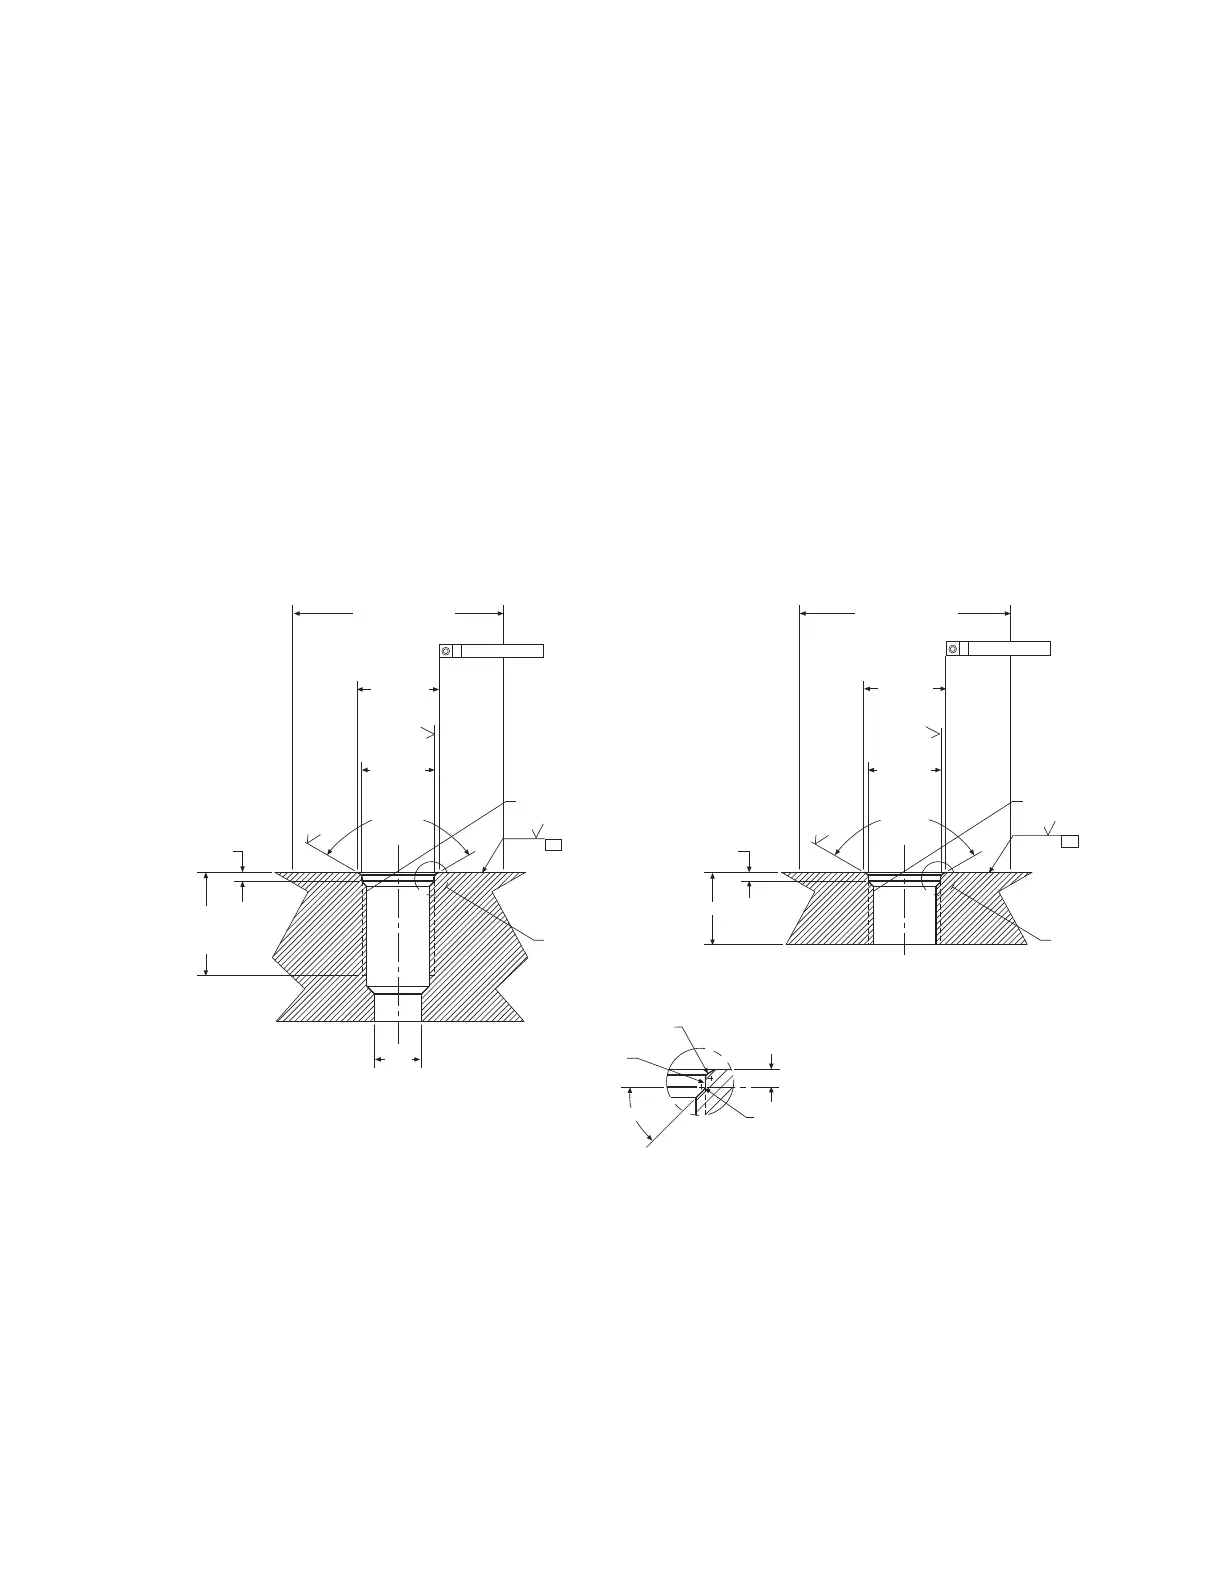
Figure 2-9a
O-ring Boss Detail
2.250 in. Minimum Dia
Specifies Surface B
0.875 in. Dia.
+.0.015
-0.000
0.769 in. Dia.
+.0.015
-0.000
120° ±0° 30'
0.094 in.
+.0.015
-0.000
1.105 in.
Minimum
Full Thread
Depth
See Detail C
3/4-16 UNIF-3B Thread
See Notes 3 And 4
0.500
Dia.
Blind Thread Design
45° ±5°
See Note 7
See Detail C
3/4-16 UNJF-3B Thread
See Notes 3 and 4
Thru Thread Design
120° ±0° 30'
2.250 in. Minimum Dia
Specifies Surface B
0.094 in. REF
See Note 8
0.030 in. ±0.010 R
Detail C
NOTES:
1. Dimensions and tolerances based on ANSI Y14.5-1982.
2. MTS has extracted all pertinent information from MS33649 to Generate this document.
3. PD must be square with surface B within 0.005 FIM across 2.250 dia minimum.
4. PD must be concentric with 2.250 dia within 0.030 FIM and with 0.769 dia within 0.005 FIM.
5. Surface texture ANSI B46.1-1978
6. Use o-ring MTS part number 560315 for correct sealing.
7. The thread design shall have sufficient threads to meet strength requirements of material used.
8. Finish counter-bore shall be free from longitudinal and spiral tool marks. Annular tool marks up to 32 micro-
inches maximum will be permissible.
Key:
FIM = Full Indicator Movement
PD = Pitch Diameter
0.020 in. R
Maximum
32 µin.
32 µin.
125 µin.
125 µin.
0.875 in. Dia.
+.0.015
-0.000
0.769 in. Dia.
+.0.015
-0.000
32 µin.
32 µin.
0.094 in.
+.0.015
-0.000
- B -
- B -
0.005 in. Dia., FIMA
0.005 in. Dia., FIMA
 Loading...