6–60 Ventilator Drive
6.18.2 Ventilator drive – Drive belt replacement
Preconditions
• Engine is stopped and starting disabled.
Spare parts
Designation / Use Part No. Qty.
V-belt
Preparatory steps
1. Remove guard cover from cooler.
2. Remove ventilator.
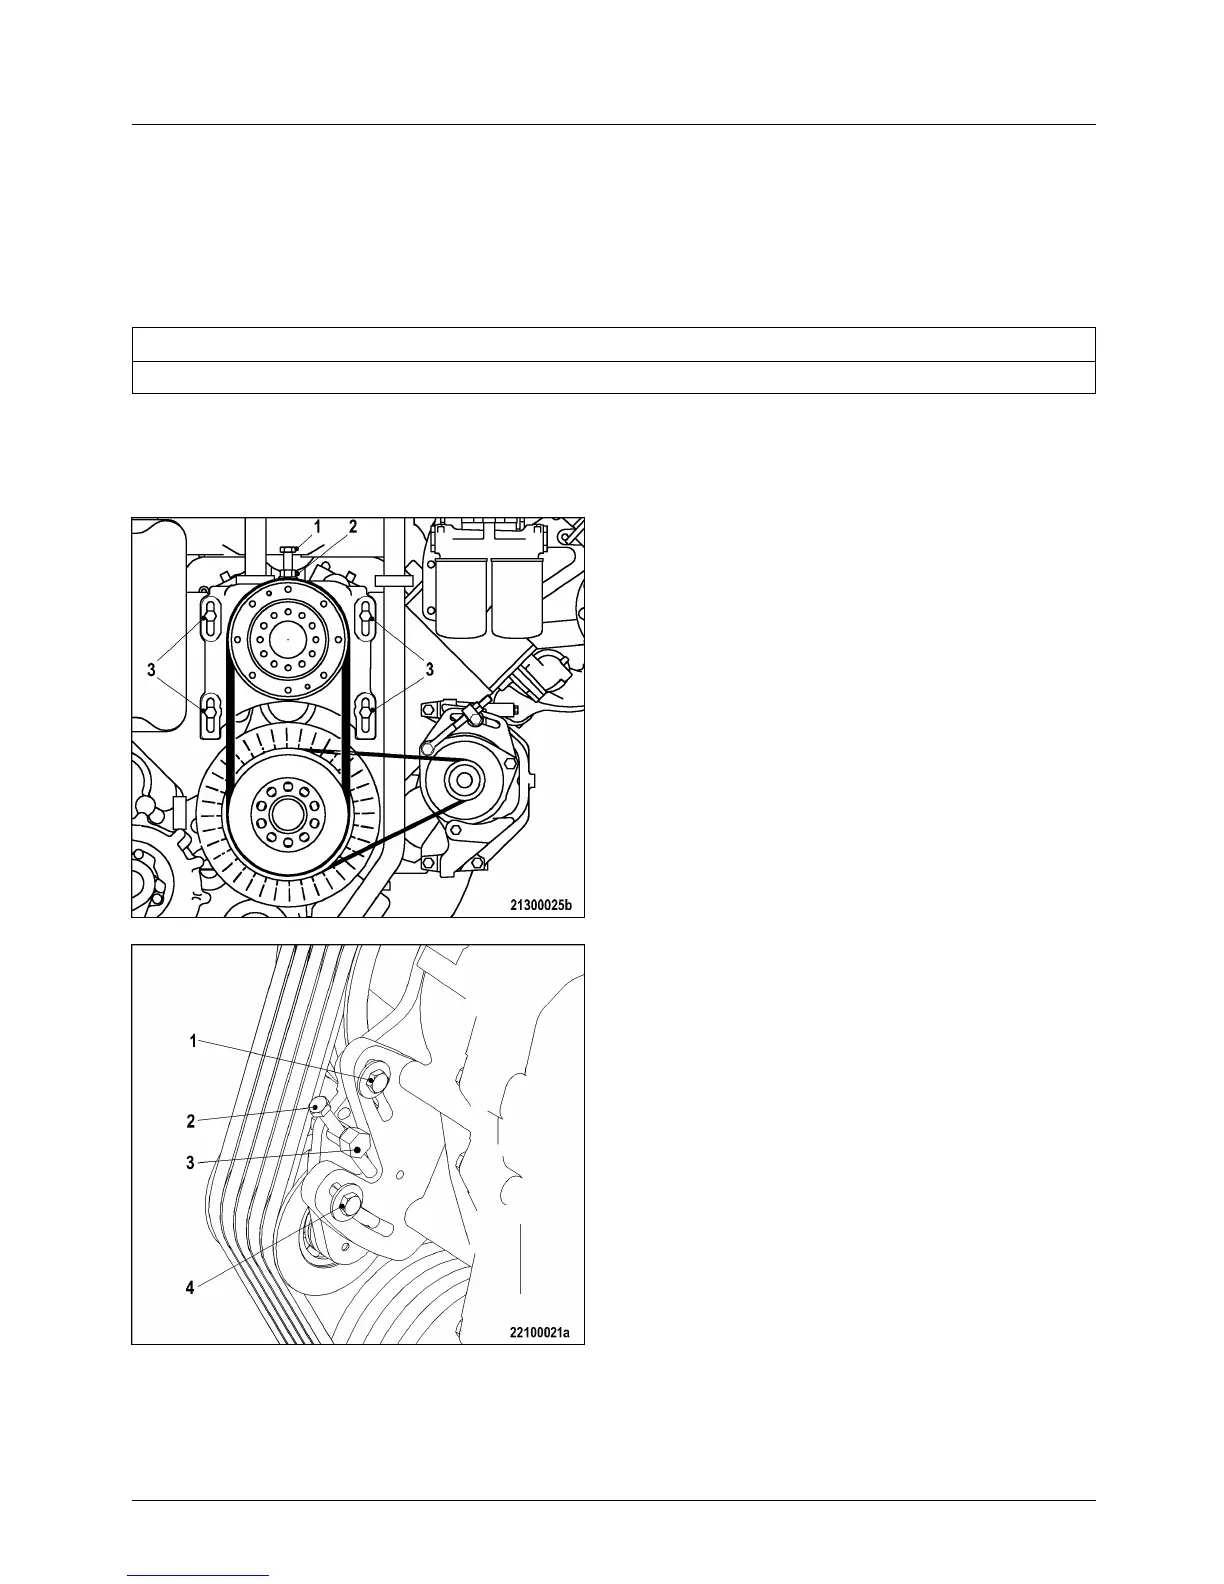
Drive belt replacement on 12V/16V engines:
1. Loosen securing screws (3).
2. Release locknut (2).
3. Screw out tensioning screw (1) until V-belts can
be removed.
4. Check belt pulley on ventilator bearing pedestal
a
nd crankshaft for contamination, clean if
necessary.
Note: V-belts must only be fitted in the grooves
as a
set and without applying any force.
5. Fit ne
w set of drive belts.
6. To check V-belt tension, the ventilator bearing
pedestal must rest against the gearcase.
7. Adjust and
check V -belt tension (→ Page 6 – 57).
Drive belt replacement on 18V engines:
1. Loosen securing screws (1 and 4).
2. Unscrew tensioning screw (2) with bolt (3) until
the V-belts can be removed.
3. Check belt pulley on ventilator bearing pedestal
and crankshaft for contamination, clean if
necessary.
Note: V-belts must only be fitted in the grooves
as a set and without applying any force.
4. Fit new set of drive belts.
5. To check V-belt tension, the ventilator bearing
pedes
tal must rest against the gearcase.
6. Adjust and check V-belt tension (→ Page 6 – 57).
Final steps
1. Install ventilator.
2
.
I
nstall guard cover.
M015560/00E 03-05 ©MTU



 To Next Page