Section 40 00-02-0994
2016-06-28 - 20 -
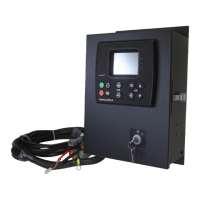
Quick-Start Setup Guide
The following sections serve to provide a walk-through of the steps necessary for some of the various
configurations and settings available on the MPC-20 Controller. Cycling power to the controller is
recommended after making changes to set points.
Stepping through the Menu will be depicted as follows:
Menu/System/Contrast directs the operator to go into the Menu first, then look for a parameter titled System and
press [Enter] to go into the System menu. Then look for a parameter titled Contrast and press [Enter] to go into
the Contrast menu, etc.
Adjusting the Contrast
1. Access Menu/System/Contrast.
2. Utilize the Up and Down arrows to adjust the Contrast (values of 0 to 255), and press [Enter] when the
desired number appears.
3. Press the [Menu] key to leave the Menu Setup screens.
NOTE: The following parameters all utilize the Application Configuration of Pump All
Purpose. The MPC-20 will hide or display certain parameters that are specific to the
Application Configuration chosen.
Setting MPC-20 to Auto Start on a Single Contact Input
1. Access Menu/Application Configuration/Auto Start_Stop Function/Single Contact.
2. Press [Back] once and select Input / Output/Digital Inputs.
3. Assign the Function of Single Contact Start/Stop to one of the Digital Inputs.
4. Press the [Menu] key to leave the Menu Setup screens.
Setting MPC-20 to Auto Start on Local Key
1. Access Menu/Application Configuration/Auto Start_Stop Function/Local Start Key and press [Enter].
2. Press the [Menu] key to leave the Menu Setup screens.
Setting MPC-20 to Auto Start on Float Inputs
1. Access Menu/Application Configuration/Auto Start_Stop Function.
2. Highlight Single Contact, Two Contact Maintained or Two Contact Momentary and press [Enter].
3. Press [Back] once and access Input / Output/Digital Inputs, and select a Digital Input to modify.
4. Assign the appropriate input for the selected AI.
NOTE: If Single Contact is chosen, only one digital input needs to be configured. If Two
Contact (Maintained and Momentary) is chosen, two digital inputs need to be configured, one
for start and one for stop.
5. Ensure the appropriate number of Digital Inputs is configured (as per the Note above), and press the
[Menu] key to leave the Menu Setup screens.