23
IOM
W415-2288 / 08.29.2019
4.7 PACKAGED UNIT INSTALLATION
Procedure
1. Verify that isolation grommets are installed in the ve holes on the
top mounting bracket.
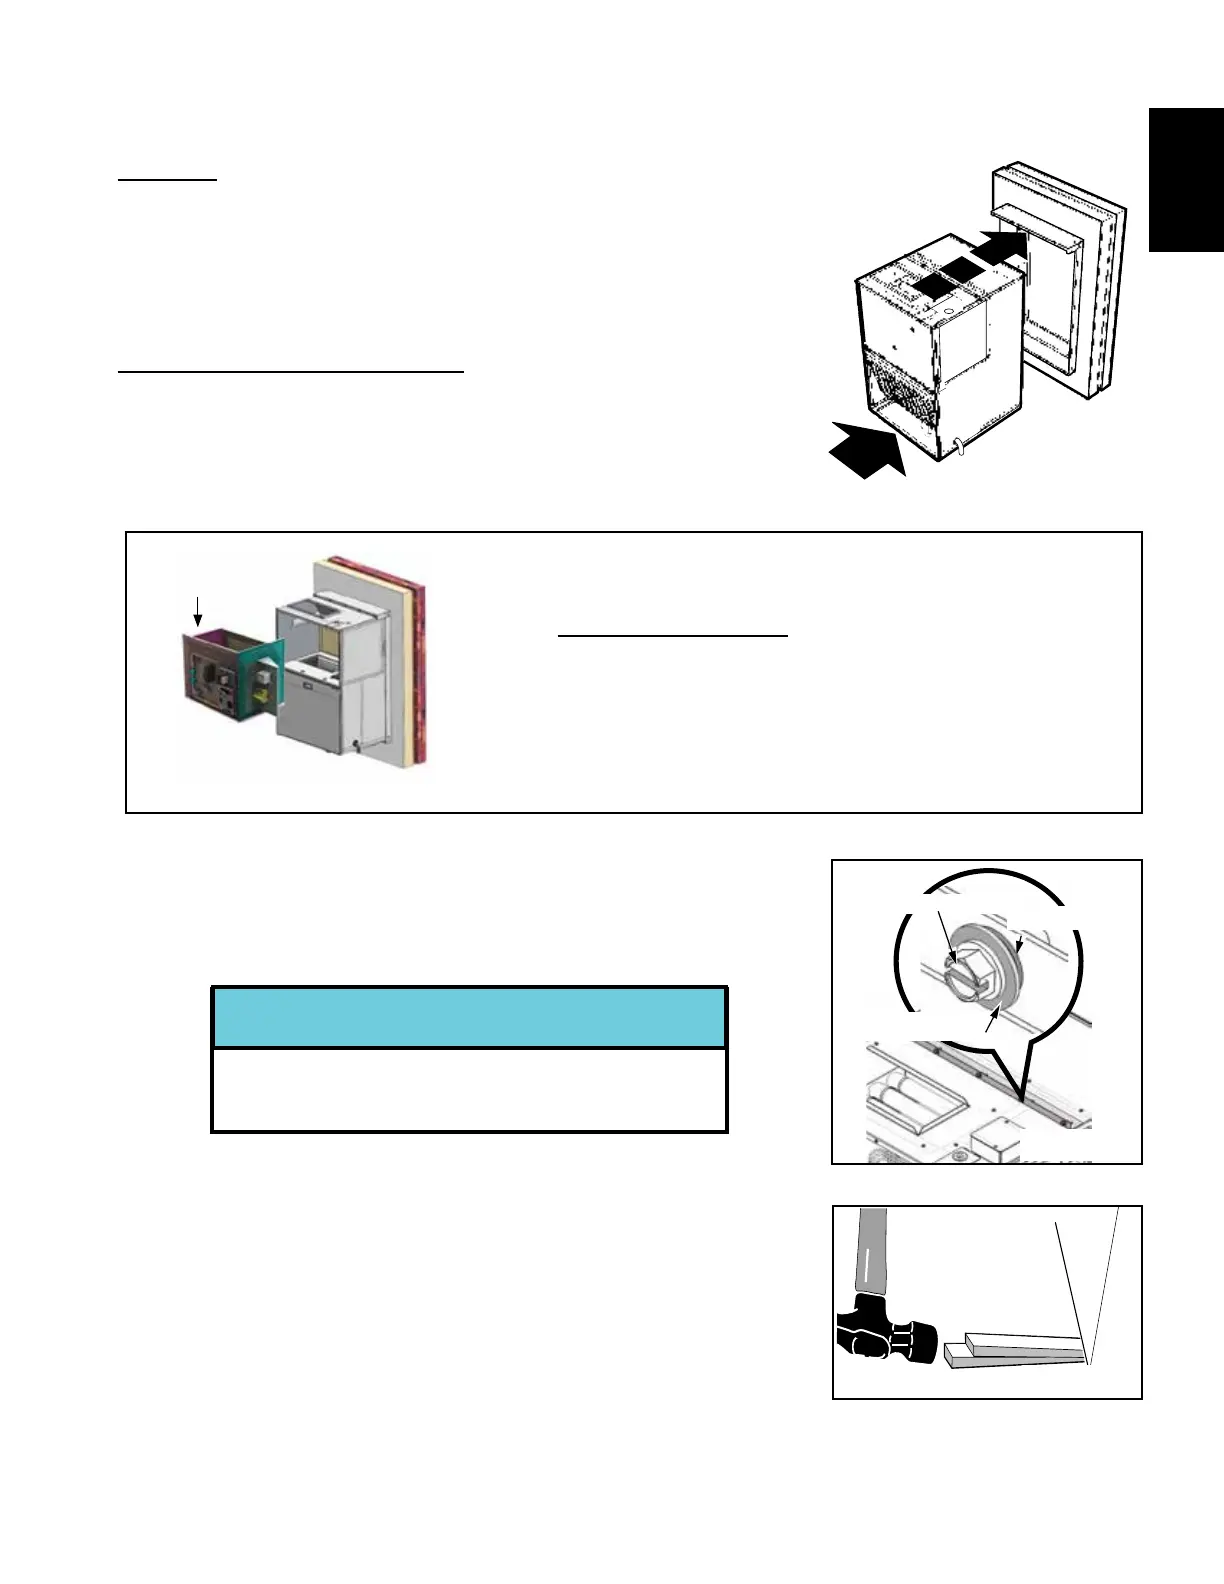
2. Bring the Condo Pack as close as possible to wall opening (FIG.
4.6.A). Carefully slide the unit into the Wall Sleeve (refer to “4.4
Wall Sleeve Assembly and Installation”) so the front of the unit is in
contact with the front anges of the Wall Sleeve.
For ease of installation (OPTIONAL):
a. Install cabinet into the Wall Sleeve without HEATING unit.
b. Furnace module can be removed separately (FIG. 4.6.B).
Refer to section “5.2.1 Heating Module Removal”.
FIG. 4.6.A
3. Use a at washer with each 1/4”-20 x 1 1/4” screw. Secure Condo
Pack unit to the Wall Sleeve using ve 1 1/4” screws through
the isolation grommets in the ve holes on the Wall Sleeve top
mounting bracket (see FIG. 4.6.C).
OVER-TIGHTENING THE SCREWS WILL
DEFORM THE ISOLATION GROMMETS AND
REDUCE THEIR EFFECTIVENESS.
NOTE
4. Caulk and seal all spaces around the top, sides and bottom of the
exterior grille area, making sure that the openings for drainage in
the bottom edge are not blocked.
5. Shim (FIG. 4.6.D) between unit support (Diagram B) and the bottom
rear corners of cabinet to prevent twisting loads onto structural walls.
1/4”-20 x 1 1/4”
Grommet
Flat Washer
FIG. 4.6.B
FIG. 4.6.C
Heating Module Removal.
Furnace module can be removed from cabinet separately.
Refer to “5.2.1 Heating Module Removal”.
FIG. 4.6.D
Heating
Module