6 RealPOS XR7 Integration Tray Kit Instructions
Installing the Transaction Printer
The NCR 7167, 7168, 7197, 7198, or 7199 printer can be located on either side of the
Integration Tray.
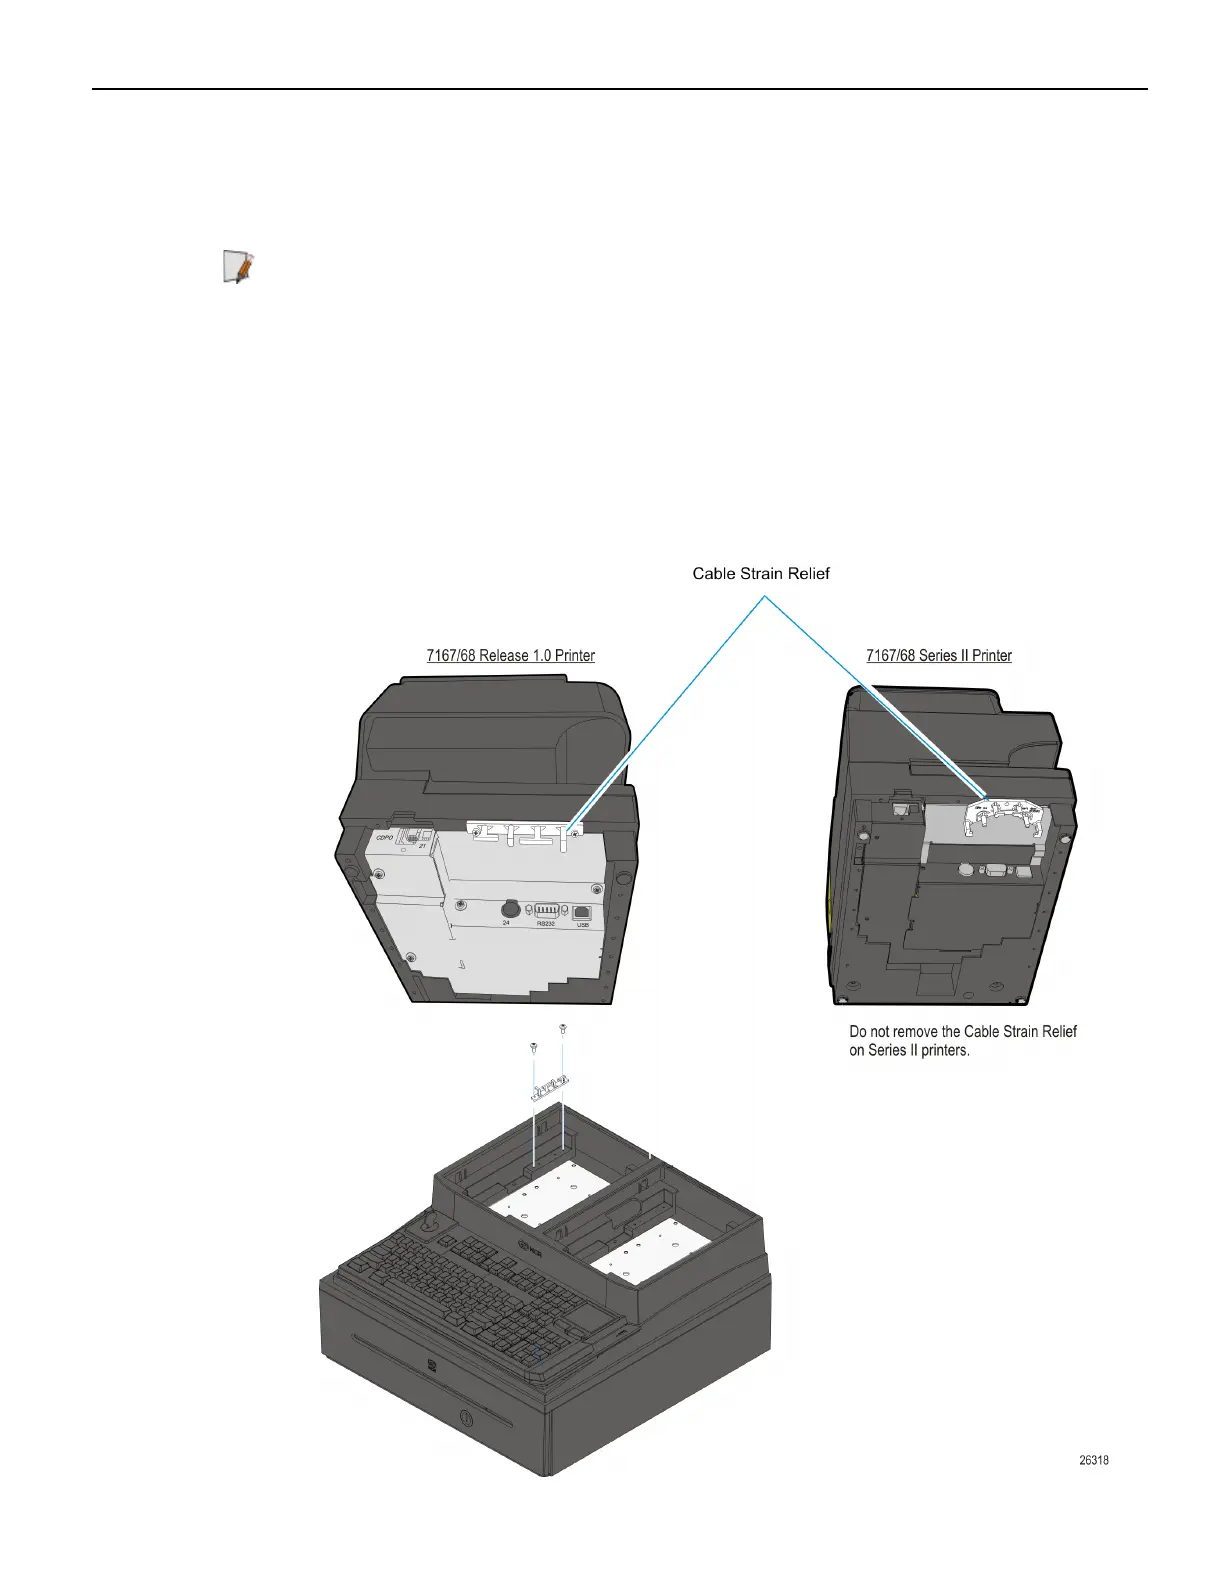
Note: The Printer Cable Strain Relief is different on the Release 1.0 and the Series II
printers. The Cable Strain Relief on Release 1.0 printers prevents the printer from sitting
properly in the Integration Tray and must be removed from the printer and installed in
the Integration Tray.
NCR 7167/7168 Release 1.0 Printers Only:
1. Remove the Cable Strain Relief from the back of the printer (2 screws). The printer
will not sit properly in the tray with it installed.
2. Install the Cable Strain Relief on the Integration Tray using the same screws.
 Loading...