8-28
8. Using On-Screen Menu
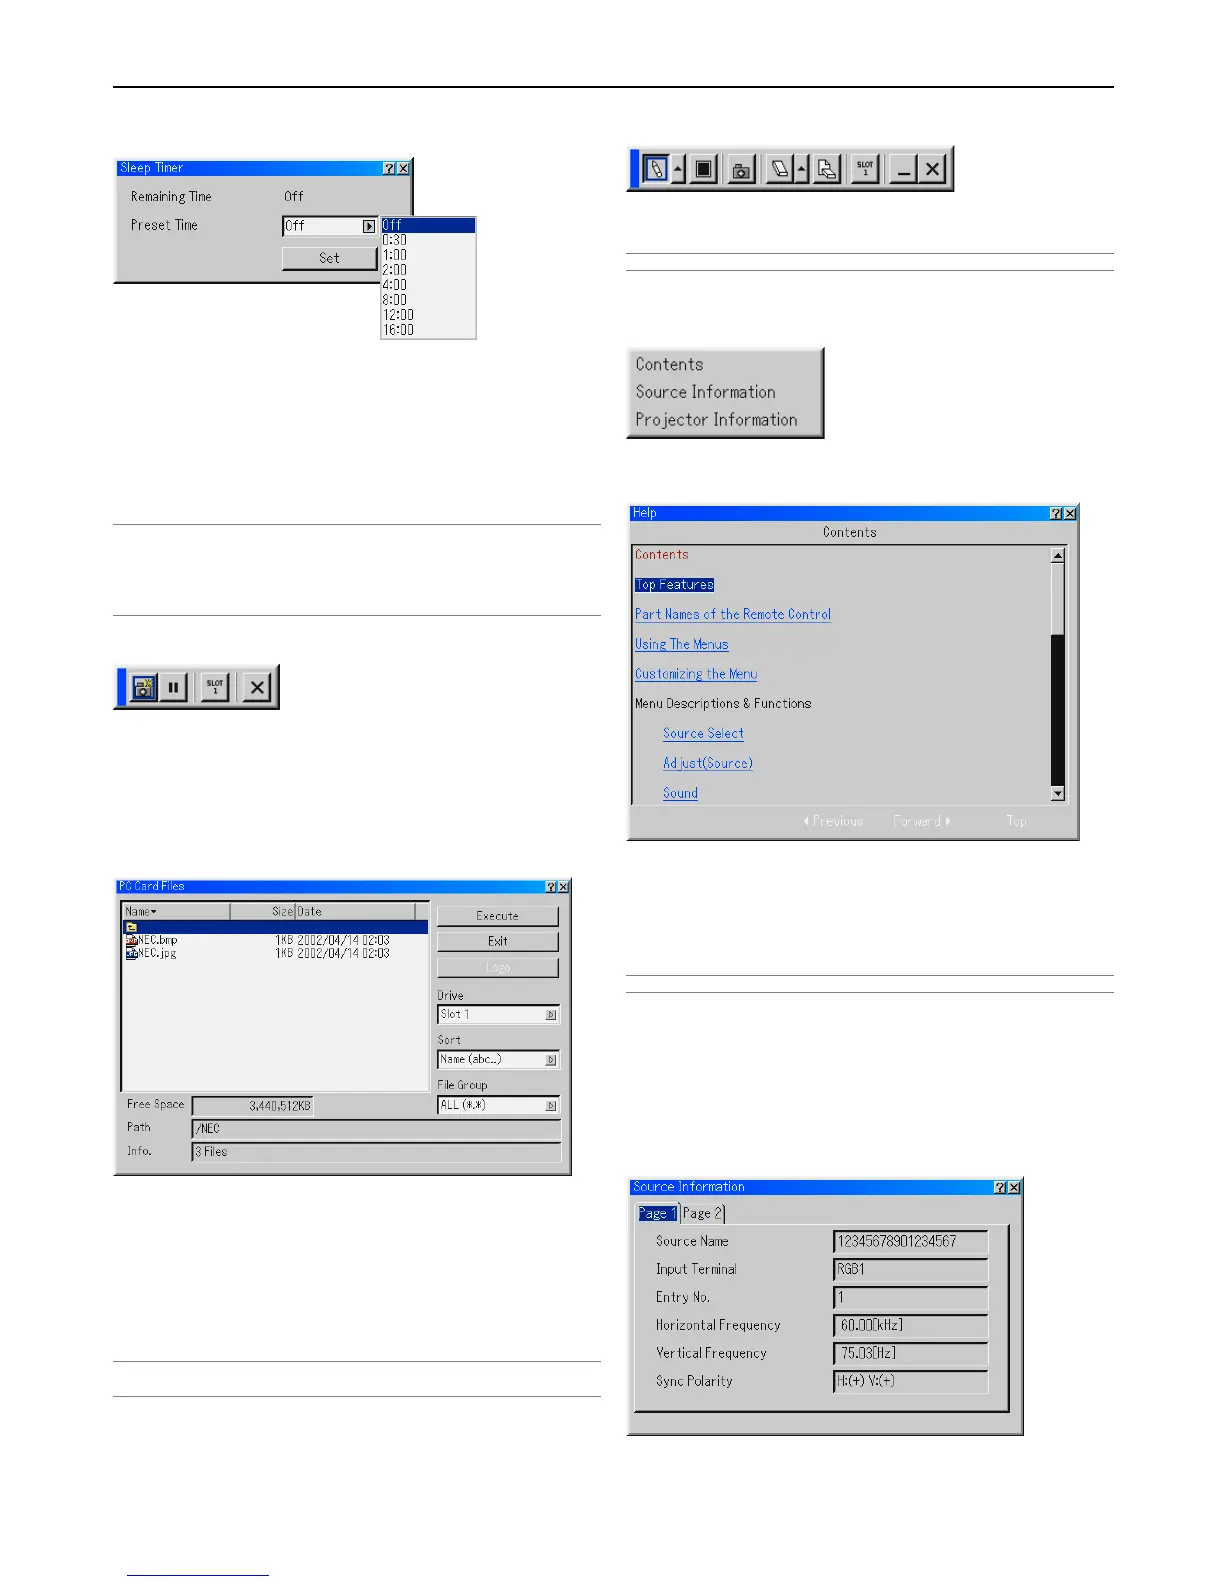
Enabling Sleep Timer
1. Select your desired time between 30 minutes and 16 hours: Off, 0:30,
1:00, 2:00, 4:00, 8:00, 12:00, 16:00.
2. Select “Set” and press the ENTER button on the remote control.
3. The remaining time starts counting down.
4. The projector will turn off after the countdown is complete.
NOTE:
• To cancel the preset time, set "Off" for the preset time or turn off the power.
• When the remaining time reaches 3 minutes before the projector is turned off,
the "Projector will turn off in 3 minutes" message will be displayed on the bottom
of the screen.
Using Capture (GT5000 only)
Allows you to capture an image from a source that is currently
being displayed. The image is saved as JPEG in the PC card.
When you select Capture from the menu, you will get a tool bar.
You can capture an image directly using the tool bar when the
menu is not displayed. See page 5-4.
Using PC Card Files
The PC Card Files feature allows you to display a list of all the
files stored in the PC card so that you can select a file you want
to display. You can also sort files by file name or date, or display
the file. See page 4-4.
Changing Background Logo:
You can change the default background logo using the PC Card
Files feature. See page 4-4.
NOTE: File size must be 256KB or less. Other file formats than JPEG and BMP are
not available. See page 4-4.
Using ChalkBoard
The ChalkBoard feature allows you to write and draw messages
on a projected image. See page 4-4.
NOTE: This feature is available only when using with USB mouse.
Help
Contents
Provides an online help about how to use the menus. An under-
lined link means that you can move to an adjustment item di-
rectly.
Selecting the underlined link and pressing ENTER moves to the
corresponding adjustment item.
NOTE: The Help menu may not be displayed correctly when an image is overscanned.
Source Information
Information
Displays the status of the current signal. This dialog box has
two pages.
Page 1
Source Name, Input Terminal, Entry No., Horizontal Frequency,
Vertical Frequency, Sync Polarity