English−18
3. Installing an Option Board
1. Turn off the main power switch.
2. Place the monitor face down on the protective sheet.
NOTE: Be sure to place the monitor on a flat and adequate space.
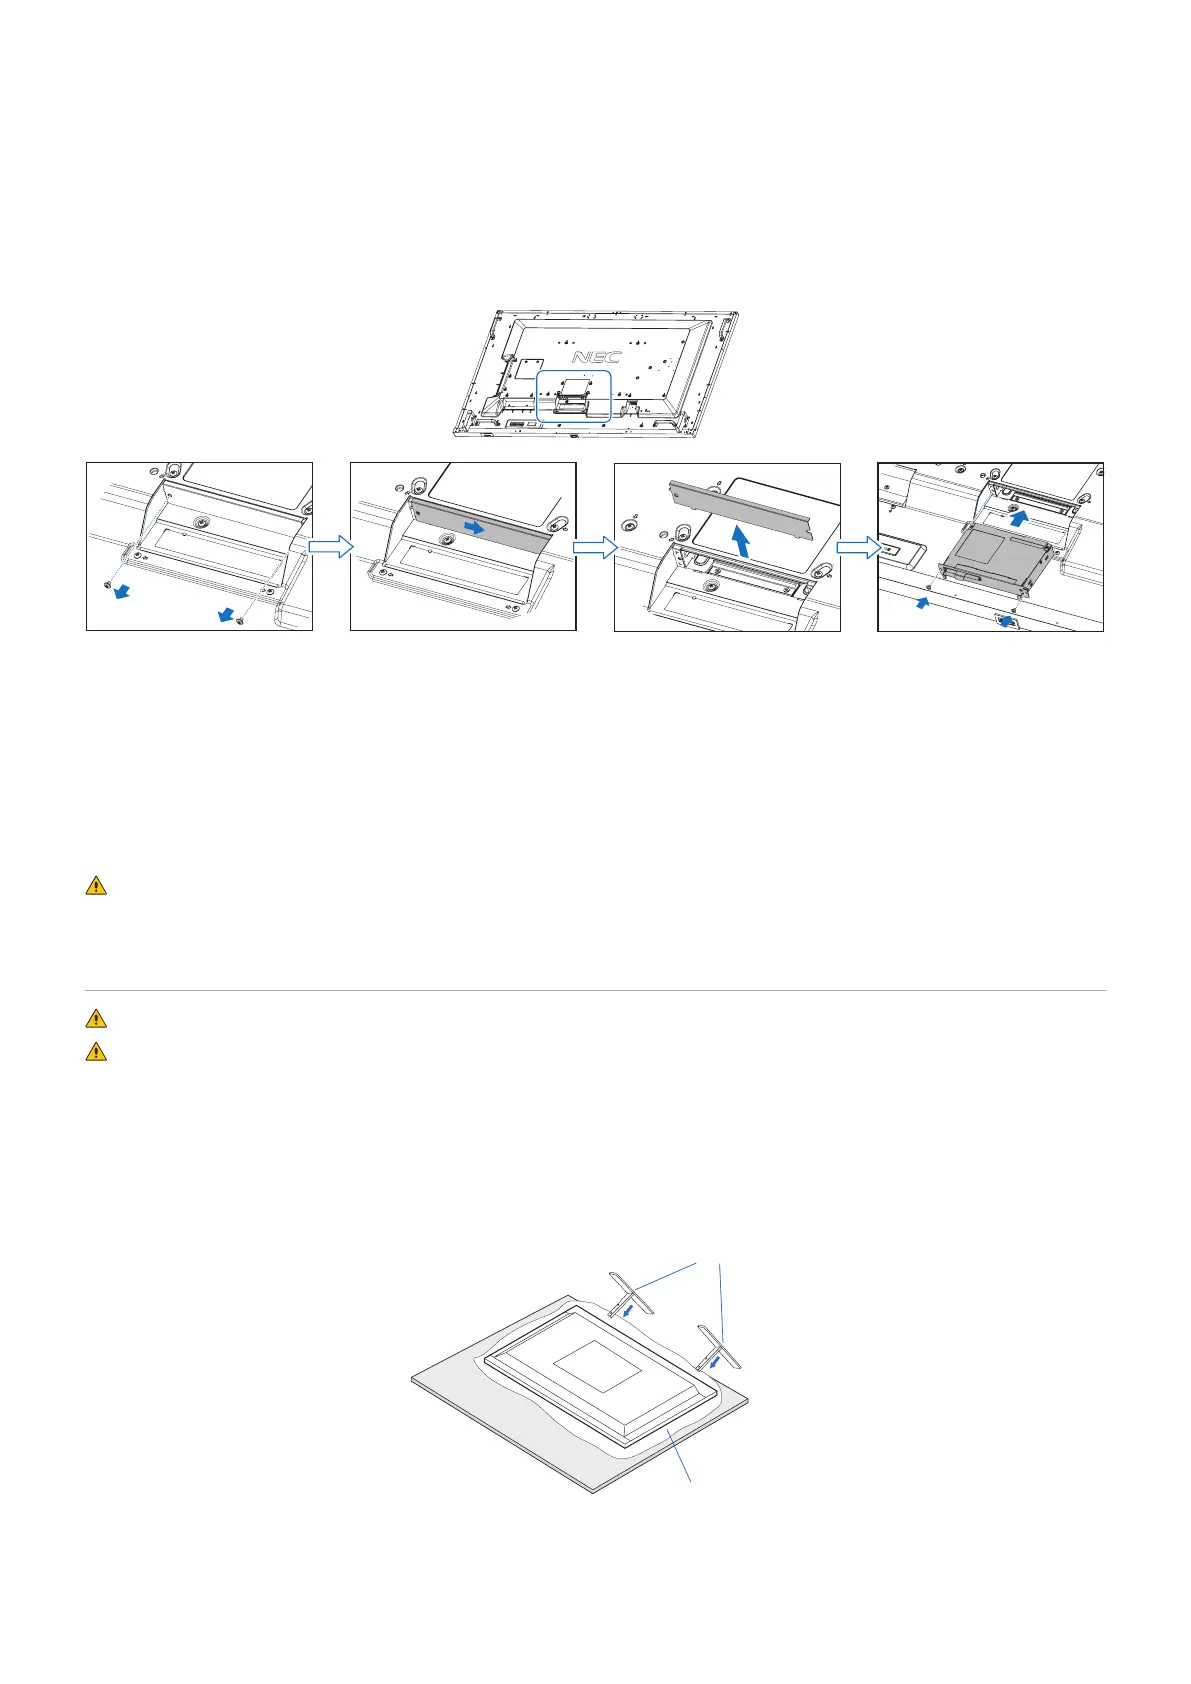
3. Remove the attached slot cover by unscrewing the installed screws (Figure 1), sliding to right (Figure 2) and moving up
(Figure 3).
Figure 1 Figure 2 Figure 3 Figure 4
4. Insert the Option Board into the monitor and fix it with the removed screws (Figure 4).
(Recommended Fasten Force: 139 - 189N•cm).
NOTE: Unless your monitor is purchased as part of a special bundle package, no Option Boards will be in the box or installed
in the monitor. These are optional accessories available for separate purchase. Please contact your supplier for a list of
Option Boards available for your monitor.
Make sure the board is inserted into the slot in the correct orientation.
Do not apply excessive force to manipulate the Option Board before attaching it with screws.
WARNING: Please refer to “WARNING 14”.
Installing and Removing the Optional Table Top Stand
WARNING: Please refer to “WARNING 8”.
CAUTION: Please refer to “CAUTION 5”.
For installation, follow the instructions included with the stand or mounting equipment. Use only those devices recommended by
the manufacturer.
NOTE: • Use the ST-801.
• ONLY use screws which are included with the optional table top stand.
Install the stand so the long end of the feet face forward.
• The monitor can only be used in the landscape orientation with the tabletop stand.
Soft cloth
Optional table top stand
Table