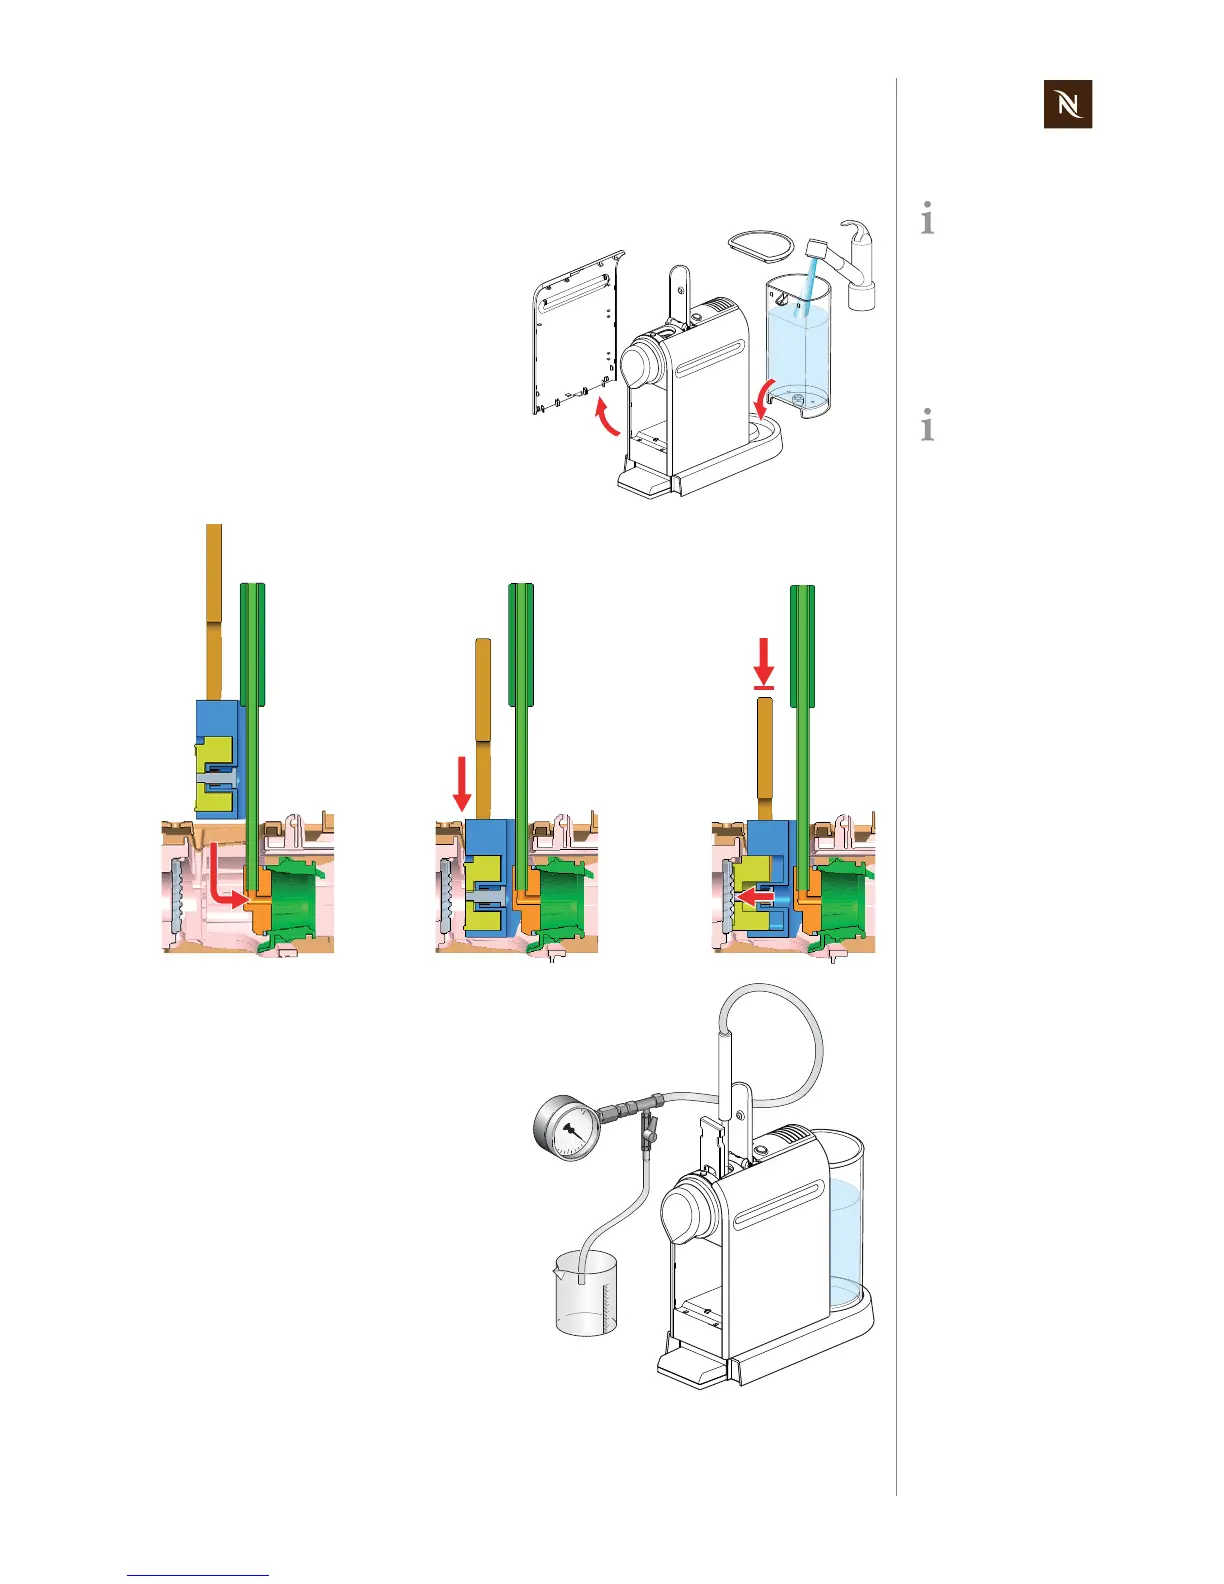
Citiz service manual
105
FUNCTION TESTS
9.4.1 Preparations
Depending on core
unit range, refer to
"Disassembly of core
unit, C-range" on page 91
or "Disassembly of core
unit, D-range" on page 109.
The pressure adapter
must sit firmly in the
capsule bay.
1) Remove left side panel of core unit.
2) Insert core unit back into platform.
3) Fill and insert water tank.
4) Insert connecting unit of pressure
adapter into capsule bay. Push back
sealing cone into capsule cage.
5) Insert fixation unit of pressure adapter
into capsule bay.
6) Press down operating lever.
7) Connect pressure hose to pressure
tester.
8) Place a measuring cup under the drain
hose of the pressure tester.
3.
1.
2.
 Loading...