131
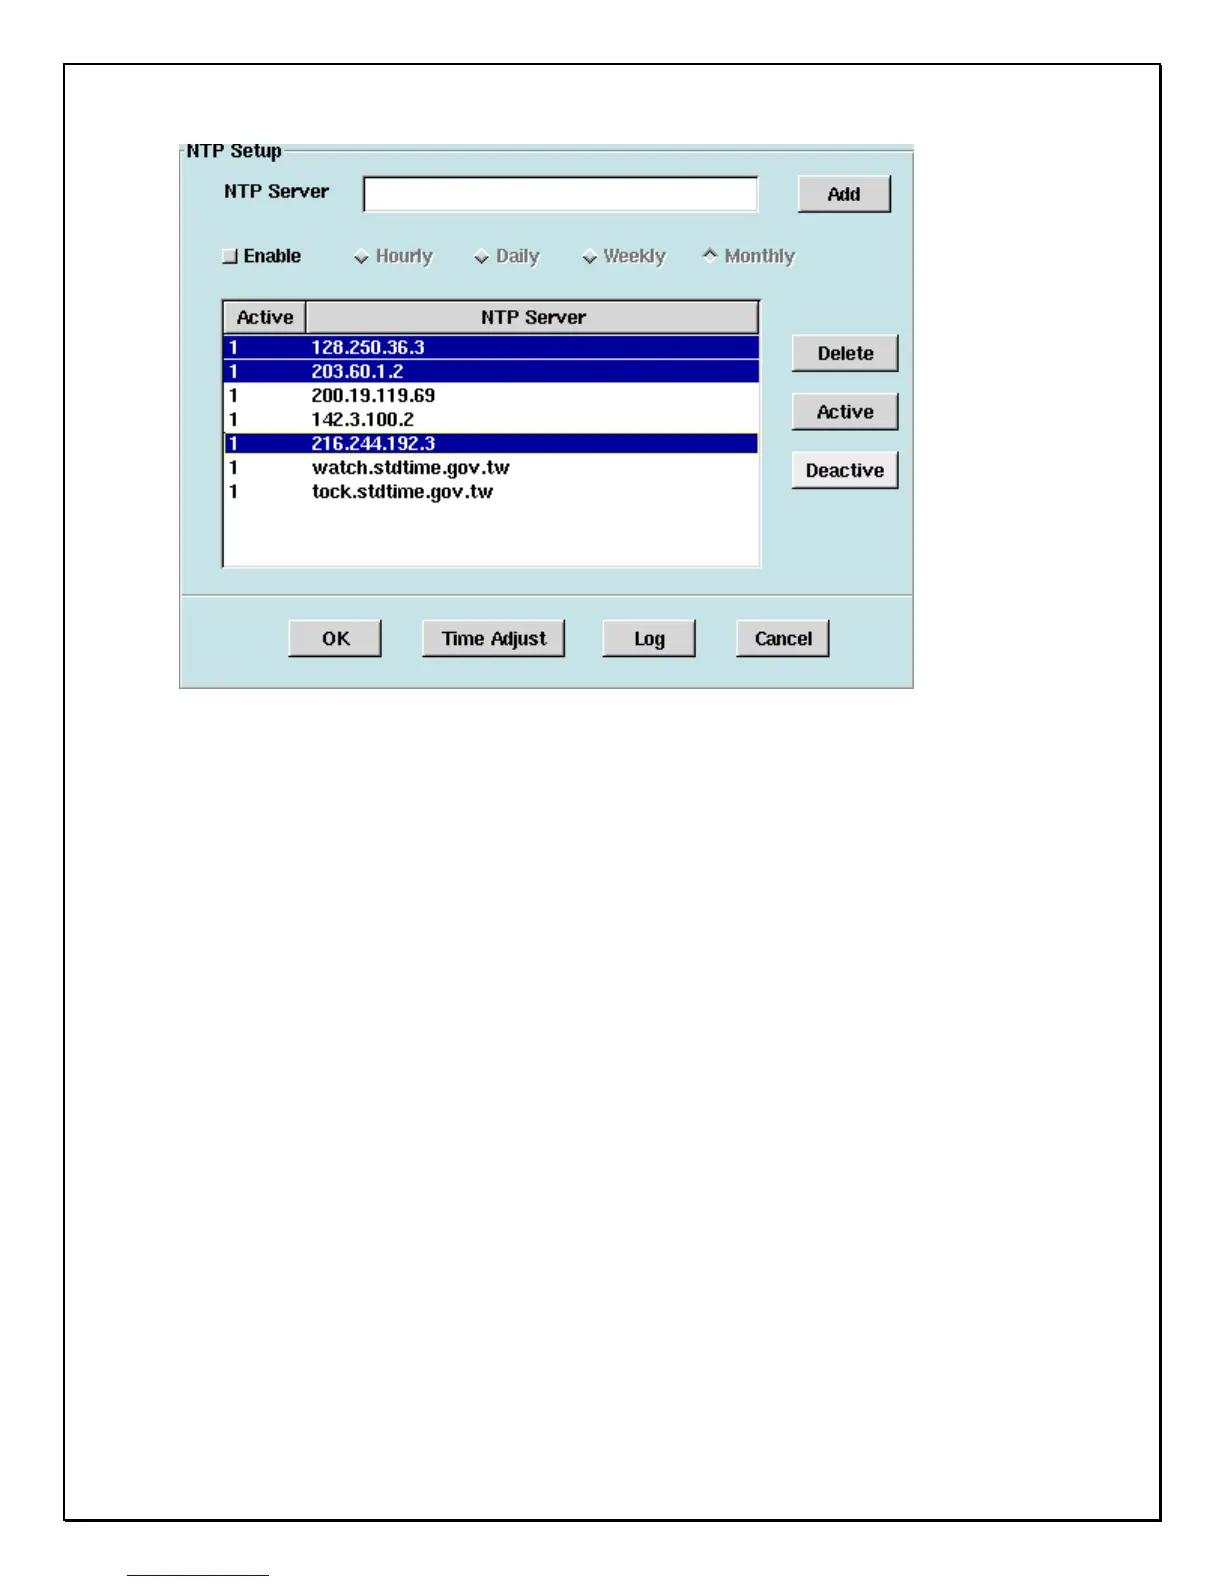
4. NTP Server: Fill in the ‘’NTP Server’’ and click the ‘’Add’’ button to put the NTP
server into the list. DVR can have their own time server added for keeping a DVR
synchronized. (Several NTP servers have been added by default)
5. Active: Activate the selected NTP server.
6. Deactivate: the selected NTP server.
7. Delete: Delete the selected NTP server in the list.
8. Enable: Clicking the ‘’Enable’’ checkbox, enables time interval updates to the DVR
every hour, day, week or month as nominated.
(Note: The DVR will only connect to the top/first highlighted NTP server within the
list, and if the connection fails, the DVR will connect to the next one and so on.)
9. Time Adjust: manually adjusts the clock on NAS.
10. Log: status logging and monitors every time correction