38
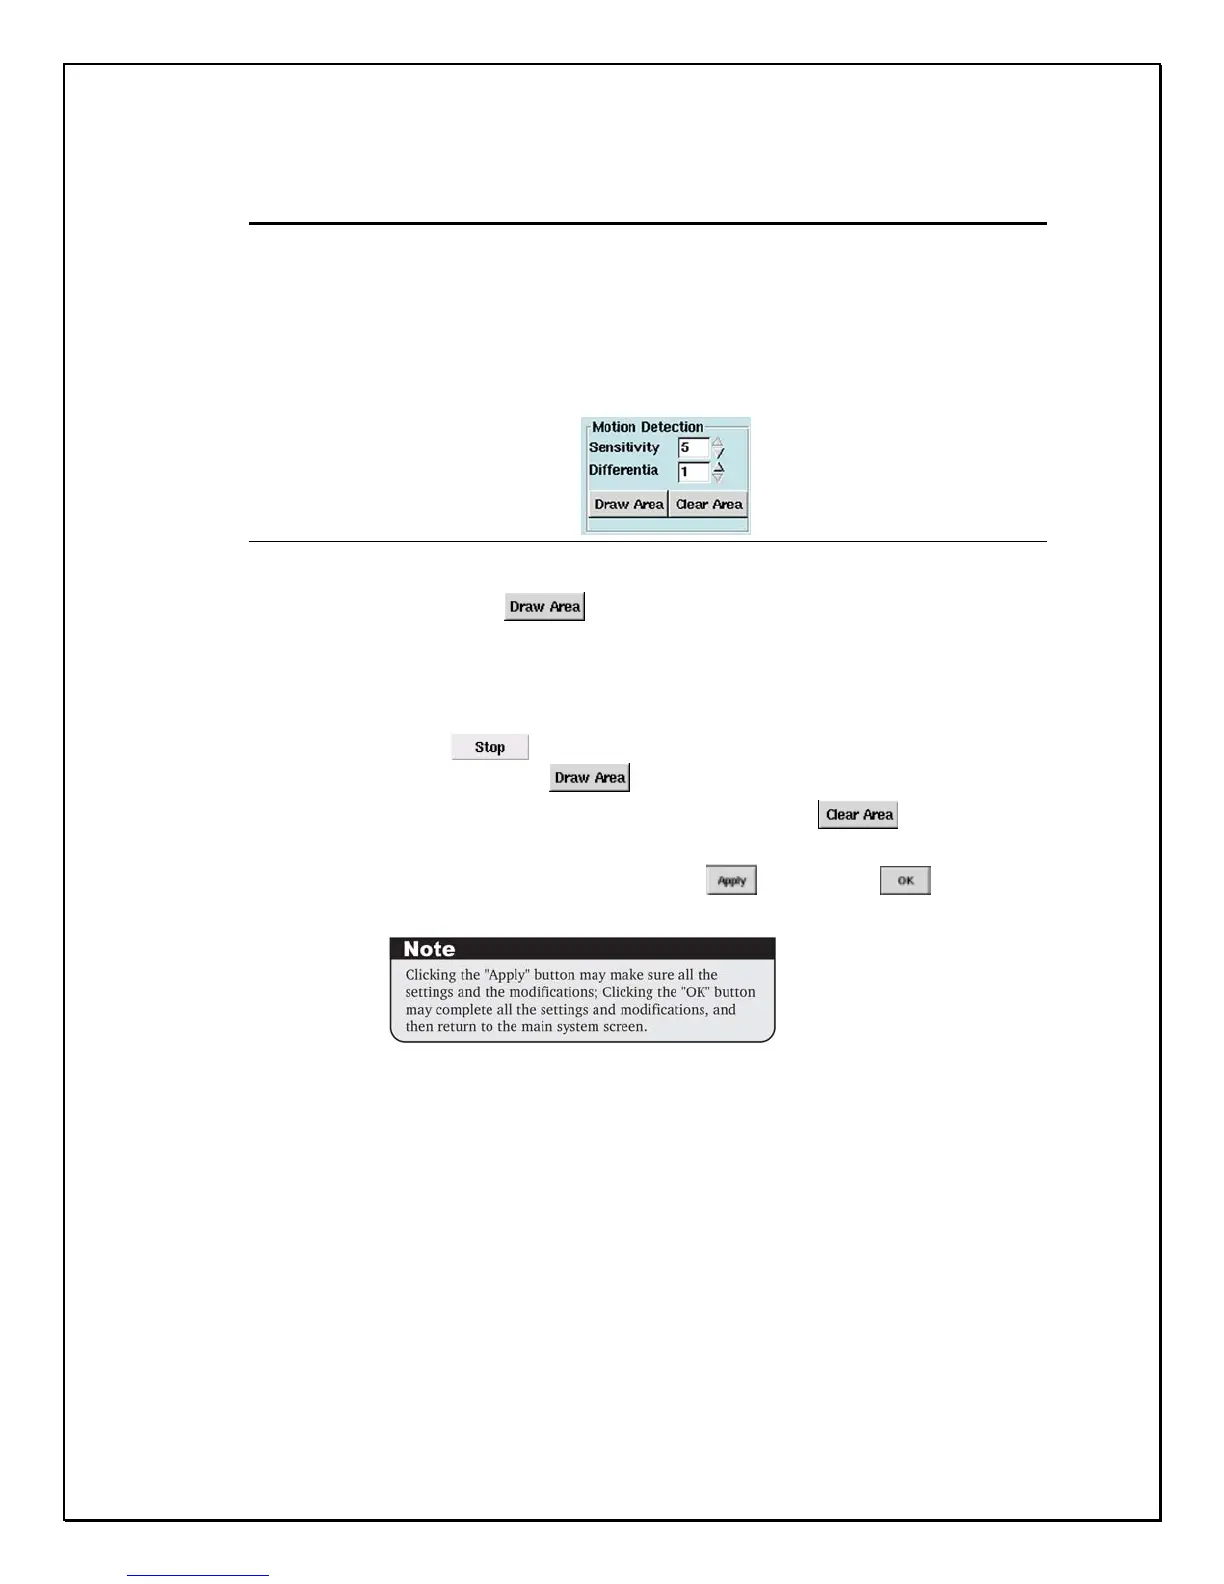
Setting Motion Detection
• Under “Motion Detection” users can select:
i. Sensitivity – To set the sensitivity relative to the motion detection zone (from 1
to 5). The higher the value, the more sensitive the detection will be.
ii. Differentia - A Pulse Count factor that distinguishes differences among images
within a given time.
Up to six different Motion Detection Zones can be created in one camera view.
Figure 4-8: Motion Detection Area ( Zone )
• Click on “Draw Area”, : to draw a motion detection frame in the camera scene,
just click-hold and draw a frame-sized window over the desired area for motion detection.
Repeat this and draw up to six individual zones into the camera scene to create effective
detection zones. Avoid nuisance false alarm objects such as, busy roadways, flickering TV,
VGA monitors, shrubs, trees, and any object that is movable by drafts and wind or
mechanical movement.
• Click on “Stop”
. After you have finished drawing to hide all zones. To show all
zones click on “ Draw Area”
.
• To cancel current motion detection settings click “Clear Area” .
to erase all the frames one by one.
• When all settings are complete click on “Apply”
and then “OK”
to save all settings. (The screen will return to main screen)