SCREENGUARD
™
INSTALLATION AND USER MANUAL
31
TROUBLESHOOTING
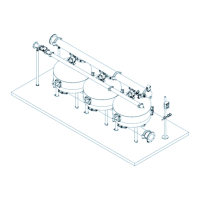
Flushing-nozzle replacement
A
B
D
D
F
G
E
B
C
Disassembly:
1.
Unscrew 2 screws (A) with a 10mm wrench.
2.
Disconnect the nozzle clamp set from the collector pipe (F).
Assembly:
1.
Insert the flushing nozzle (E) into one of the clamps (D).
2.
Place the two joined parts (D and E) against the hole (G).
3.
Place the second clamp (D) opposite the first one, clutching the collector pipe (F).
4.
Place a spring washer (B) on each screw (A) and insert through the 2 clamps (D).
5.
Place a spring washer (B) and a nut (C) on the other end of each screw (A).
6.
Hand-tighten the 2 nuts (C) with a 10mm wrench - do not use electric or impact tools.
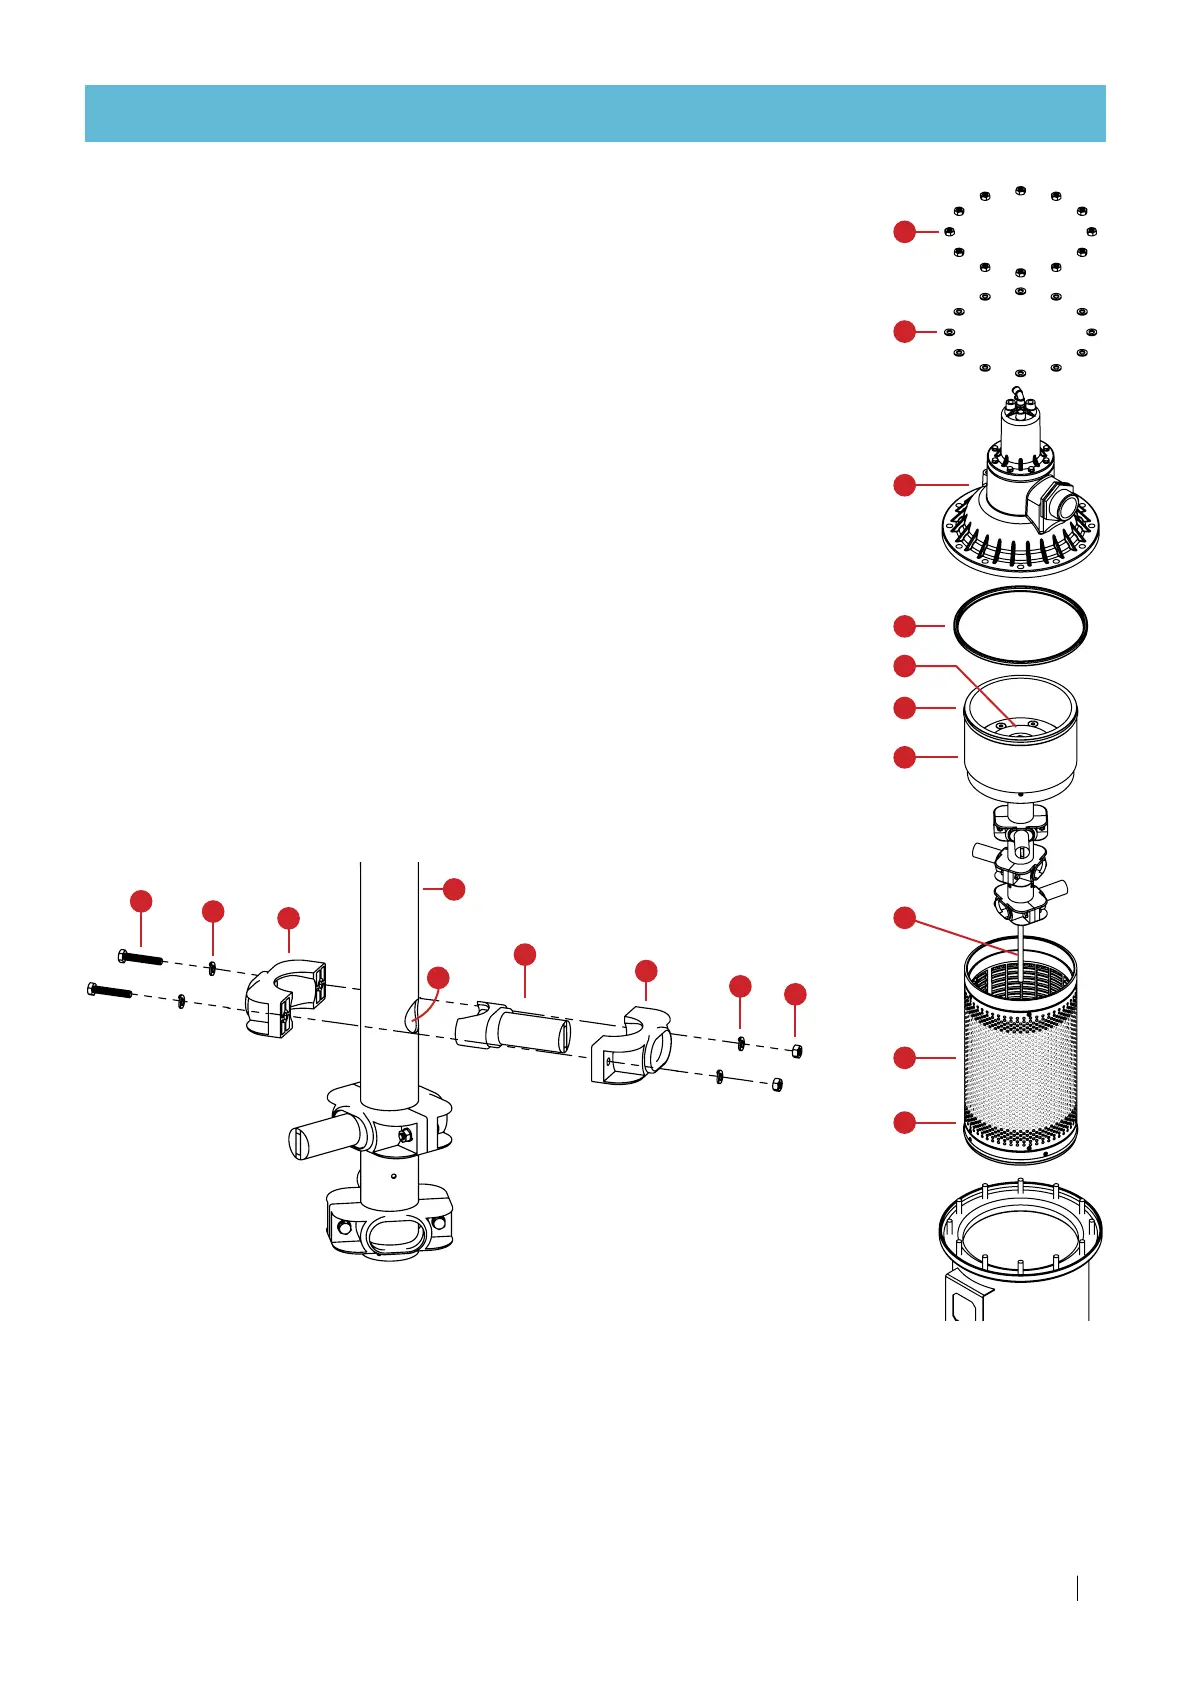
Filter body opening and Screen assembly extraction
Disassembly:
1.
Unscrew nuts (A) with a 17mm wrench
2.
Remove washers (B)
3.
Remove Piston Cover Assembly (C) and gasket (D)
4.
Pull out suction assembly (E)
5.
Pull out screen assembly (F).
Assembly:
1.
Lubricate screen assembly O-rings (H).
2.
Insert screen assembly (F) and push all the way.
3.
Insert suction assembly (E) and push all the way.
Make sure suction assembly (E) is aligned and positioned inside the socket
of the screen assembly (F), and that the main shaft (G) is lodged inside the
bottom bearing.
4.
Manually rotate the turbine (I). It should rotate freely.
5.
Make sure gasket (D) is in place.
6.
Put Piston Cover Assembly (C) in place.
7.
Place washers (B) and nuts (A) and tighten the nuts.
G
F
E
D
C
B
A
H
H
I