Instruction Manual Model 3100 Analyzer
Manual P/N: C5-06-4900-16-0
Manual file name: MN-A-0005, Rev. C
Page 13
2.2 Step 3 – Start up and commissioning
Power up check list
2.2.1
The Model 3100 is shipped ready to use. Factory default configuration settings are listed in Appendix C.
Review the factory default configuration settings before commissioning your system. If you choose to
change any of the factory default settings, refer to sections 4.1.1 and 4.1.2.
REMINDER: Always start up the unit with a sample inlet pressure of 6 psig or less. Exposing the sample
pump to operating pressures higher than 6 psig may damage the unit. Verify the following conditions:
No flammable vapors are present in the area
No exposure to rain, dripping water, or hose down
Wiring correctly installed – interface cable connected
Plumbing connections on the RSM are gas-tight
Ambient temperature is below 40° C (104° F)
Step 1 -- Power up the unit
2.2.2
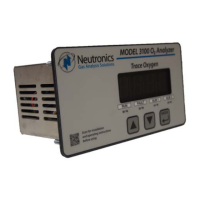
When the Model 3100 is powered-up, it will go through a 5-second self-test. The 7-segment
alphanumeric display will show “8.8.8.8.”, then XXXX (software build), and then the power supply voltage
setting. The RUN, Alarm-1, Alarm-2, and Fault LED indicators will go through a display test sequence
(lamp test). Upon completion, the analyzer will enable the RSM warm-up.
The RSM warm-up takes approximately eight minutes. The digital display will alternately indicate ‘nr‘
(system not ready) and the temperature of the sensor heater until warm-up is complete.
After the warm-up period is completed, the Model 3100 will check the current sensor reading and update
the digital display and status LED’s. When configured for auto-ranging, the Model 3100 analyzer will
automatically display units in parts per million or in percent oxygen, according to the sensor output.
When the analyzer is in percent range oxygen measurement, the display flashes the concentration in
bright then dim illumination. When the analyzer is in parts-per-million range oxygen measurement, the
display shows the concentration illuminated steadily bright.
Once the analyzer reading has stabilized (approx. 20 minutes for thermal equilibrium), the user may apply
an instrument air source to the sample inlet port of the RSM (see RSM equipment manual) to check the
unit. Allow the reading to stabilize. It should take about 30 seconds for the gas to sweep out the sample
lines. Verify the 7-segment alphanumeric display shows 20.9 % oxygen.
step1
•powerup
step2
•initial
calibration
step3
•setalarm
1&alarm
2
Fig. 12, Start up and commissioning

 Loading...