NEWTON S 23
SYSTEM OPERATION MANUAL
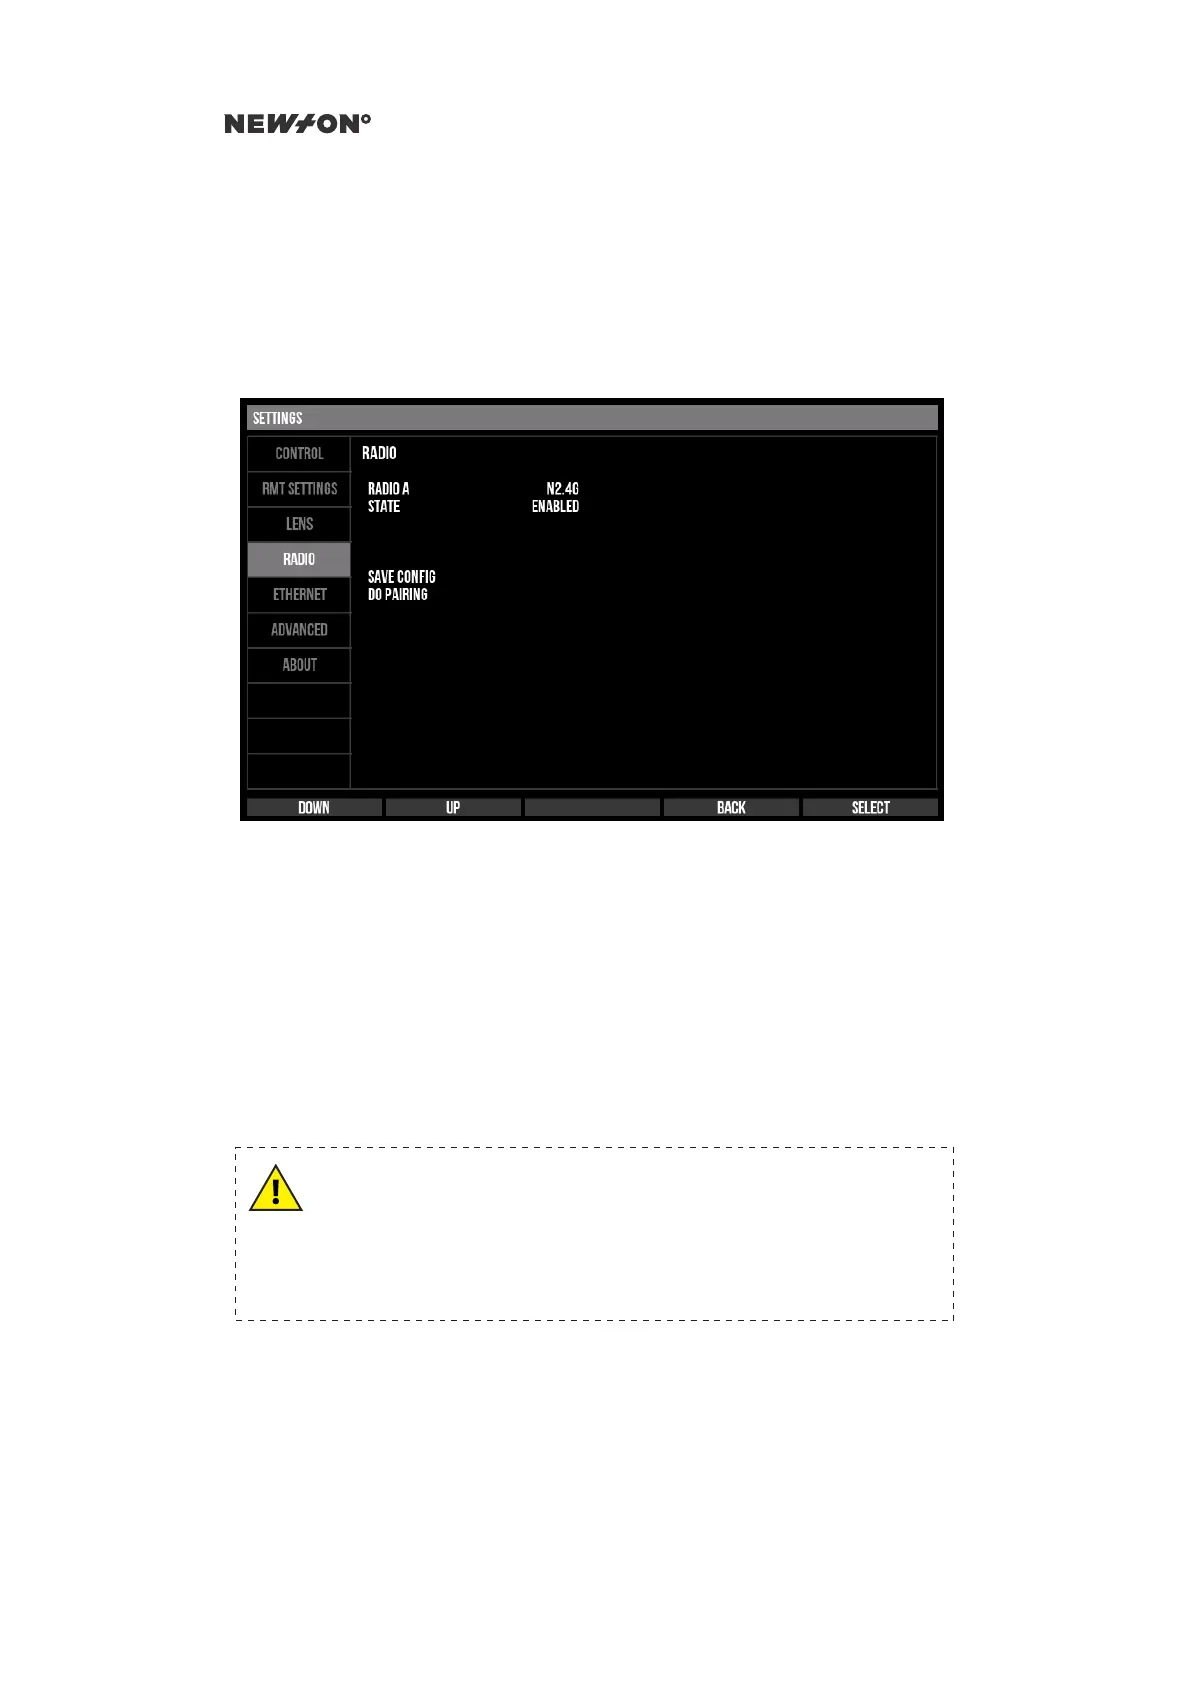
2. Move the selector to the DO PAIRING option using the DOWN and UP buttons and press
SELECT. The message “RADIO PAIRING IN PROGRESS” will be displayed
3. Turn on the remote head
4. The pairing procedure can take up to 60 seconds. When the pairing is completed the message
“RADIO PAIRING SUCCESSFUL” will be displayed. To abort the procedure, press CANCEL
Figure 5.4: Newton C1 Settings - Radio tab
5.4.2 ETHERNET
Under the ETHERNET settings tab the Ethernet connection is configured, such as the IP address
and net-mask of the Newton C1 as well as the IP address of the remote head. The Newton C1 and the
remote head must be on the same IP subnet. Note that the Newton C1 and Newton S are configured
to be compatible with each other as default.
If the setting AUTOCONNECT is set to ENABLE the Newton C1 will try to connect as soon as a
valid physical link is established. It will also automatically reconnect should the connection break for
any reason. When AUTOCONNECT is set to DISABLED, the Ethernet connection must be manually
initiated by selecting CONNECT.
WARNING
If AUTOCONNECT is set to ENABLE in a use-case where radio is the
prefered transport and an ethernet connection is not expected to be
available, it can lead to stutter in control and loss of connection.
If using radio, set AUTOCONNECT to DISABLED.
DO NOT DISTRIBUTE
Copyright © 2019 Newton Nordic AB