Page 28/62 GEO M6 HARDWARE SETUP PROCEDURE
1 to 3 (maximum) Geo M6 ceiling mounted 8.3.2
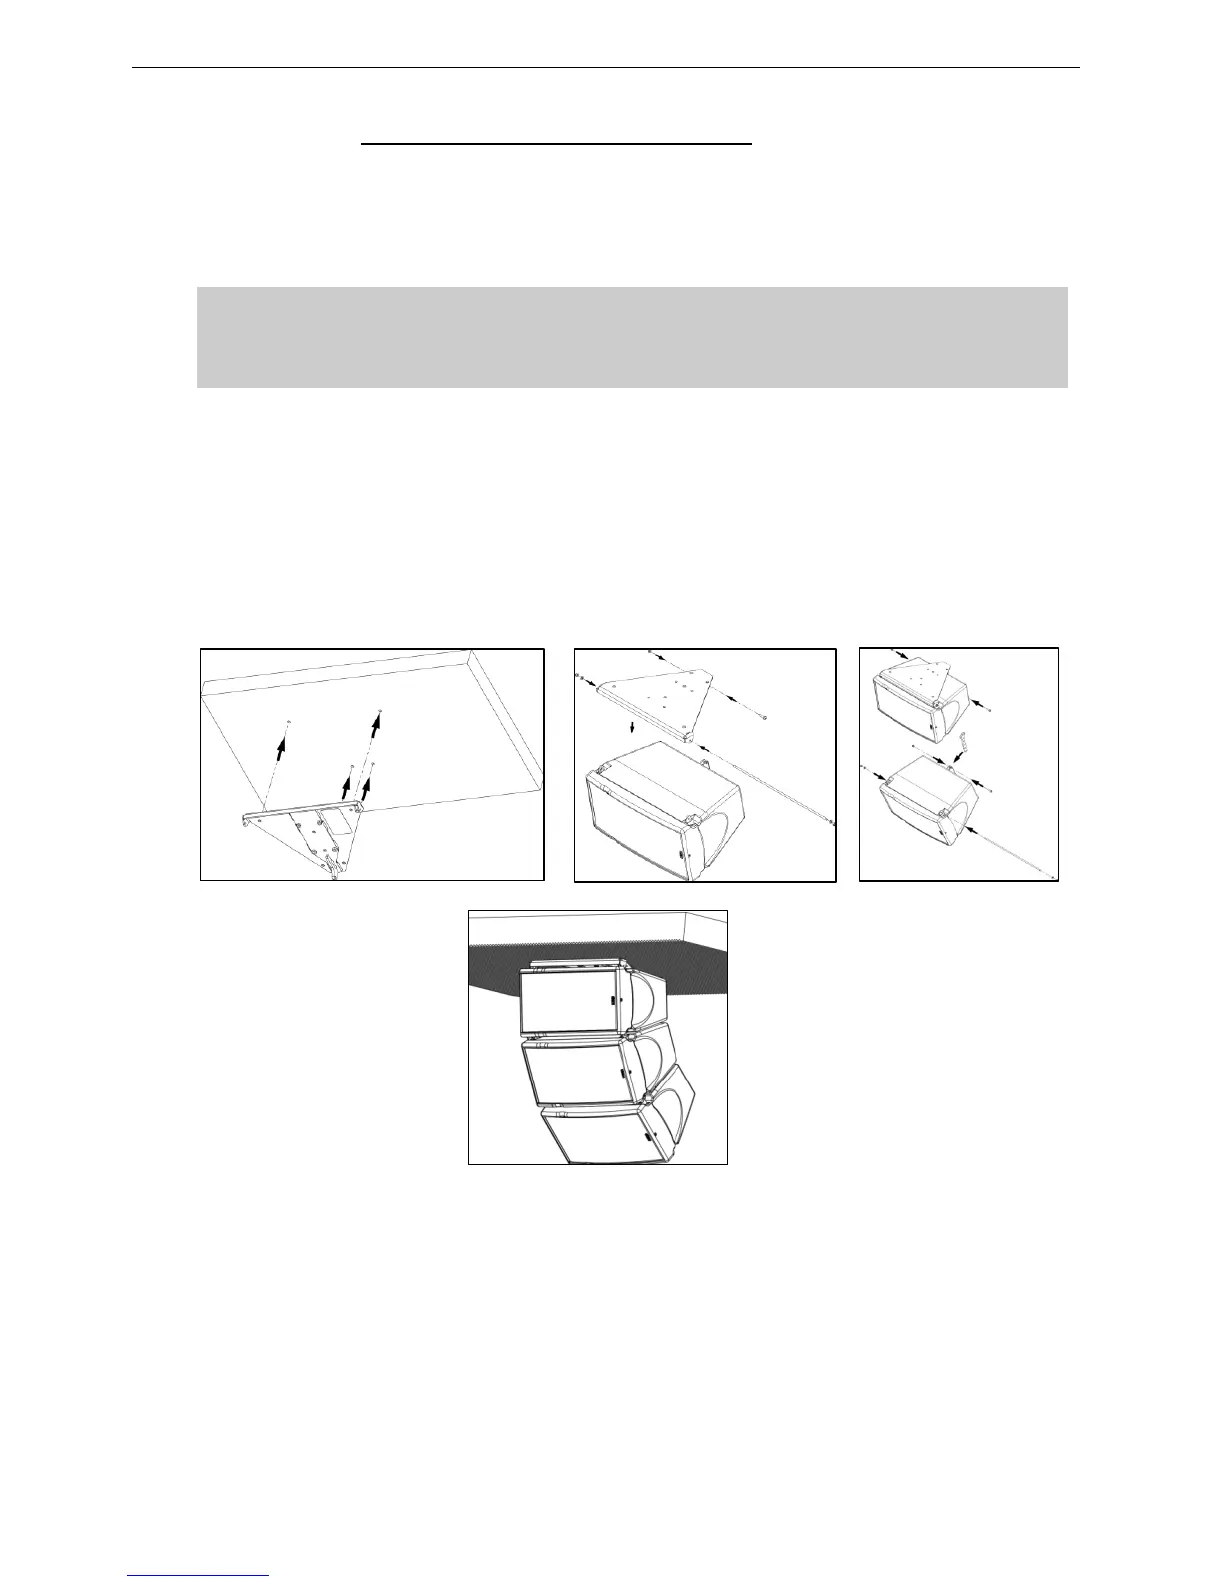
Required items
- 1 x GMT-LBUMP
- 1 to 3 x GMT-BNFIX
- 4 x 8mm diameter screws (not provided)
IMPORTANT
Ensure that the ceiling is strong enough to hold GEO M6 cluster weight and that the
four screws 8 mm diameter and corresponding plugs required to fix the GMT-LBUMP
under the ceiling are properly dimensioned.
Procedure
- 4 x 8mm diameter screws (not provided) are required to fix the GMT-LBUMP to the ceiling;
- Connect GMT-LBUMP to top cabinet by inserting the GMT-BNFIX axis through front holes and
secure axis and rear link with GMT-BNFIX screws;
- Connect subsequent cabinets with GMT-BNFIX at required inter-angle values;
NB: please note that top cabinet angle will be -10° in relation to the L-bumper
 Loading...