GEO M6 HARDWARE SETUP PROCEDURE Page 33/62
1 to 6 (maximum) GEO M6 stacked on Sub 8.3.6
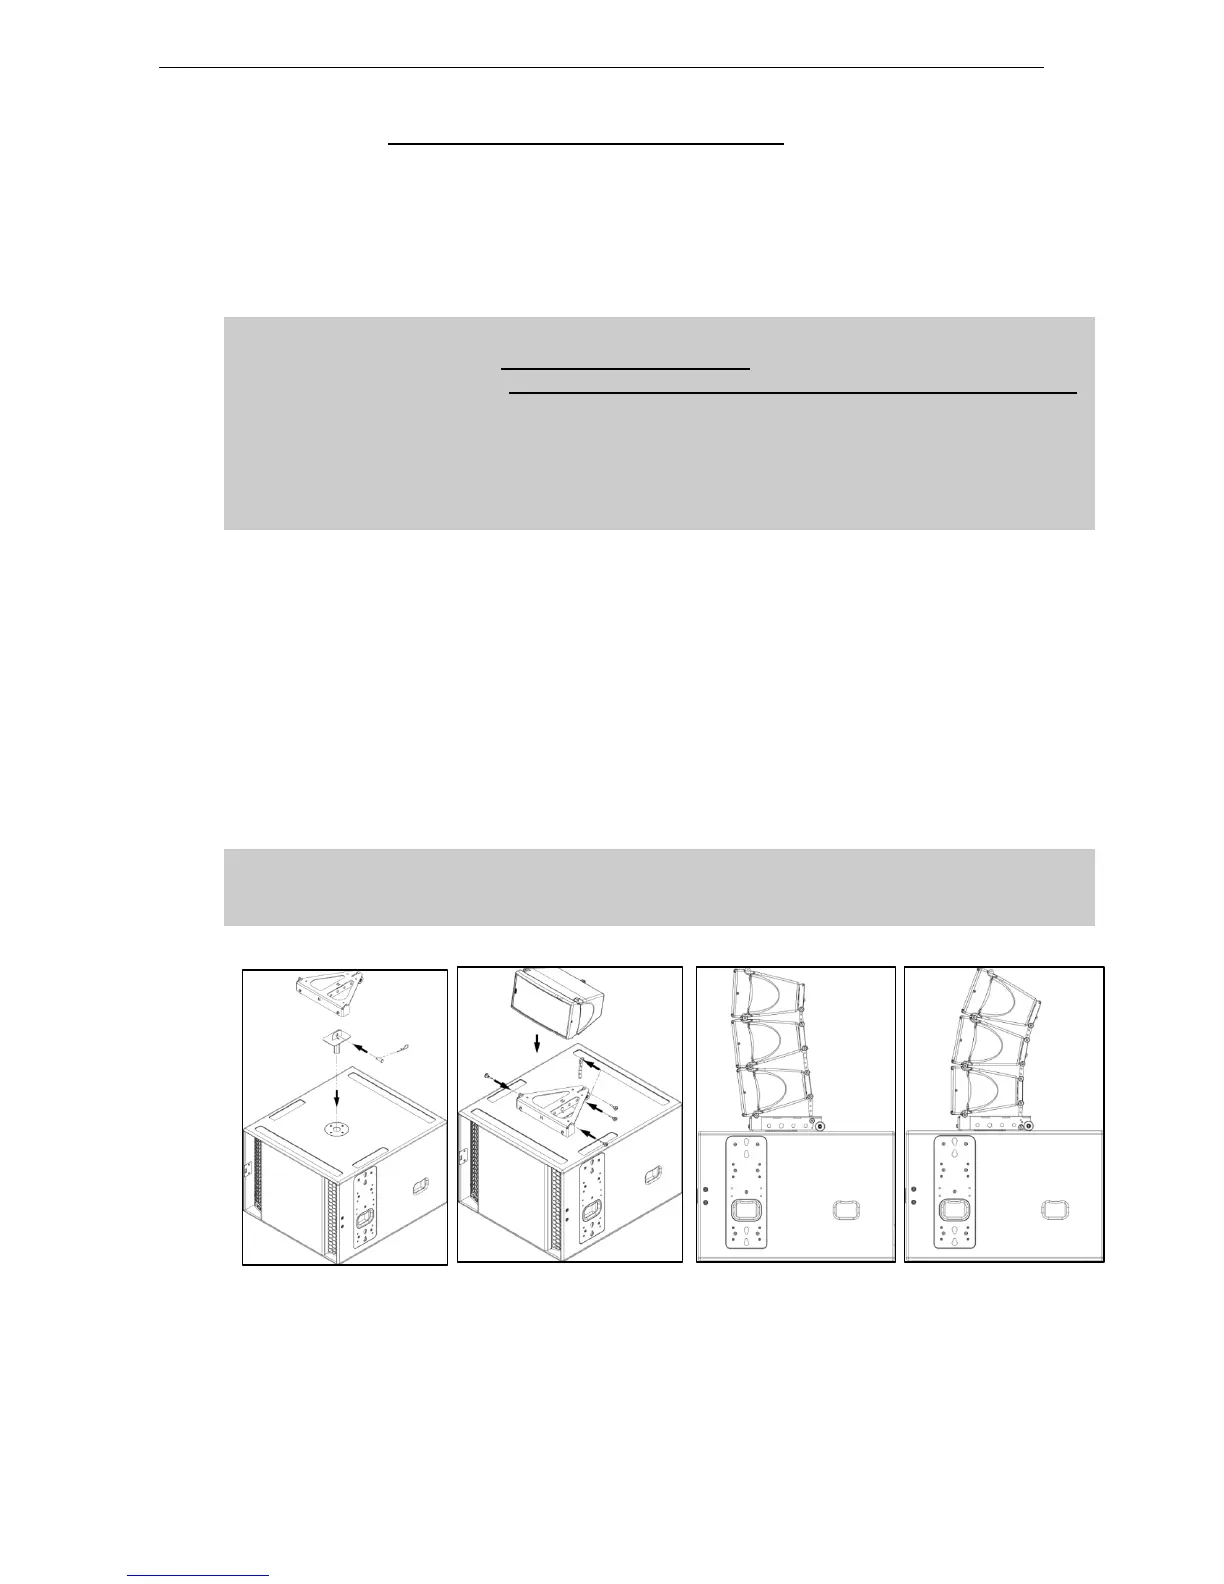
Required items
- 1 x GMT-BUMPER
- 1 x GMT-BPADPT
- 4 VXT-BL515 per GEO M6
IMPORTANT
GMT-BPADPT is rated for a maximum of: 6xGEO M6s on a single LS18 in any inter
cabinet angle configuration, provided the stack is assembled according to below rules:
- LS18 must always be installed on a horizontal surface;
- Ensure that public is not allowed within a safety area which radius is equal or higher
than assembly height.
- It is highly recommended to secure the system to a fix point located at the back of the
stack.
Procedure
- Connect GMT-BPADPT poles stand adaptor to GMT BUMPER using provided clevis pin; secure pin
with “R” clip
- Stack GMT-BUMPER on top of LS18 by inserting GMT-BPADPT into LS18 pole mount hole
- Connect bottom cabinet to GMT-BUMPER at required vertical angle with 4 x VXT-BL515 quick
release pins
NB: please note that bottom cabinet angle can be adjusted from -7° to 0° in relation to LS18
- Connect subsequent cabinets at required inter-angle values with 4 x VXT-BL515 quick release pins
IMPORTANT
Ensure that the clevis pin is properly locked in GMT-BBADPT, and that 5mm pins are
properly locked into GEO M6
 Loading...