MAINTAINING THE CONTROLLER Part Number 12762 Rev 1.1 | April 30, 2014
NiMH Battery Installation and Maintenance
| NETWORK CONTROLLER 3E & 6E MOUNTING AND WIRING GUIDE 27
replace) the battery, you must remove power to the controller and remove its cover.
Then you mount the battery assembly on top of the option card area (Figure 9).
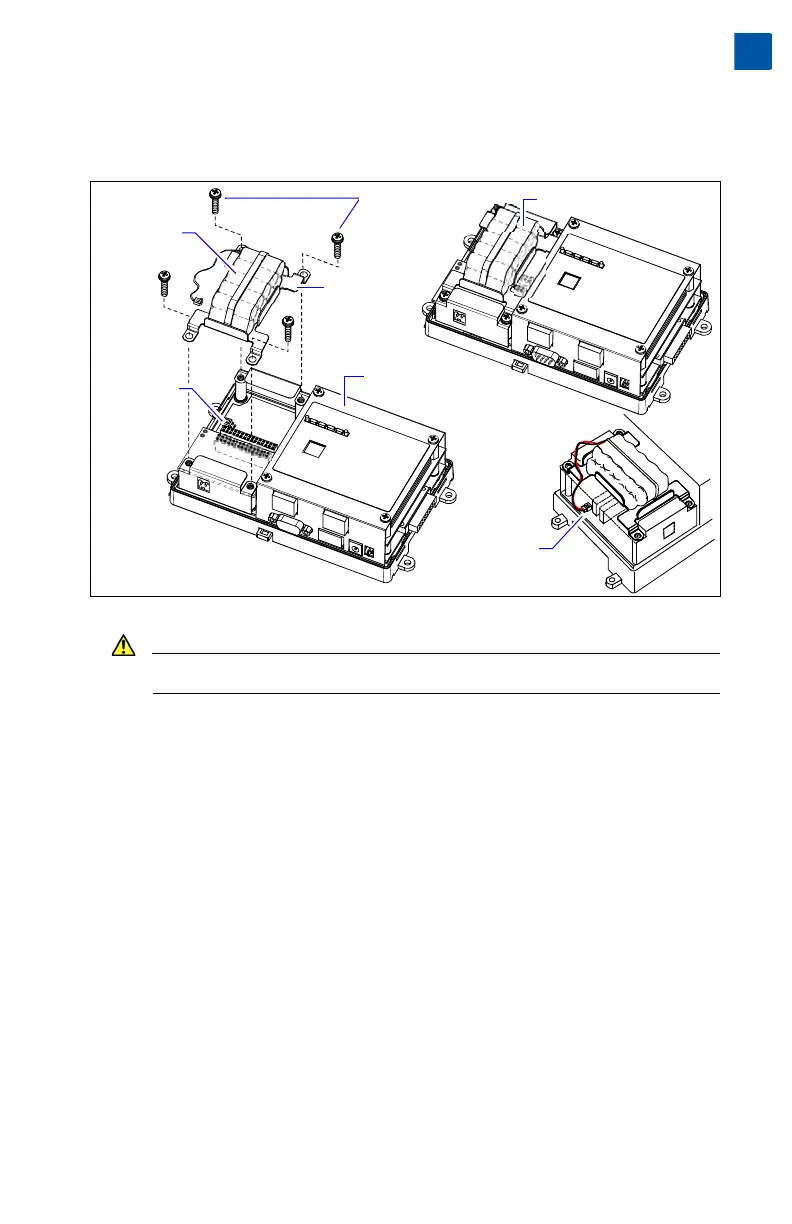
Figure 9 Optional NiMH battery pack in T-300E or T-600E controller.
Caution Use only NiMH battery packs approved for use with the controller.
Procedure 8 Installing/replacing T-300E or T-600E controller NiMH battery assembly.
Step 1 If replacing an existing battery in a controller not currently configured for
SRAM usage, backup the controller’s configuration to your PC using the
appropriate NiagaraAX software tool (for example, Workbench).
Step 2 If a station is running, stop it using the platform Application Director view.
Step 3 Remove all power from the controller. Wait for all LED activity to stop (if a
battery is already installed, this may take a minute or two).
Step 4 Remove the cover. See “Removing and Replacing the Cover,” page 10.
Note the Option Slot area where the NiMH battery assembly mounts.
Step 5 If a battery assembly is already mounted, unplug the battery from the con-
nector on the controller board (see Figure 9).
Step 6 Remove the four screws that secure both option slot end plates (and if
installed, the existing battery assembly bracket). Set the screws aside.
Remove any existing battery assembly (if applicable).
Step 7 Plug the battery connector plug of the new battery assembly into the battery
connector on the controller (see Figure 9).
Installed NiMH battery assembly
Bracket
part of
assembly
NiMH battery
plugged into
connector on
controller
Optional
NiMH
battery
assembly
(NPB-BATT)
NiMH battery
connector on
controller board
Mounting
screws (4)
Controller with
cover removed