11
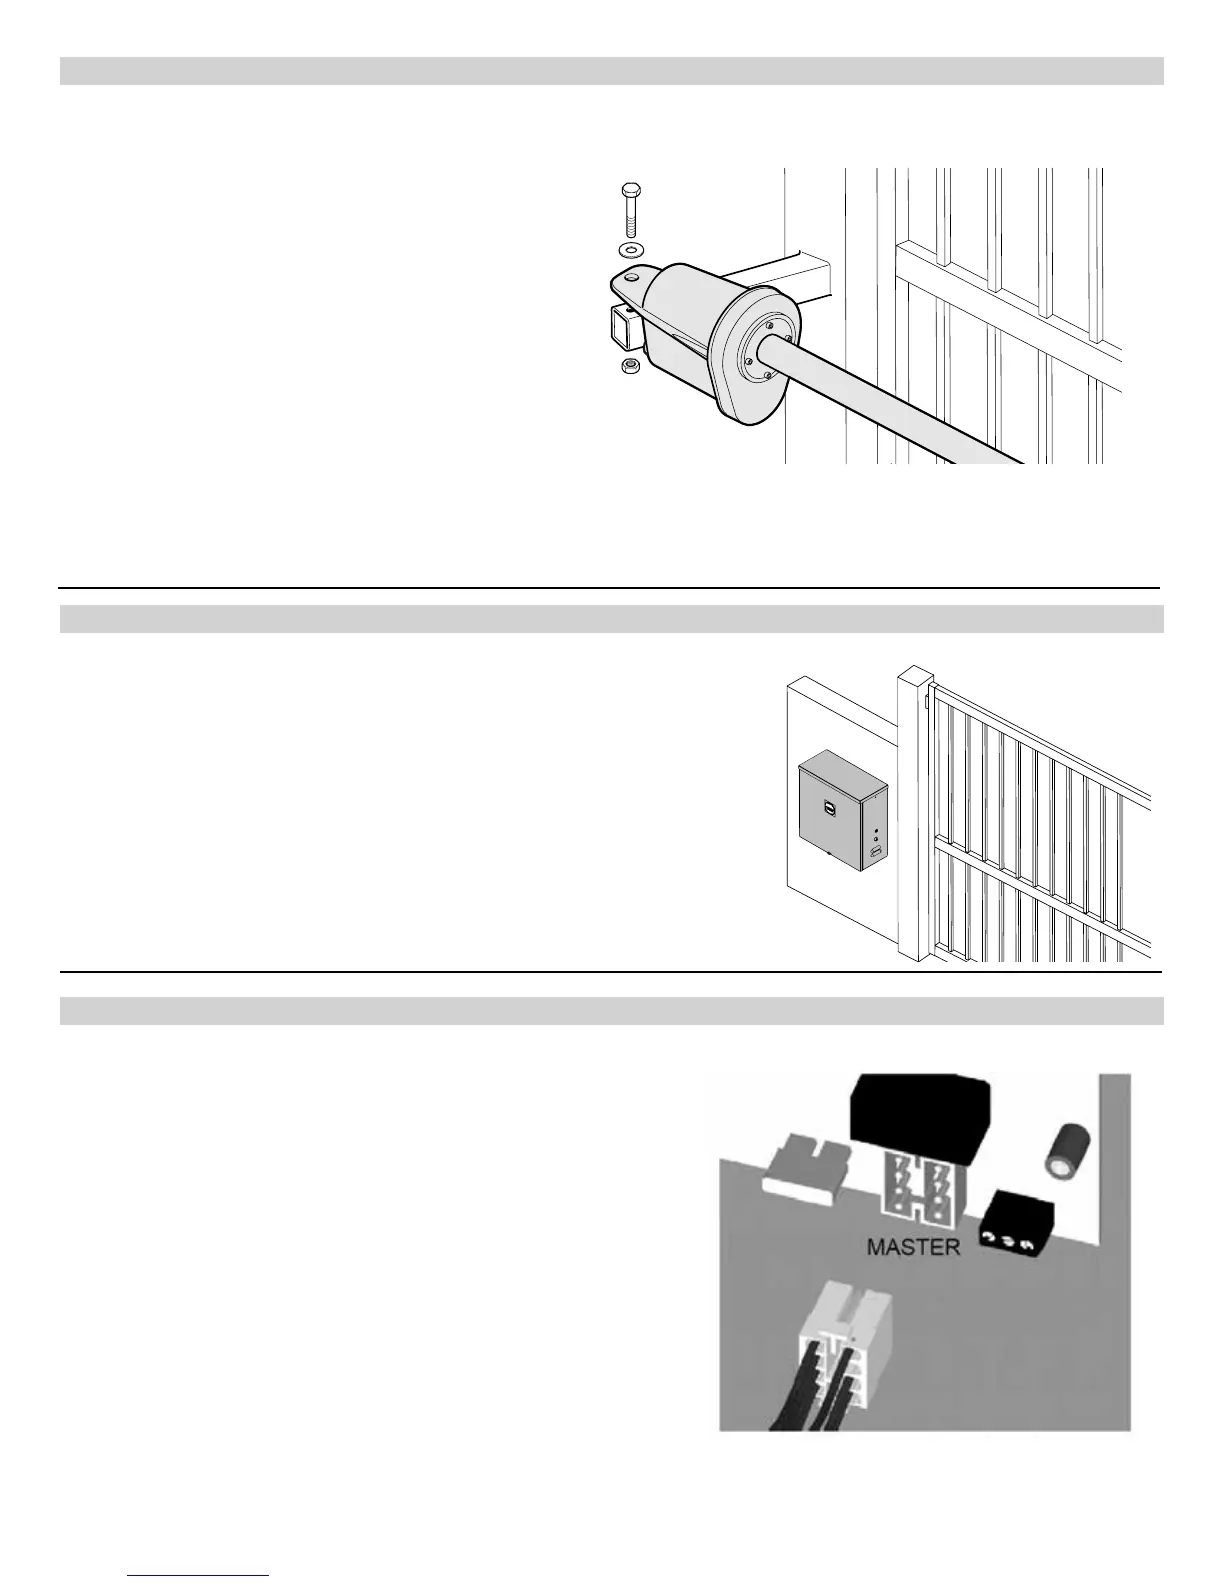
11 - CONTROL BOX MOUNTING
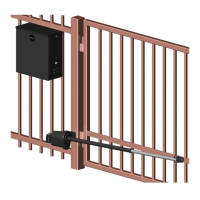
10 - ACTUATOR MOUNTING
12 - CONNECTING THE ACTUATOR
Mount the actuator to the pivot arm as shown.
Please notice the washer goes above the actuator
ange.
The lock nut should be tight to prevent movement or
shifting when the actuator is running. This will also
prevent excessive “bounce” or “wobble” when the gate
stops moving.
Mount the control box within 4 feet of the pivot arm. Use mounting
hardware capable of supporting the weight of the control box with the
battery installed.
Do not mount the control box where the person using the push button on
side of the box can come in contact with the gate.
Set battery inside of control box with terminals toward the front
(Do not use
any battery with side
terminals).
Connect actuator cable to the “MASTER” connector on the control
board.
If a 1600 Dual Operator is being installed it is recommended to install
conduit (1” diameter or larger) under the roadway to protect the actuator
cable. Run the cable across the drive through conduit and up through
the control box.
Connect to the “SLAVE” connector on the control board.
Connect the RED power wire (s) to the battery positive ( + ) and the
BLACK power wire (s) to the battery negative ( - )
NOTE: If it is necessary, instead of cutting the slave cable, remove
the pins on the plug with appropriate tool, run the cable through the
conduit and reinsert the pins into the plug. Make a note of wiring before
removing pins from plug.