19
Adding Additional Base Units
Batteries must be installed and the units turned ON.
1. Press and release the “ID SET” button on the Keypad.
2. Press the number on the Keypad that corresponds to the Intercom you are adding or changing. You will
hear the number of beeps corresponding to the number you pressed.
For Example: If you are adding a third base unit to the system PRESS #3. The keypad will beep THREE
times.
3. Press the “ID SET” button on the base unit until it beeps then release. You will hear beeps from the base
unit and beeps from the keypad, which means the ID Codes are set.
IMPORTANT: Place Intercoms through the home or ofce with at least 10 feet between them to prevent
interference.
RELAY
OUTPUT
AC/DC
POWER IN
123456789
+
0
–
ID SET
+
–
–
–
+
+
–
+
RESET
JUMPER
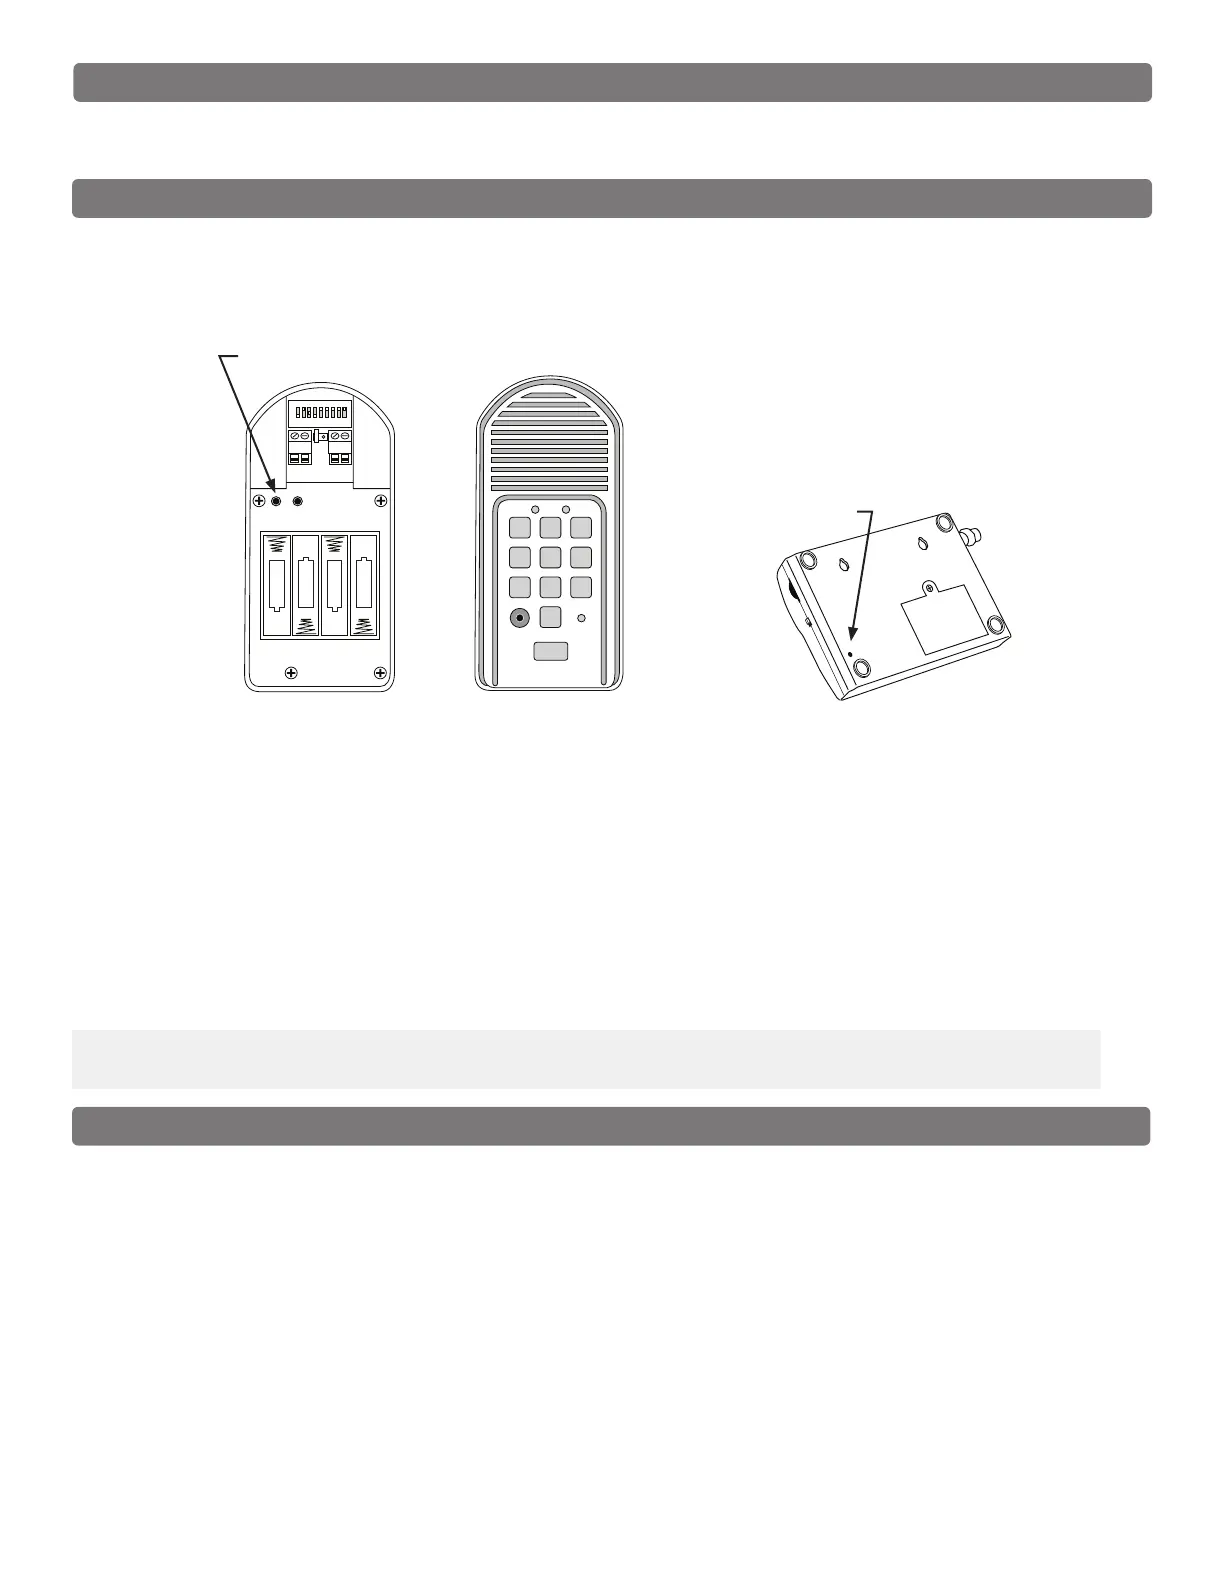
ID SET button
ID SET
VOLUME
POWER
OFF
ON
Keypad - Inside
Intercom - Bottom
1 2
ABC
3
DEF
4
GHI
5
JKL
6
MNO
7
PRS
8
TUV
9
WXY
0
CALL
STATUS
PROGRAM
CALLING
GRANTED
Keypad - Front
ID SET button
Intercom ID Codes
The Base and Keypad that came in this kit are programmed at the factory to communicate with each other,
but do not need the ID Codes programmed. This Base is the MASTER or #1 unit.
If you have purchased additional Base units to enhance your system, each additional unit’s ID Code must be
programmed into the Keypad so they can communicate. Follow the steps below to set the ID codes.
Test the System
IMPORTANT: The Base unit and the Keypad can not be within 30 feet of each other when operating. If units
are closer than 30 feet the signal will be inconsistent as well as emit speaker feed back. Also, multiple Base
units must be no closer than 10 feet from each other to prevent interference.
1. Have someone press the CALL button on the keypad at the gate.
2. When the base unit inside the house rings, press the ANSWER button and talk to the person at the gate
to check the connection and range.
3. Press the GRANT PERMISSION button, and have the person at the gate press any key on the keypad
to activate the gate.