9
Wired Installation of the Keypad
NOTE: If you also plan to power the keypad with the gate opener’s power source, run two pairs of wires as
described below. Run onne pair to hard-wire the keypad and the other pair to connect the keypad to the gate
opener’s battery.
Step 1: Turn the gate opener’s power switch OFF. Use 16 gauge, stranded, direct burial low voltage wire (part
no. RB509) to connect the keypad to the opener control board. Run wire through PVC from the ground to
keypad and then from the ground to the opener control board. This will protect the wire from lawn mowers or
grazing animals.
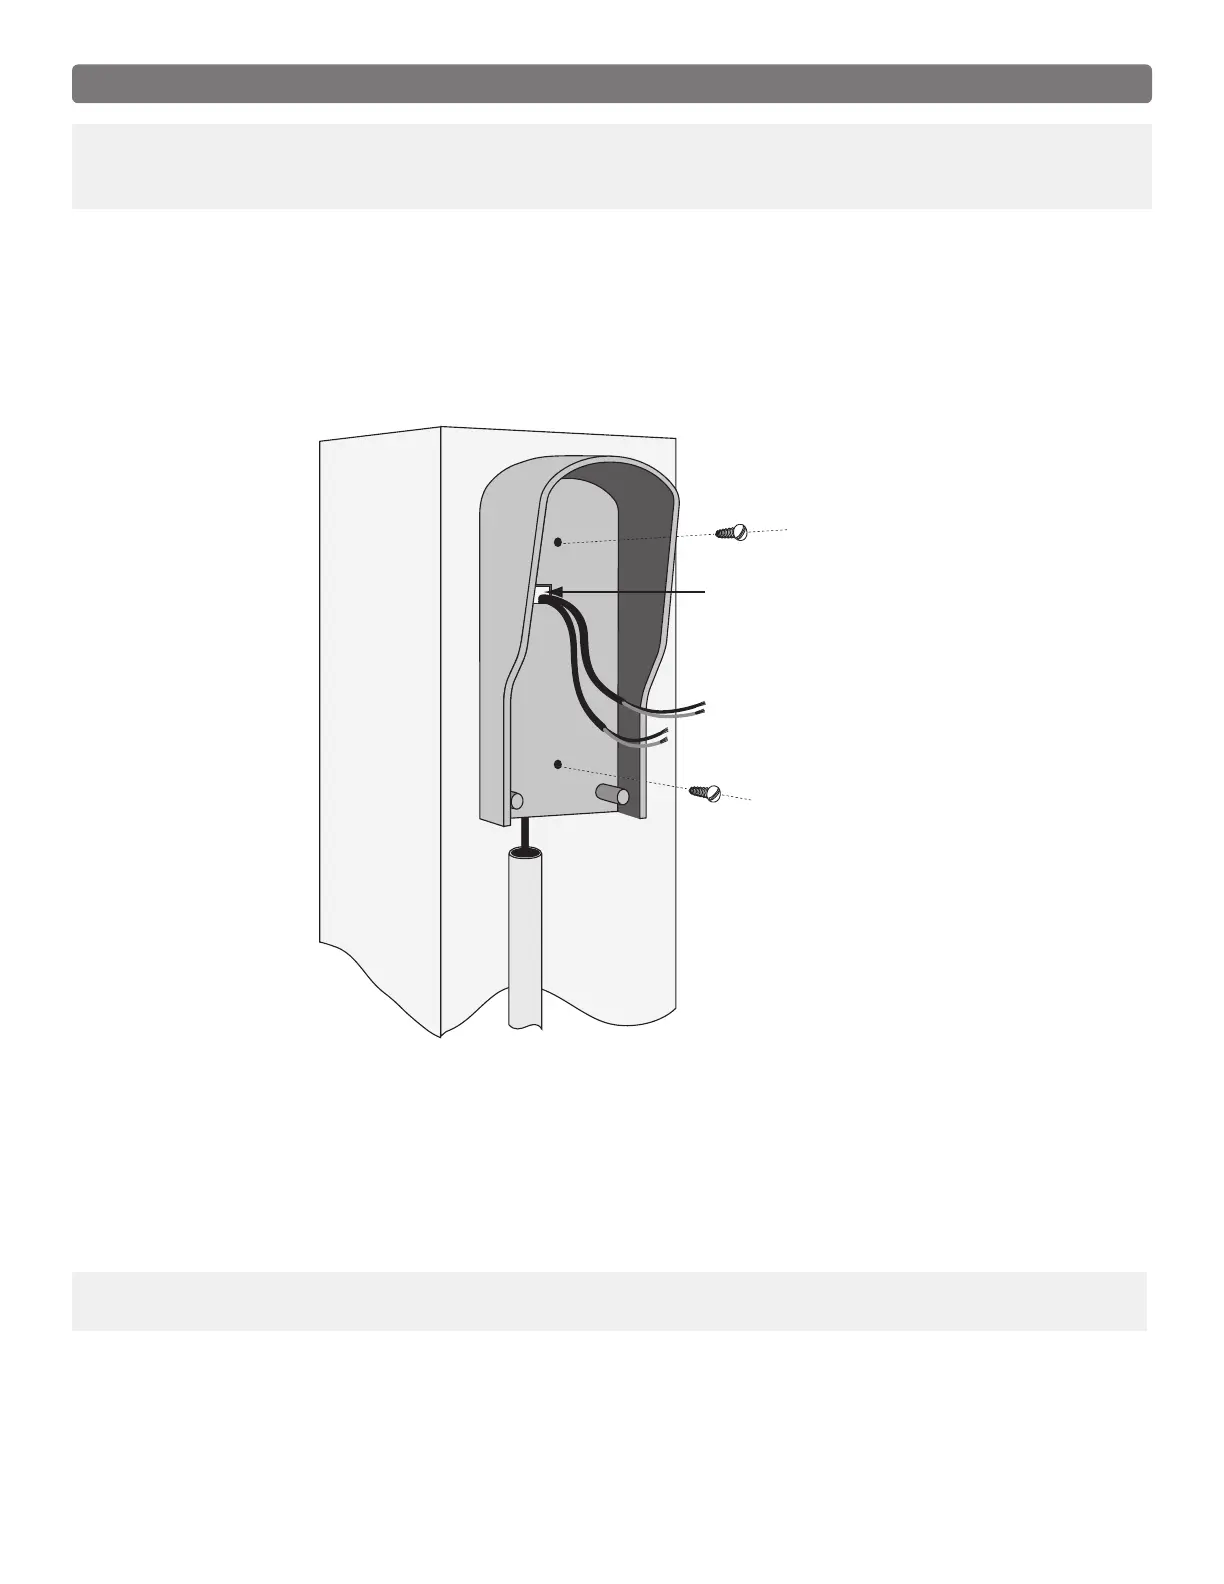
Determine how the wire will enter the keypad (i.e. from the back through a hole drilled in the mounting post
or running the wire on the surface of the post). Remove the small rectangular knock-out on the back of the
keypad cover, and pull the wire into the cover. Then mount the cover to the post using the screws provided.
Step 2: For hard-wired communication between the keypad and gate opener [using 16 gauge (AWG)
stranded, direct burial, low voltage wire (part no. RB509)], strip the wires back 3/16” and attach the wires to
the terminal block marked RELAY OUTPUT on the keypad control board as shown to the above. Connect the
other end to the opener’s control board (as shown in Control Board Connections, page 11).
To wire the power supply to the keypad, attach the wires to the AC/DC POWER IN terminal on the keypad control
board, next page. Connect the other end to the opener’s battery. Connect one end to the POSITIVE (RED) pole and
the other to the NEGATIVE (BLACK) pole.
NOTE: For a hard-wired application the jumper between the two terminals on the keypad control board must
be connected (ON) as shown. This will disable the 318 MHz RF transmitter.
Step 3: Slide the keypad into the cover and secure with the small screws provided.
Step 4: Turn the power to the opener OFF. Remove the opener control board cover, and feed enough of the
low voltage wire from the keypad through a strain relief to reach the gate opener control board terminals.