16
2
Turn the camera on
The power-on lamp will light and the monitor
will display a welcome screen ( 78). The
camera is ready to shoot when the monitor
shows the view through the camera lens.
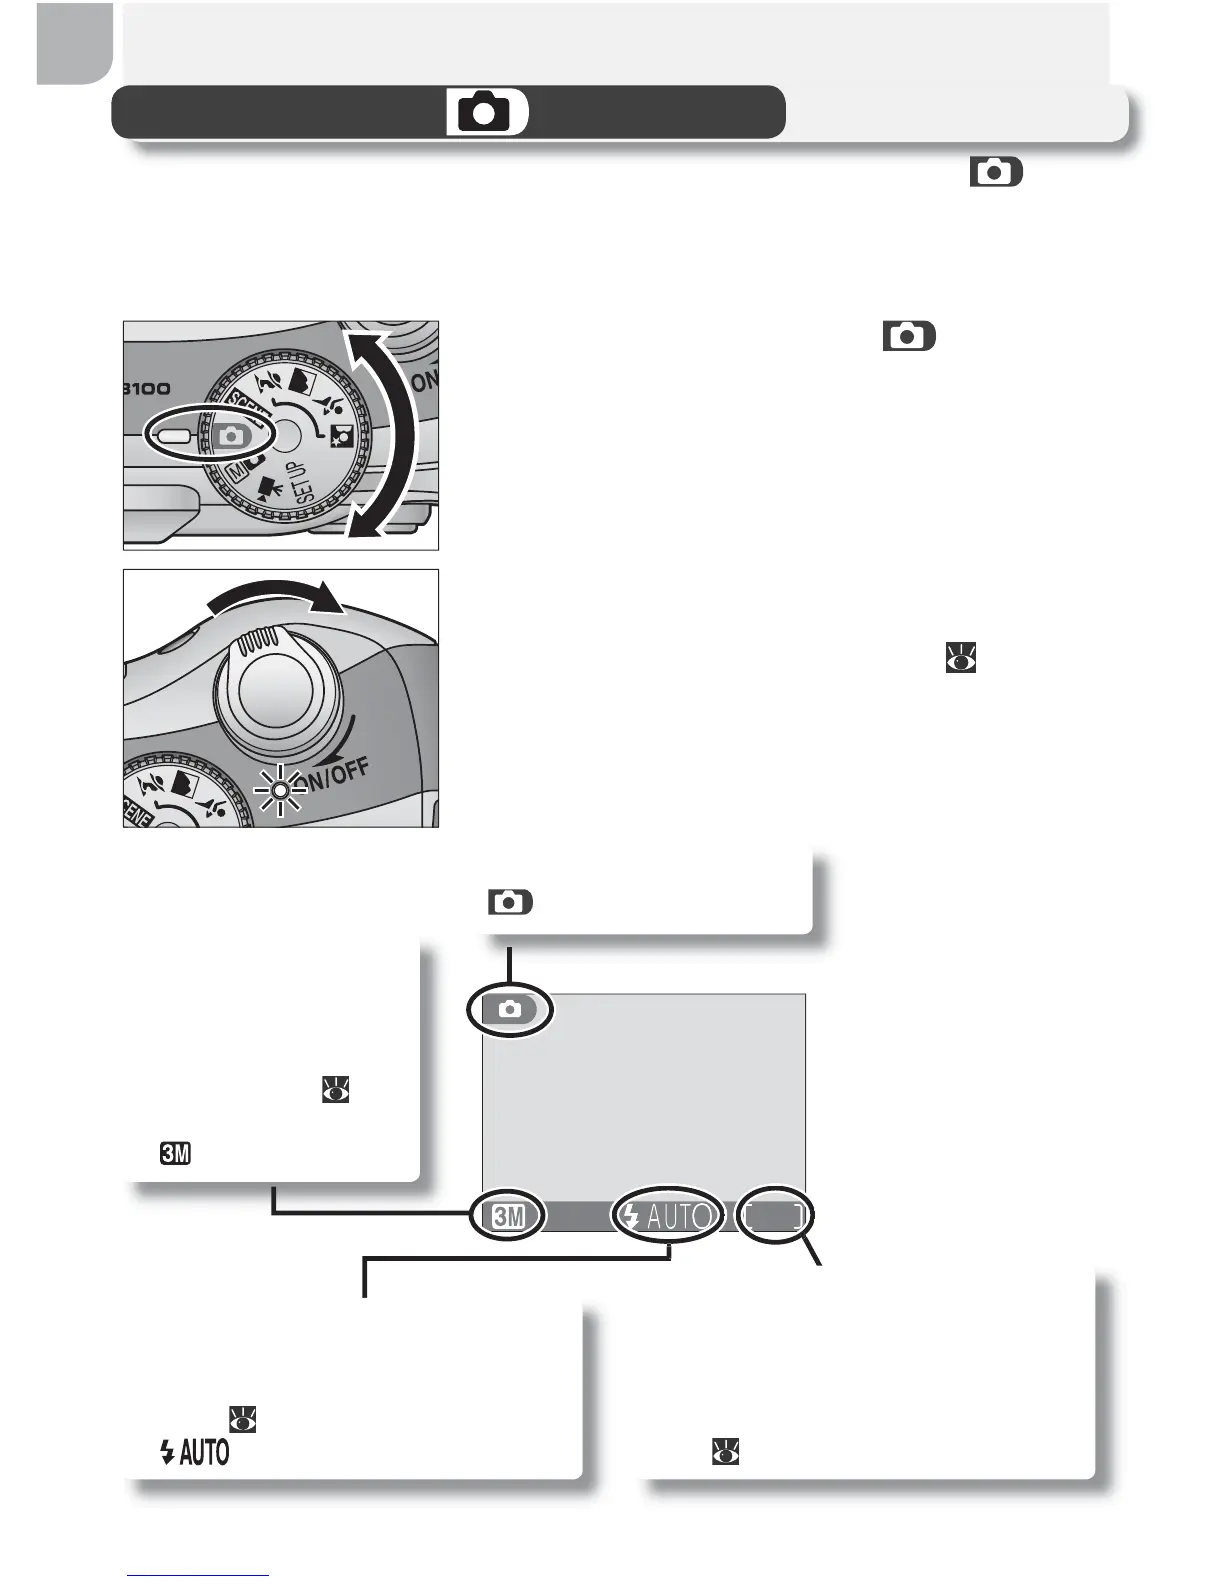
Step 1 —Select Mode
This section details the basic steps involved in taking pictures in (auto)
mode. In this automatic, “point-and-shoot” mode, the majority of camera
settings are controlled by the camera in response to shooting conditions,
producing optimal results in most situations.
1
Rotate the mode dial to
Shooting mode
indicates auto mode.
Image quality/size
Choose from fi ve op-
tions depending on
how you plan to use
the picture (
58).
The default setting
is .
19
Flash mode
Choose from four modes depend-
ing on lighting and your creative
intent ( 24). The default setting
is (auto).
Number of exposures remaining
The number of pictures that can be
stored on a memory card depends
on the capacity of the card and the
option chosen for Image quality/
size ( 59).

 Loading...