Nikon D5100 Experience
55
work). This information will now be stored as your Preset (PRE) White Balance, and be used
whenever WB is set to PRE. The camera can only store one preset WB setting, and it will be
replaced the next time a WB value is measured using this method or the Use Photo method.
Remember to change the WB back to Auto or another desired setting when done photographing
the current scene.
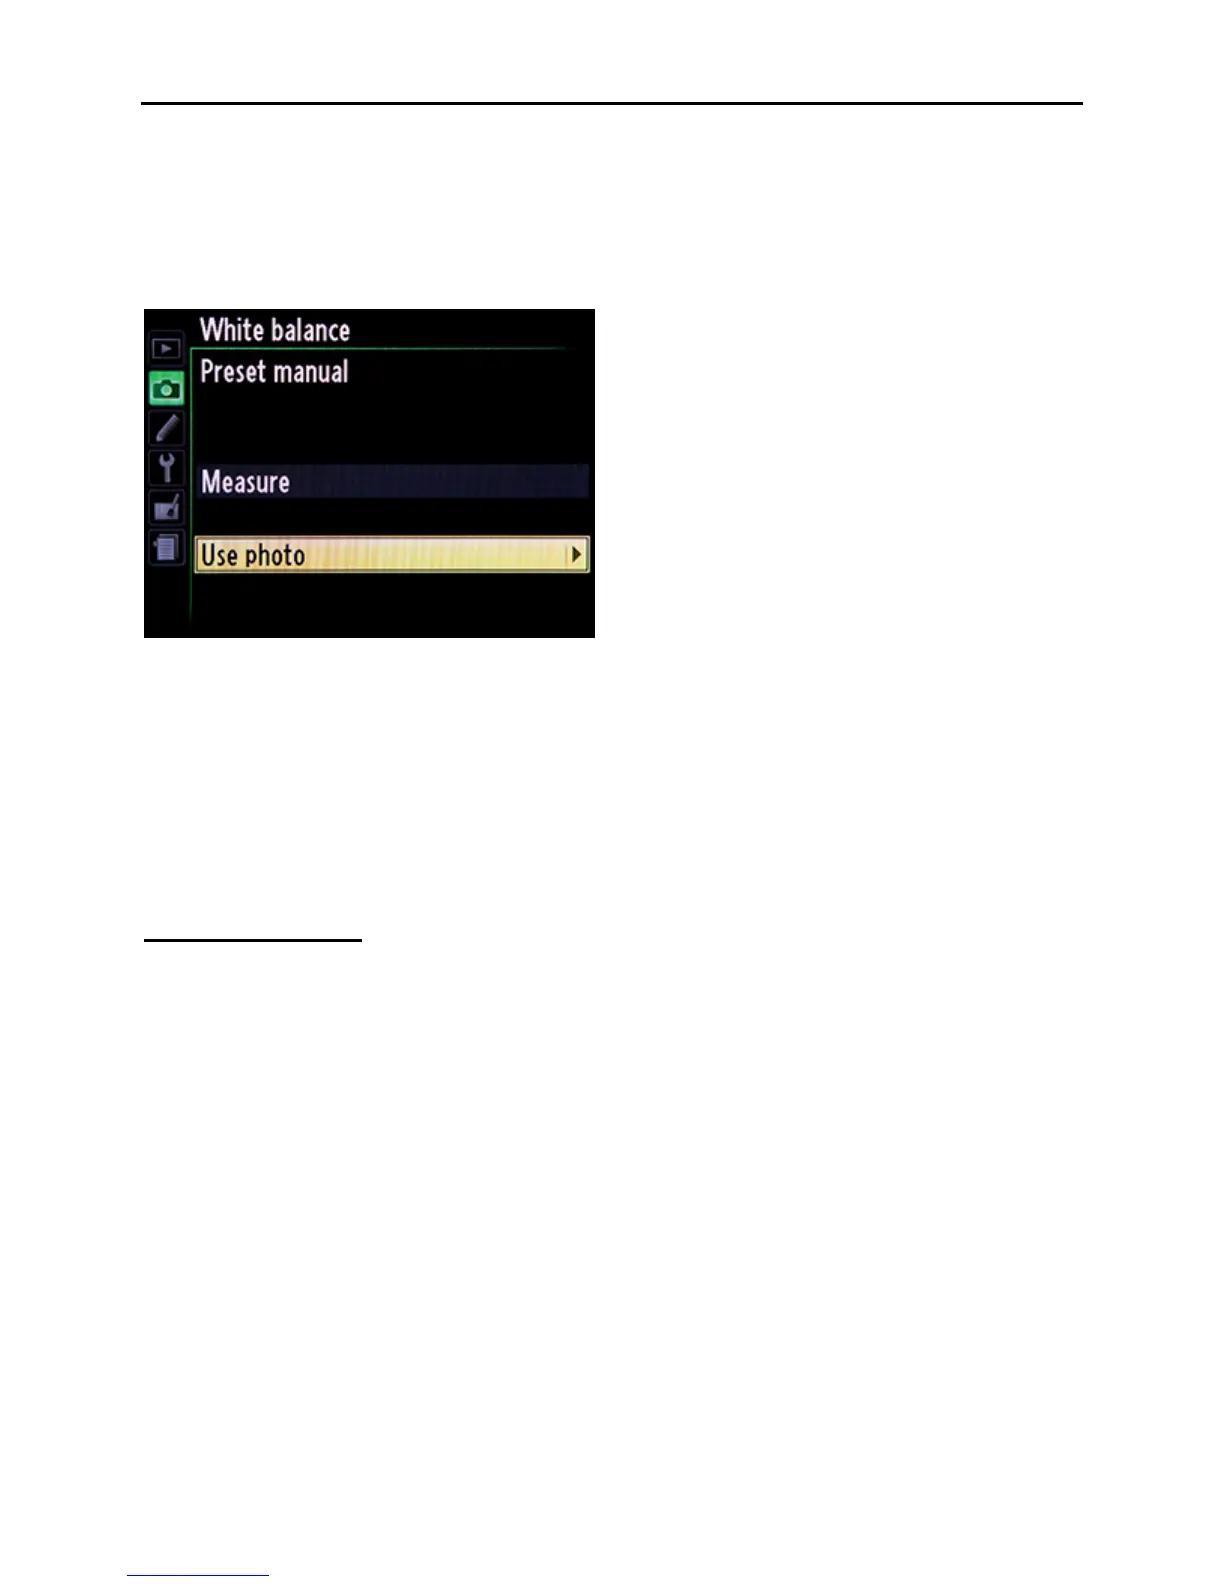
Figure 35 – White Balance Preset Manual Menu
Use Photo – To set a custom preset WB using a photo, take a photo of the digital grey card in
your desired lighting, framed so that the card fills the viewfinder. Return to the WB menu, select
the PRE Preset manual option, and then Use photo (see Figure 35). Choose Select image and
navigate to the image of the grey card you wish to use, and press the OK Button. The custom
WB will be determined from this image and will now be stored as your Preset (PRE) White
Balance, and be used whenever WB is set to PRE.
Picture Controls
Picture Controls were discussed briefly in the Shooting Menu section above, but I will repeat and
add a little to that. Picture Controls are used to apply your desired settings of Sharpening,
Contrast, Brightness, Saturation, and Hue to JPEG image files as they are processed and saved
in the camera. Remember, these changes are final, and are permanently part of the JPEG file.
You can still adjust the images in Photoshop, but certain information will have been lost during
this in-camera processing. That being said, if you have decided to shoot in JPEG and will not be
post-processing, carefully select and modify a Picture Control to create the type of images you
want.
To create a Custom Picture Control, start with the Standard one and adjust it to suit your tastes in
the Picture Controls section of the Shooting Menu. Highlight the Picture Control you wish to
modify, press the OK Button, and then adjust each of the settings as desired (see Figure 36).
Press OK to save and exit. That Picture Control will now display an (*) next to its name to
remind you it has been modified from its default settings.