Nikon D5100 Experience
57
Control, edit its settings if you have not yet done that, then hit OK and select which custom
Picture Control you wish to save it as: C-1 through C-9. You can then name that custom Picture
Control and use the Load/save item of the Manage Picture Control menu to save it to a memory
card. This menu item can also be used to load a custom Picture Control from a memory card into
the camera. Custom Picture Controls can be created in ViewNX 2 or Capture NX 2, or can be
found from developers on the Internet. For example, photographers create custom Picture
Controls to mimic certain roll film looks such as Kodachrome or Velvia, and videographers
create custom Picture Controls to create a look or to aid them in post-processing.
Flash
Most photographers and books about dSLRs will recommend that you avoid using the built-in
pop-up flash. This is because it creates pretty harsh, in-your-face lighting and is limited in its
ability to be modified, diffused, or bounced. If you do need to use it, dial it down a little bit
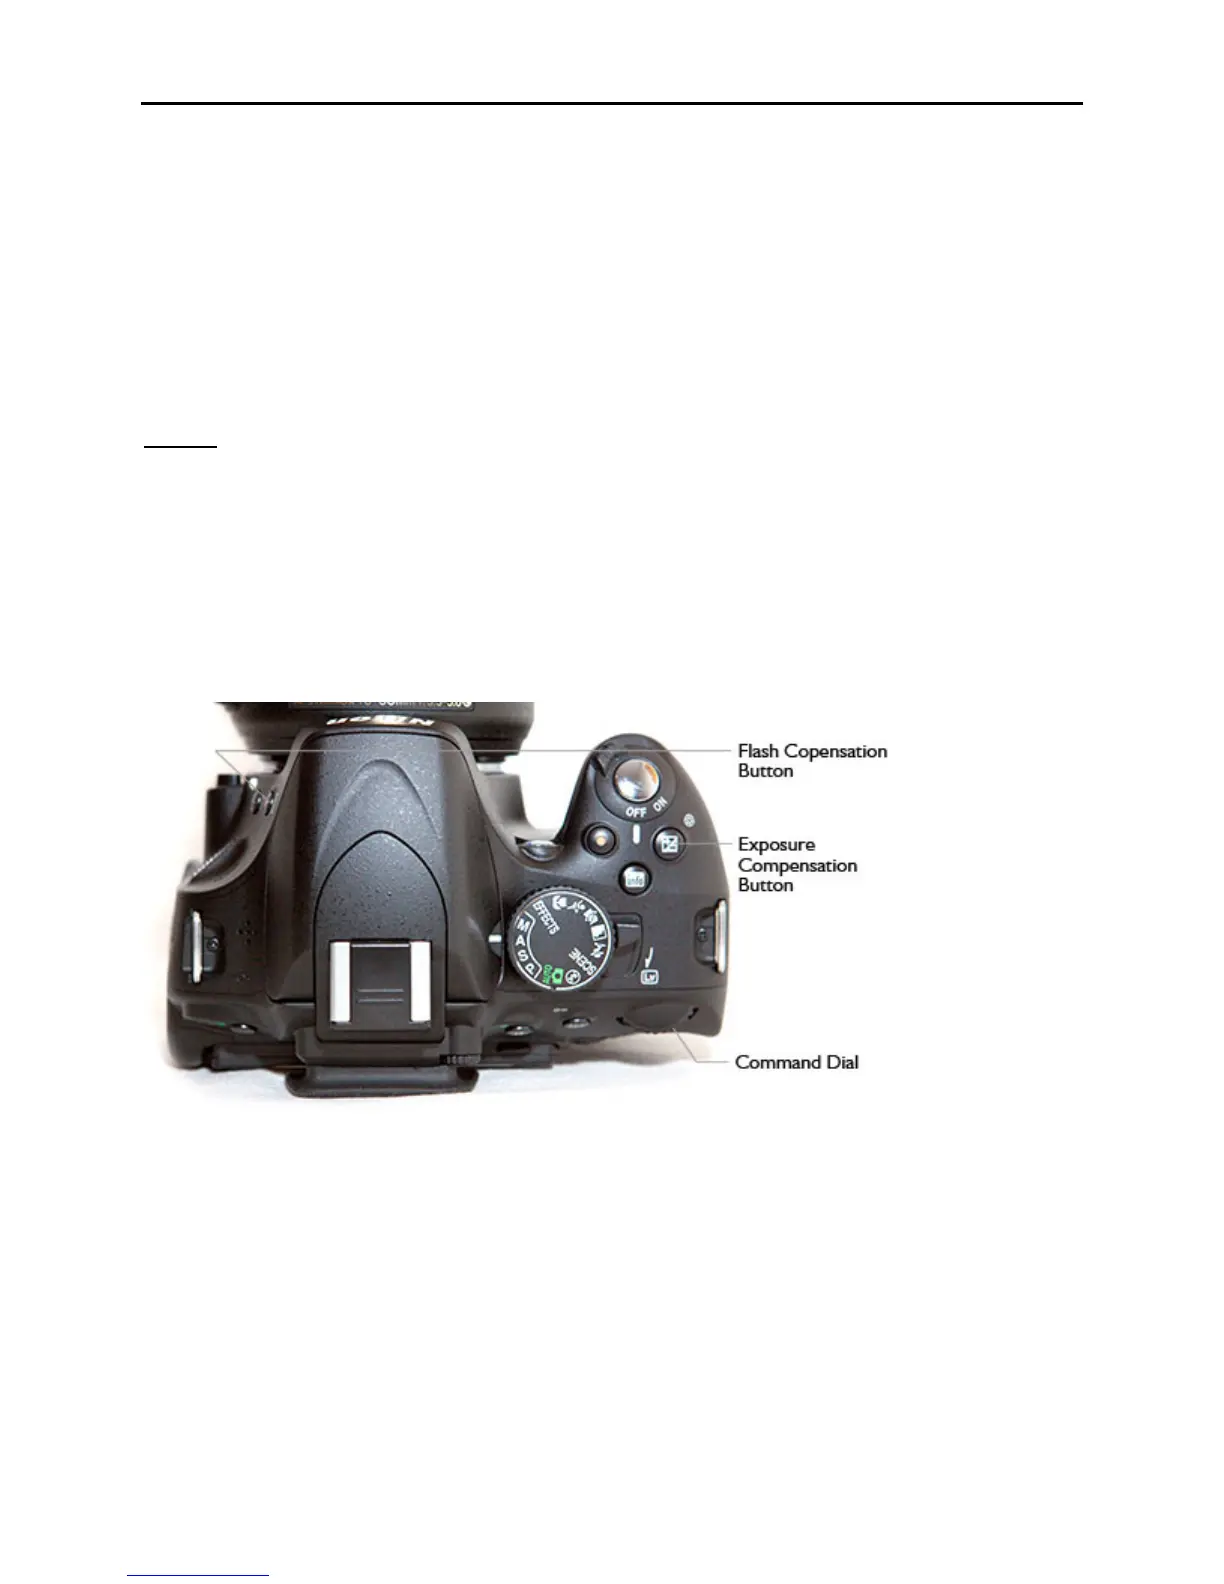
using Flash Compensation, which is adjusted using either the i Button and Information Display
or by pressing the Flash Compensation Button and the Exposure Compensation Button while
turning the Command Dial and viewing the setting on the Information Display (see Figure 37).
Set Flash Compensation to minus 1 and then adjust it according to your results.
Figure 37 – Press the Flash Compensation Button and the Exposure Compensation Button then
turn the Command Dial to adjust Flash Compensation
In P, A, S, and M modes you can turn the flash on by pressing the Flash Mode Button to raise the
flash. You adjust the Flash Mode by then pressing the same button and turning the Command
Dial. The Flash Mode can also be set using the i Button and Information Display.
Flash Modes
Fill Flash means the flash will fire and illuminate your subject.
Red-Eye Reduction will make use of the Red-Eye Reduction Lamp to reduce red-eye