19
II. Microscopy Method
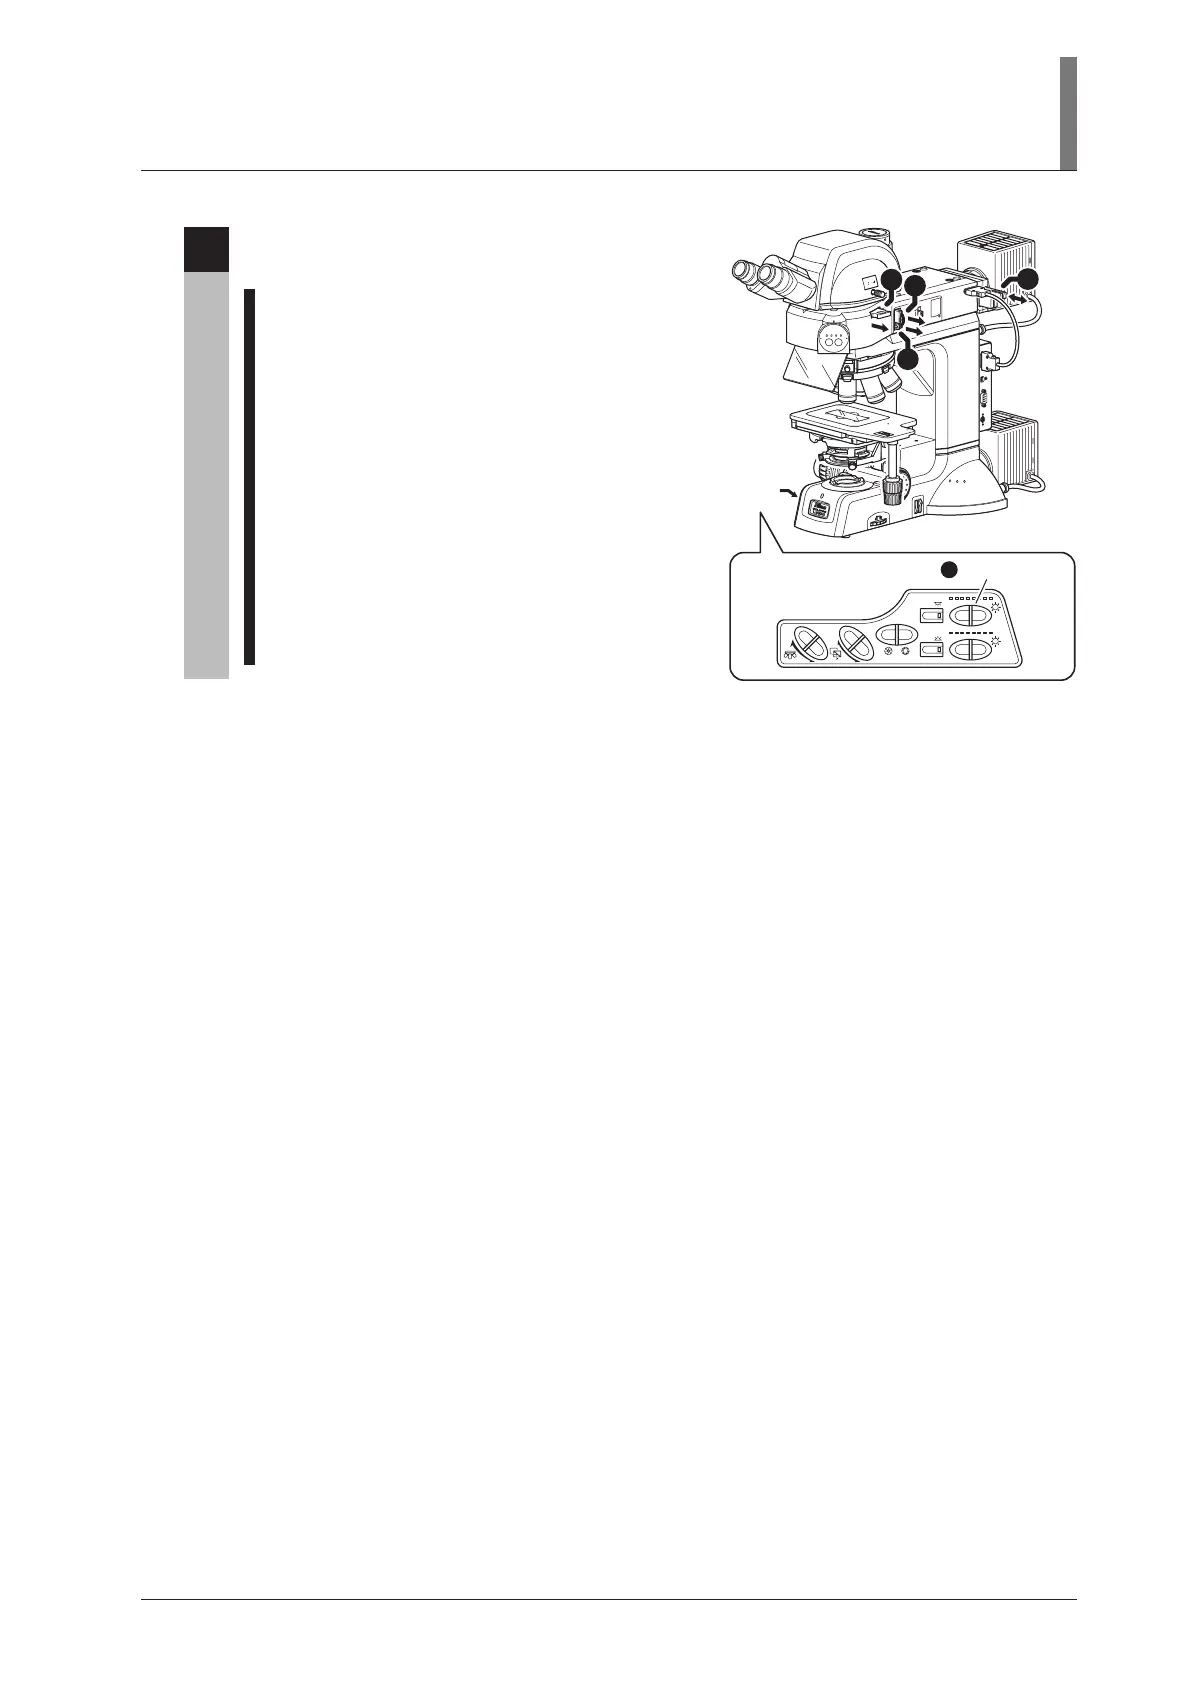
4
Return to the bright-field microscopy under the
epi illumination.
1 Pull out the analyzer slider and move the
analyzer away from the optical path.
(See Page 60.)
2 Pull out the polarizer slider and move the
polarizer away from the optical path.
(See Page 57.)
3 Pull out the lambda plate slider to remove the
lambda plate from the optical path.
(See Page 62.)
4 Operate the EPI brightness switch on the
operation panel to adjust the brightness of the
episcopic illumination. (See Page 42.)
5 Adjust the brightness with ND filters.
(See Page 44.)
UEPI2
A
USB
RS
2
3
2
C
L
C
N
T
N
D8
N
C
B
F
.
S
.
A
c
hr
N
.
A
=
0
.
9
JAPAN
0
.
8
0
.
7
0
.
6
0
.5
0
.
4
0
.
3
0.2
0.1
3
x
2
S
T
A
G
E
J
A
P
A
N
F
.
STOP
JA
P
A
N
BF DF FL1 FL2
FL1
FL2
1
0
02
0
0
1
0
0
IN
OUT
L
V
-
T
T2
OBJ.
CUBE
A.S.
EPI
DIA
EPI
DIA
5
4
1
2
3
Operation
panel
EPI brightness
switch