28
8
Polarization Microscopy under the Dia Illumination (Simplified/Sensitive Color)
1
Attach the accessories required for the polarization microscopy under the dia illumination.
The following accessories must be attached to perform the simplified/sensitive color polarization
microscopy under the dia illumination.
• Diascopic slider (See Page 94.)
• Analyzer slider (See Page 83.)
• Lambda plate holder (for the sensitive color microscopy) (See Page 80.)
2
Focus on the specimen with the bright-field microscopy under the diascopic
illumination.
(See Pages 26, to 27.)
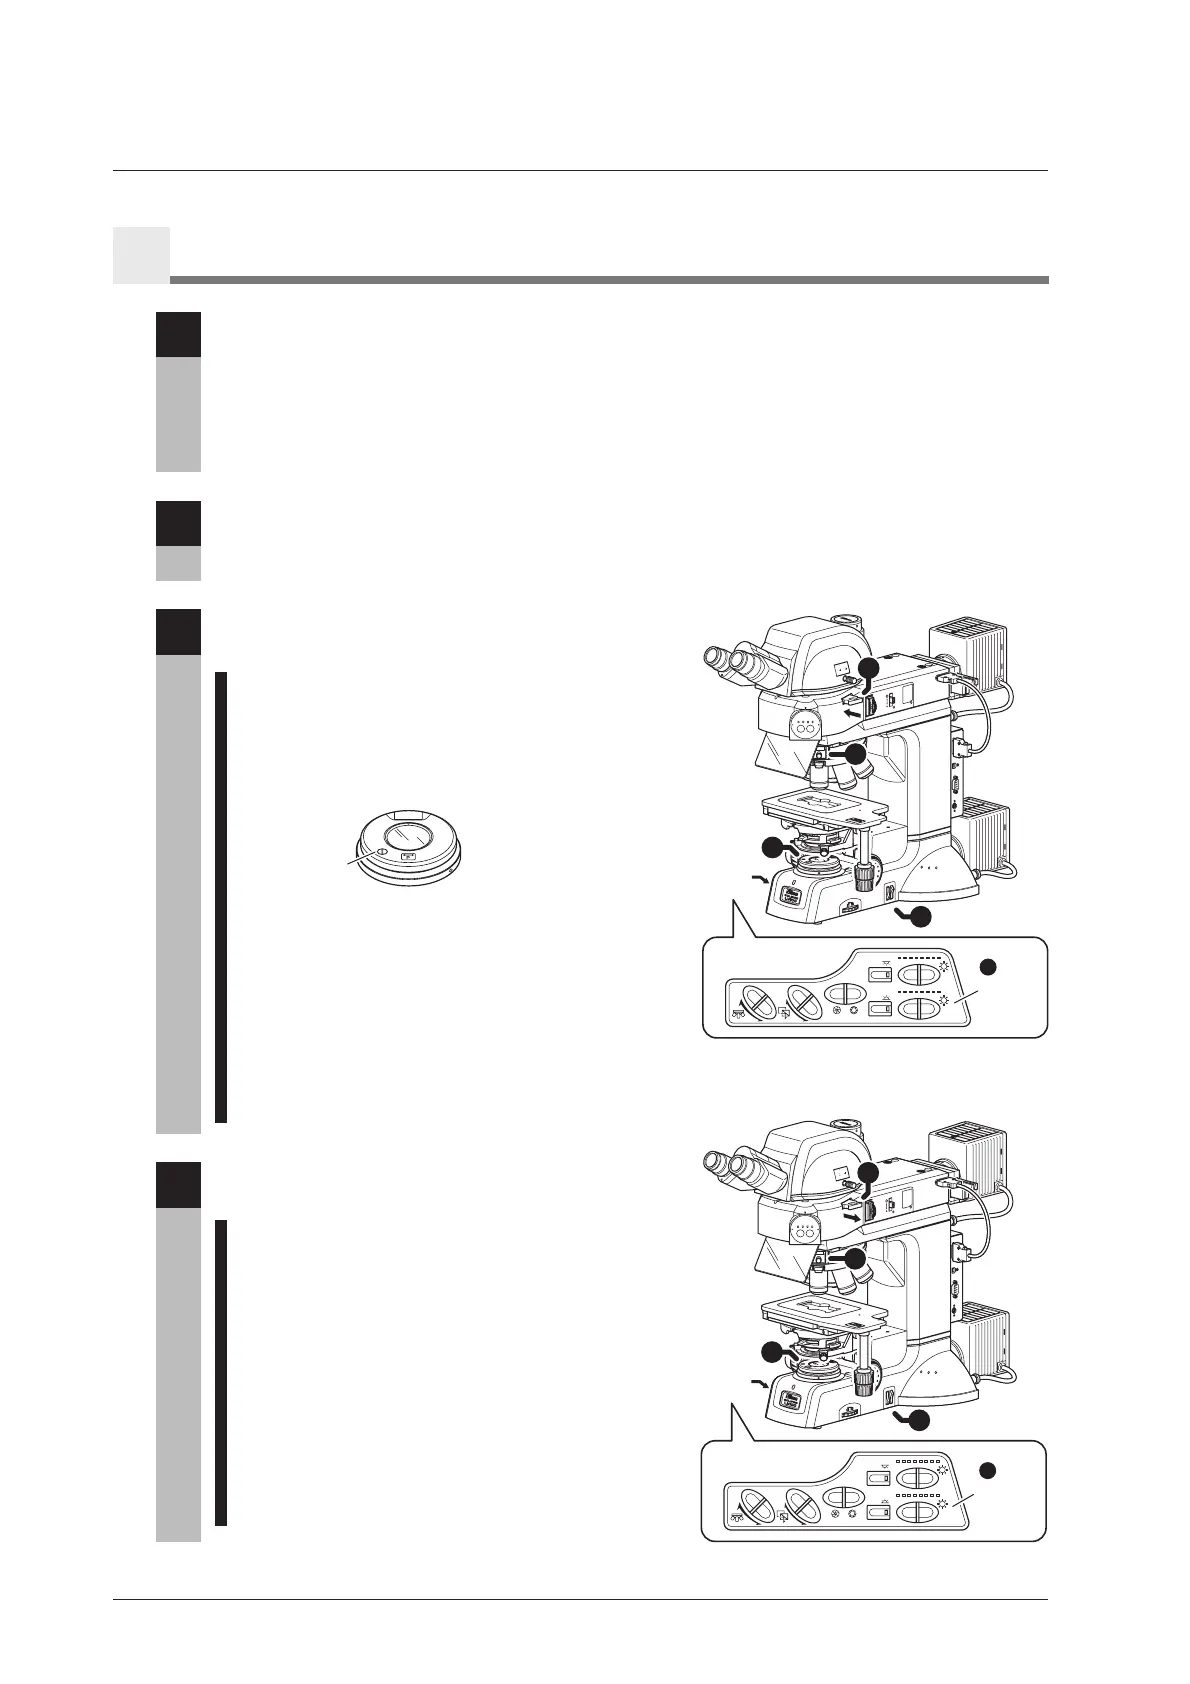
3
Set the microscope for the polarization
microscopy under the diascopic illumination.
1 Push in the analyzer slider to locate the analyzer
into the optical path. (See Page 60.)
2 Locate the polarizer for the diascopic
illumination and make a crossed Nicols position.
(See Pages 58 and 59.)
Set the polarizer to the
crossed Nicols position.
Swing-out
center
3 To perform the sensitive color polarization
microscopy, push in the lambda plate slider to
locate the lambda plate into the optical path.
(See Page 63.)
4 Operate the DIA brightness switch on the
operation panel to adjust the brightness of the
diascopic illumination. (See Page 42.)
5 Adjust the brightness with the ND filter.
(See Page 44.)
4
Return to the bright-field microscopy under the
diascopic illumination.
1 Pull out the analyzer slider and move the analyzer
away from the optical path. (See Page 60.)
2 Move the diascopic polarizer away from the
optical path. (See Pages 58 and 59.)
3 Pull out the lambda plate slider and move the
lambda plate away from the optical path.
(See Page 63.)
4 Operate the DIA brightness switch on the
operation panel to adjust the brightness of the
diascopic illumination. (See Page 42.)
5
Adjust the brightness with ND filters. (See Page 44.)
UE
PI2A
USB
RS
2
3
2
C
LCN
T
N
D8
N
C
B
F
.
S
.
7
5
3
7
0
1
J
AP
A
N
A
chr
N
.
A
=
0
.
9
JAPAN
0
.8
0
.
7
0
.6
0
.
5
0
.
4
0
.
3
0.2
0.1
3
x
2
S
T
A
G
E
J
A
P
A
N
F
.
STOP
J
A
P
A
N
BF DF FL1 FL2
FL1
FL2
1
0
02
0
0
1
00
IN
OUT
L
V
-
T
T2
OBJ.
CUBE
A.S.
EPI
DIA
EPI
DIA
1
2
3
Operation
panel
5
DIA
brightness
switch
4
U
EPI2
A
USB
RS
2
3
2C
L
CNT
N
D8
N
C
B
F
.
S
.
7
5
3
7
0
1
J
A
P
A
N
A
chr
N
.
A
=
0
.
9
JAPAN
0
.
8
0
.
7
0
.6
0
.
5
0
.
4
0
.
3
0.2
0.1
3
x
2
S
T
A
G
E
J
A
P
A
N
F
.
STOP
JA
P
A
N
BF DF FL1 FL2
FL1
FL2
1
0
0
20
0
1
0
0
IN
OUT
LV-
T
T2
OBJ.
CUBE
A.S.
EPI
DIA
EPI
DIA
1
2
5
3
DIA
brightness
switch
4
Operation
panel