27
II. Microscopy Method
4
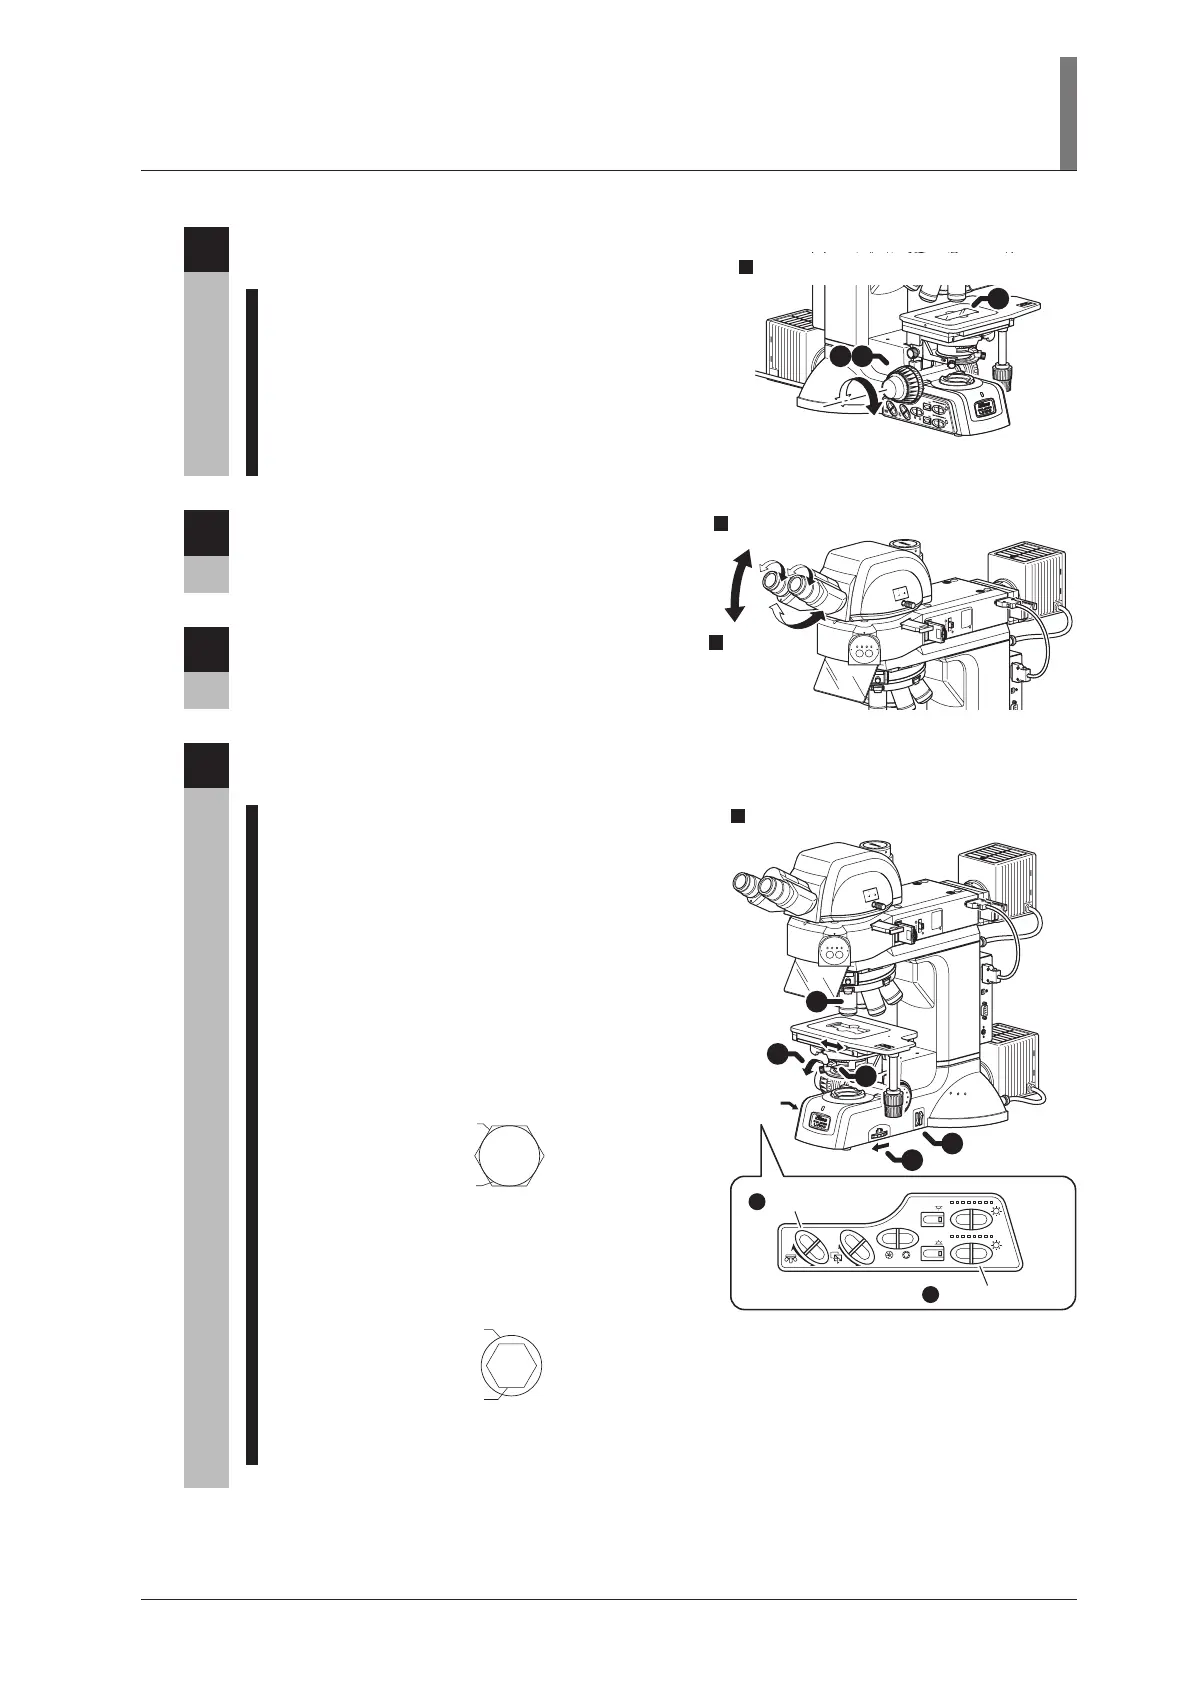
Adjust the angle of the binocular eyepiece.
(for the LV-TT2)
(See Page 48.)
5
Adjust the diopter and the interpupillary
distance.
(See Page 49.)
6
Set the desired magnification and observe the
specimen.
1 Press the OBJ. switch on the operation panel and
locate the objective of desired magnification into
the optical path. (See Page 43.)
2 Turn the coarse/fine focus knobs to bring the
specimen into focus. (See Page 46.)
3 Operate the DIA brightness switch on the
operation panel to adjust the brightness of the
diascopic illumination. (See Page 42.)
4 Use the field diaphragm ring so that the field
diaphragm image circumscribes the field of
view. (See Page 54.)
O
B
J
.
CU
B
E
A
.
S
.
E
P
I
D
I
A
E
P
I
D
I
A
A
ch
r
N
.
A
0
.
9
0
.
2
0
.
3
0.
4
0.5
0
.
6
0.
7
0.8
=
3
x
2
S
T
A
G
E
JA
P
A
N
2
1 3
3
Set the specimen onto the stage and adjust the focus.
UEPI2A
U
SB
RS
2
3
2
C
F
.
S
T
OP
J
A
P
A
N
BF DF FL1 FL2
FL1
FL2
10
02
0
0
10
0
I
N
OUT
L
V
-
T
T
2
4
5
Adjust the angle of the
binocular eyepiece.
Adjust the
diopter and the
interpupillary
distance.
U
E
PI2
A
USB
RS
2
3
2
C
L
C
N
T
N
D
8
N
C
B
F
.
S
.
A
chr
N
.
A
=
0
.
9
JAPAN
0
.8
0
.
7
0
.6
0
.
5
0
.
4
0
.
3
0.2
0.1
3
x
2
S
T
A
G
E
J
A
P
A
N
F
.
STOP
J
A
P
A
N
BF DF FL1 FL2
FL1
FL2
10
020
0
100
IN
OUT
LV
-
T
T
2
OBJ.
CUBE
A.S.
EPI
DIA
EPI
DIA
6
5
3
6
2
4
1
OBJ. switch
1
DIA brightness switch
Operation
panel
Change the magnification to observe the specimen.
3
Place the specimen onto the stage and focus
on it.
1 Lower the stage by turning the coarse/fine focus
knobs. (See Page 46.)
2 Set the specimen onto the stage.
To use the glass slide, be sure to set the
specimen in place with the cover glass facing up.
3 Turn the coarse/fine focus knobs and focus on
the specimen. (See Page 46.)
Image of the
field diaphragm
Field of view
Pupil of the objective
Image of the
aperture diaphragm
5 Stop down the condenser aperture diaphragm
with the condenser aperture diaphragm ring to
about 70% to 80% of the numerical aperture of
the objective. (See Page 54.)
6 Adjust the brightness with ND filters.
(See Page 44.)