15
II. Microscopy Method
1
Bright-field Microscopy under the Epi Illumination
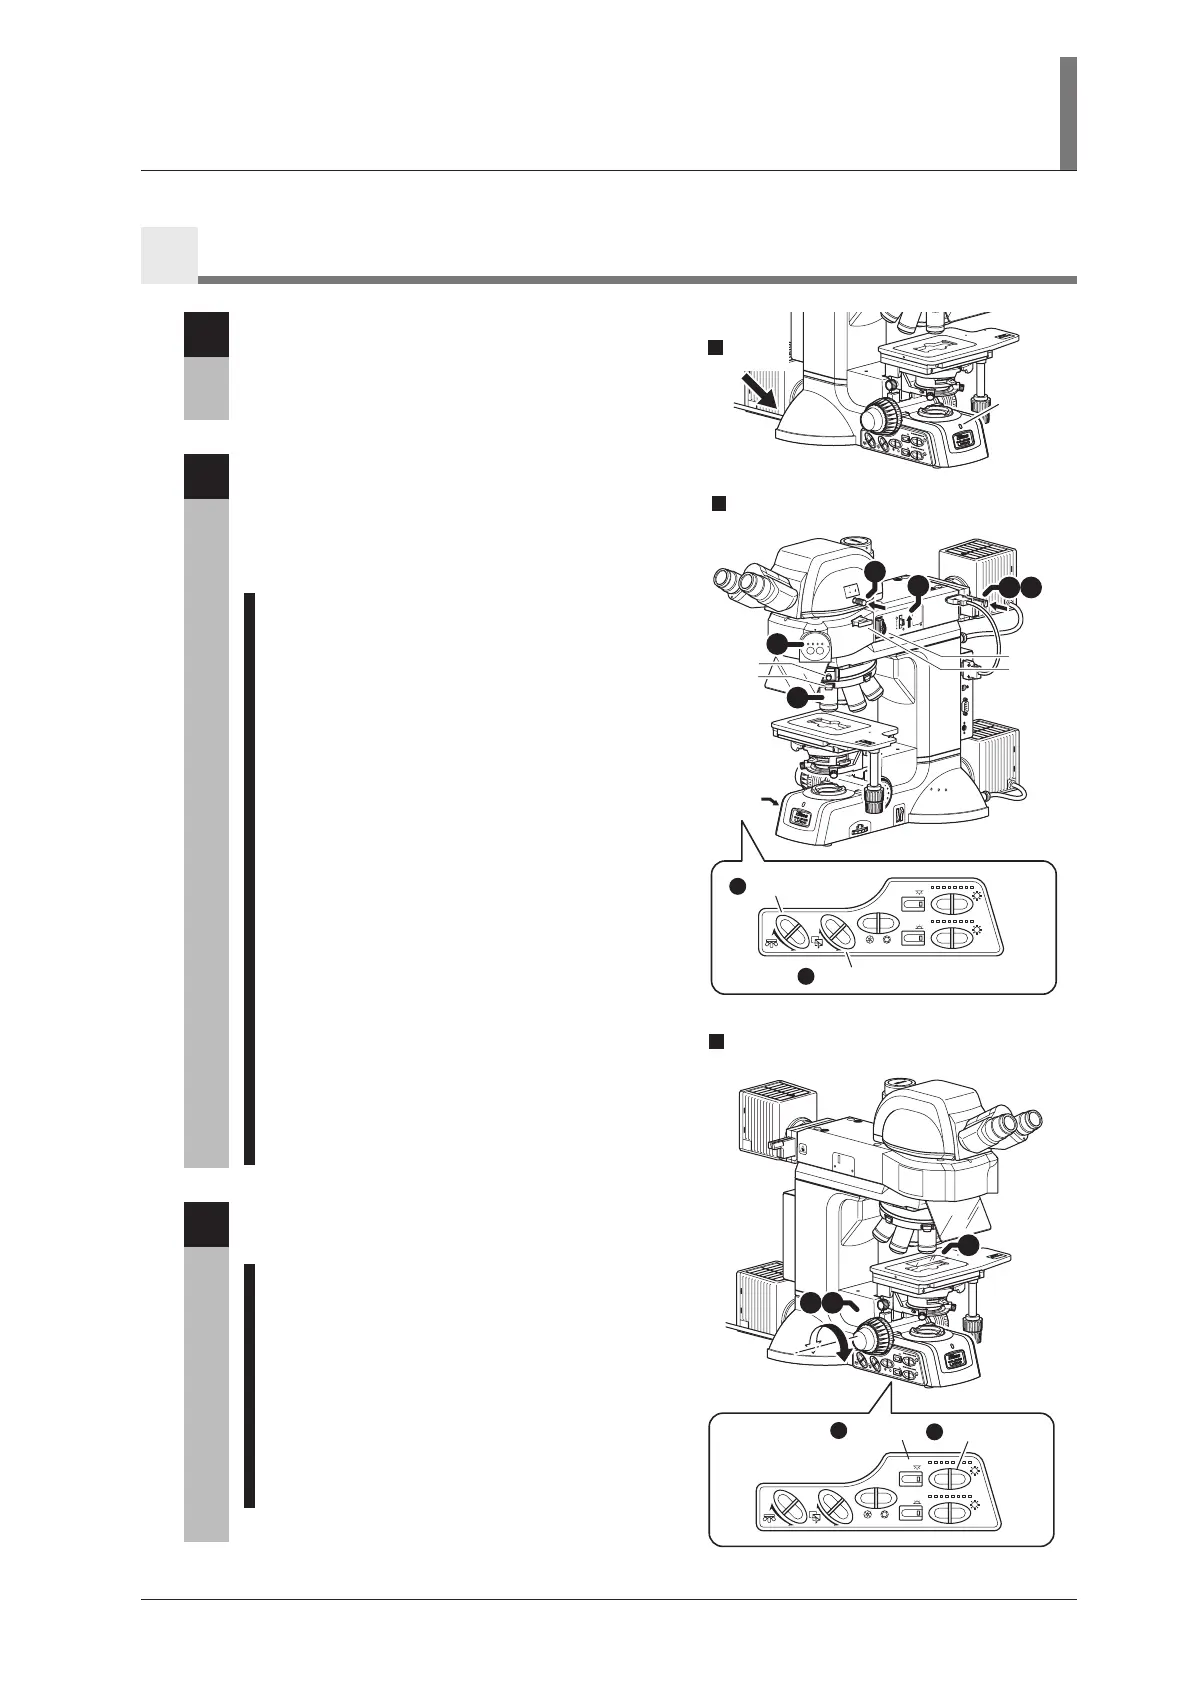
1
Turn on the power switch.
When the power to the microscope is turned on, the
microscope starts initialization. And then, the power
indicator on the microscope base is lit. (See Page 34.)
2
Set the microscope for the bright-field
microscopy under the epi illumination.
If accessories for the DIC microscopy under the
episcopic/diascopic illumination (*1 to *4) are in place,
pull them out of the optical path.
1 Push in the optical path selector lever and select
100% for the binocular eyepiece. (See Page 48.)
2 Press the CUBE switch on the operation panel
and light up the “BF (bright-field)” position of
the microscopy method indicator. (See Page 37.)
The episcopic illumination lamp is turned on with
the predetermined light quantity, and the aperture
diaphragm for the episcopic illumination is
adjusted to the predetermined size automatically
by the interlock control function.
3 Press the OBJ. switch on the operation panel and
locate the 10x objective into the optical path.
(See Page 43.)
4 Locate the NCB11 filter into the optical path and
compensate the color temperature.
(See Page 44.)
5 Adjust the brightness with ND filters.
(See Page 44.)
6 Move the open/close lever to the upper position
to fully open the field diaphragm for the
episcopic illumination. (See Page 50.)
3
Set the specimen onto the stage and adjust the
focus and the brightness.
1 Lower the stage by turning the coarse/fine focus
knobs. (See Page 46.)
2 Set the specimen onto the stage.
3 Turn the coarse/fine focus knobs and focus on
the specimen. (See Page 46.)
4 Turn on the episcopic illumination lamp with the
EPI switch on the operation panel and adjust the
brightness of the lamp with the EPI brightness
switch. (See Pages 41 and 42.)
UEPI2A
U
SB
R
S2
3
2
C
L
C
NT
N
D
8
N
C
B
F
.
S
.
A
chr
N
.
A
=
0
.
9
JAPAN
0
.
8
0
.
7
0.6
0
.
5
0
.
4
0
.
3
0.2
0.1
3
x
2
S
T
A
G
E
J
A
P
A
N
F
.
STOP
J
A
P
A
N
BF DF FL1 FL2
FL1
FL2
1
0
0
20
0
10
0
IN
OUT
L
V-
T
T
2
OBJ.
CUBE
A.S.
EPI
DIA
EPI
DIA
2
3
6
1
2
3
54
Set the microscope for the bright-field microscopy
under the epi illumination.
2
*3
*4
*1
*2
Operation
panel
CUBE switch
OBJ. switch
O
B
J
.
C
U
B
E
A
.
S
.
EP
I
D
I
A
EP
I
D
I
A
A
c
h
r
N
.
A
0
.
9
0
.
2
0
.
3
0
.
4
0.
5
0
.
6
0.
7
0.8
=
3
x
2
S
T
AG
E
JA
PA
N
Power
indicator
Turn on
the power.
1
O
BJ
.
CU
B
E
A.
S
.
EPI
D
I
A
E
PI
D
I
A
A
chr
N
.
A
0
.
9
0
.
2
0
.
3
0
.
4
0.5
0
.
6
0.
7
0.8
=
3
x
2
S
TA
G
E
J
A
PAN
J
APA
N
OBJ.
CUBE
A.S.
EPI
DIA
EPI
DIA
2
Set the specimen onto the stage and adjust the focus
and the brightness.
3
EPI switch
EPI brightness
switch
4
4
1 3