37Service Manual – SC900 24 - Electrical System
2. Place the main handle face-down, and inspect to make sure:
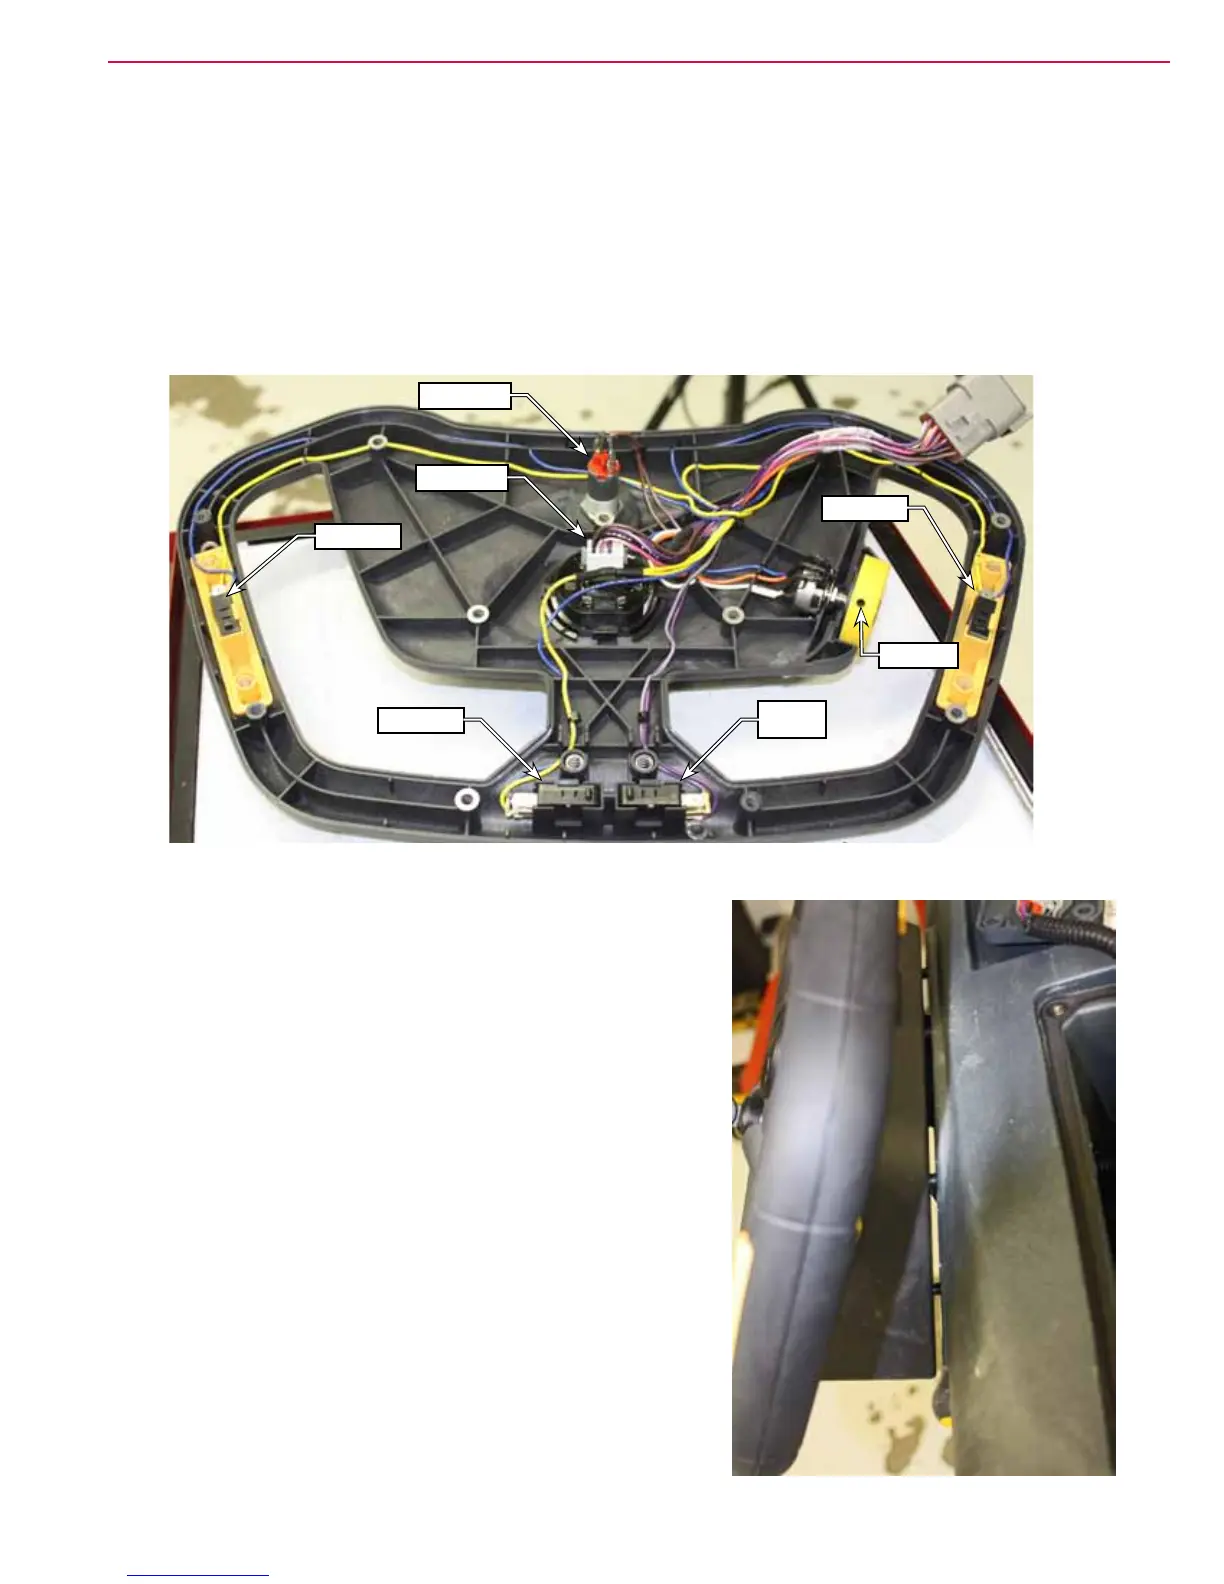
• All 6 springs are in place
• All wires are in their grooves/clips
• All switches are in place
3. Feed the harness connector through the back handle, and carefully align the two handle halves.
4. Install all 11 screws.
5. Inspect the movement of the drive switches and speed pot to make sure they move freely.
6. Reconnect the wiring harness.
7. Reposition the handle and get the rst screw started.
• Get the threads started by just one turn.
• Tug on the handle to make sure the threads are engaged,
before moving on to the next screw.
• Start with the lower screws and work upward. This
way, there will be enough gap between the handle and
solution tank to detect when a screw has engaged or not,
by wiggling the handle. Note the gap in the picture to the
right.
8. When you are sure all 5 screws are started, tighten all 5
screws.
Go Switch
Reverse
Switch
Go Switch
Go Switch
Key Switch
Hour Meter
Setscrew
 Loading...