4
Installation and set-up
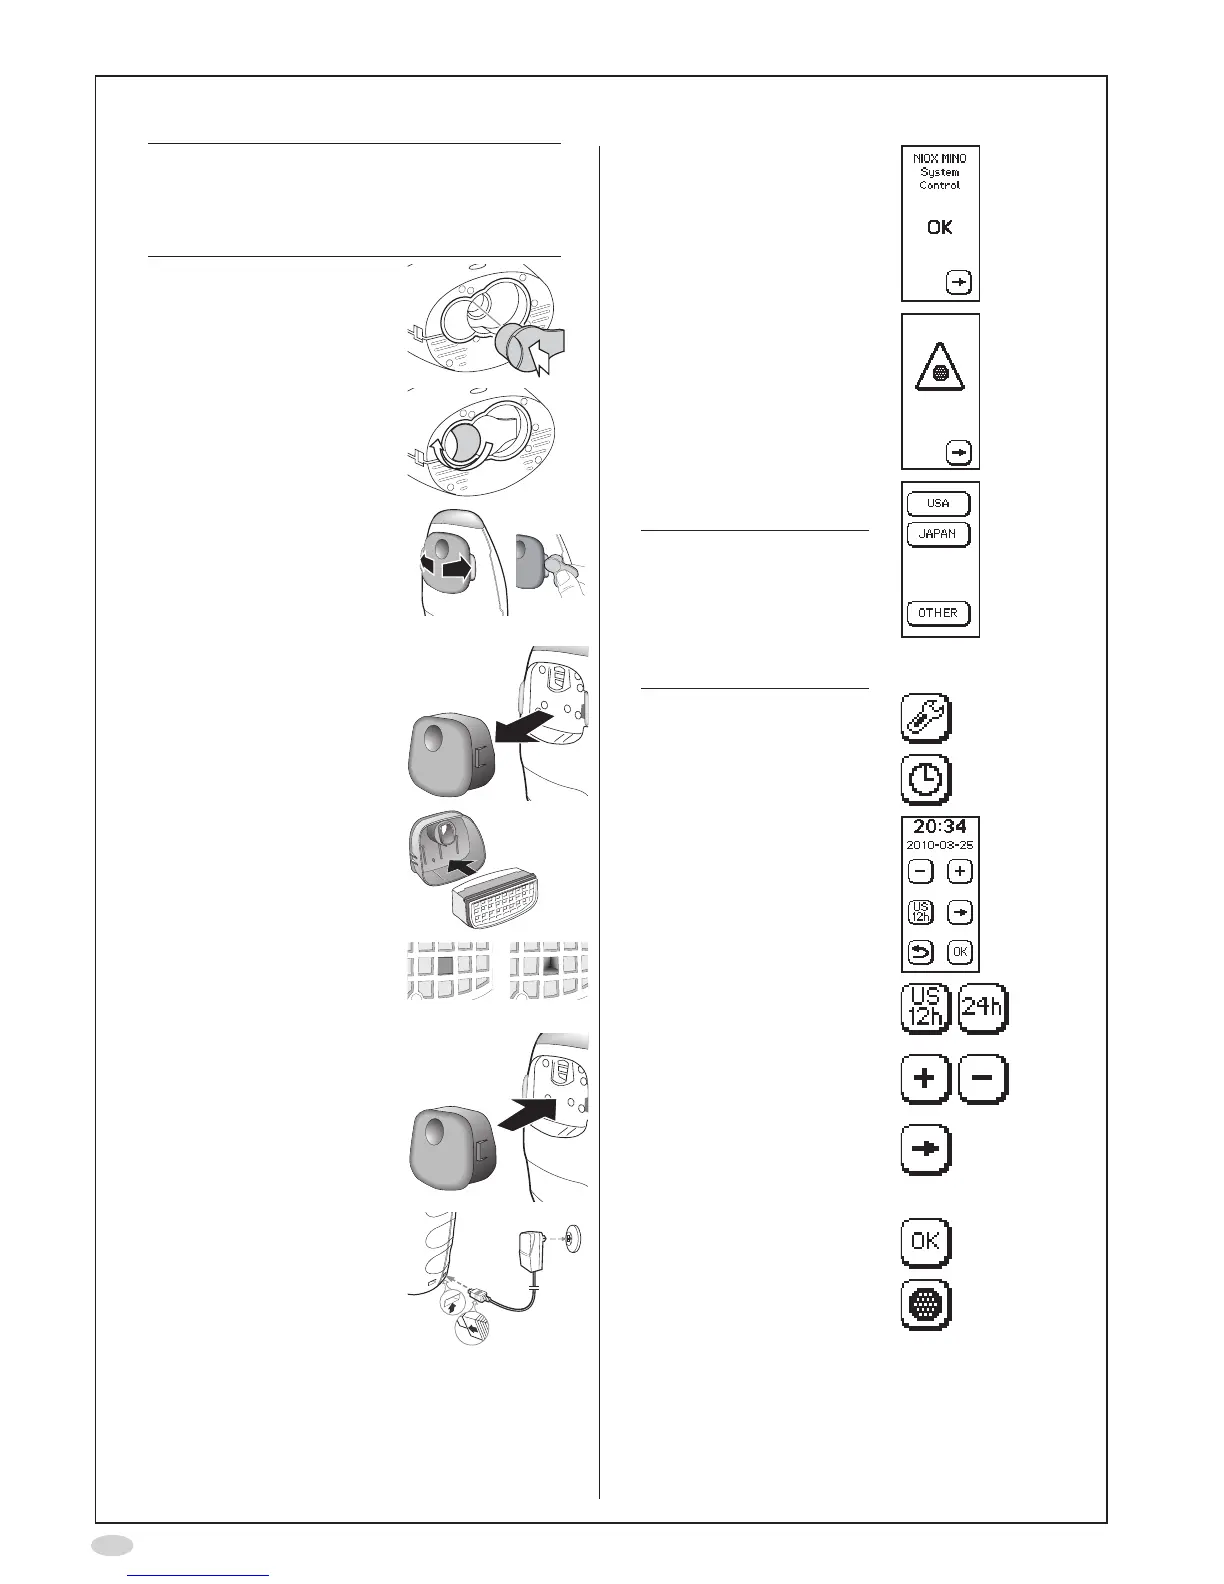
Caution!
BecarefulwhenopeningtheSensorcan.
Theinsideoftheopeninghassharpedges.
DonottouchorcleanthewhiteSensor
membrane
1. InserttheSensorintothe
compartment at the base
of the instrument
2. Turntheorangeswivel
until locked
3. Spreadthelatchesapart,
oneatatime,
(Optionally:Usethered
tooldeliveredwiththe
instrument to spread the
latchesapart)
...andcarefullypulloutthe
cover
4. Insertthenew
NOscrubberintothecover
Makesuretouseanew
NOscrubber,withan
unbroken hole
Unbroken Broken
5. Replacethecoverand
make sure it snaps in
place
6. Attachthepowersupply
unit to the instrument and
toapoweroutlet
7. Waitfortheinstrument
to start up and press the
Forwardbutton
8. Remindertoinsertanew
NOscrubber.Pressthe
Forwardbutton
9. SelectOTHERonthe
display
Note!
Thisscreenisonly
displayedatrststart-
upoftheinstrument.
TheJAPANiconisonly
availableforSW22XX
and23XX.
10.SelectSettings
11.SelectClock
12.Thetimeanddatesettings
areshown
13.Clickthetimeformaticons
tochangebetweenUS
andISOtimeanddate
14.Usetheplusandminus
buttons to set the time and
date
15.Selecttheforwardbutton
tochangebetweenhour,
minute,year,monthand
day
16.SelectOKtoacceptthe
changes
17.SelectNOscrubber