5
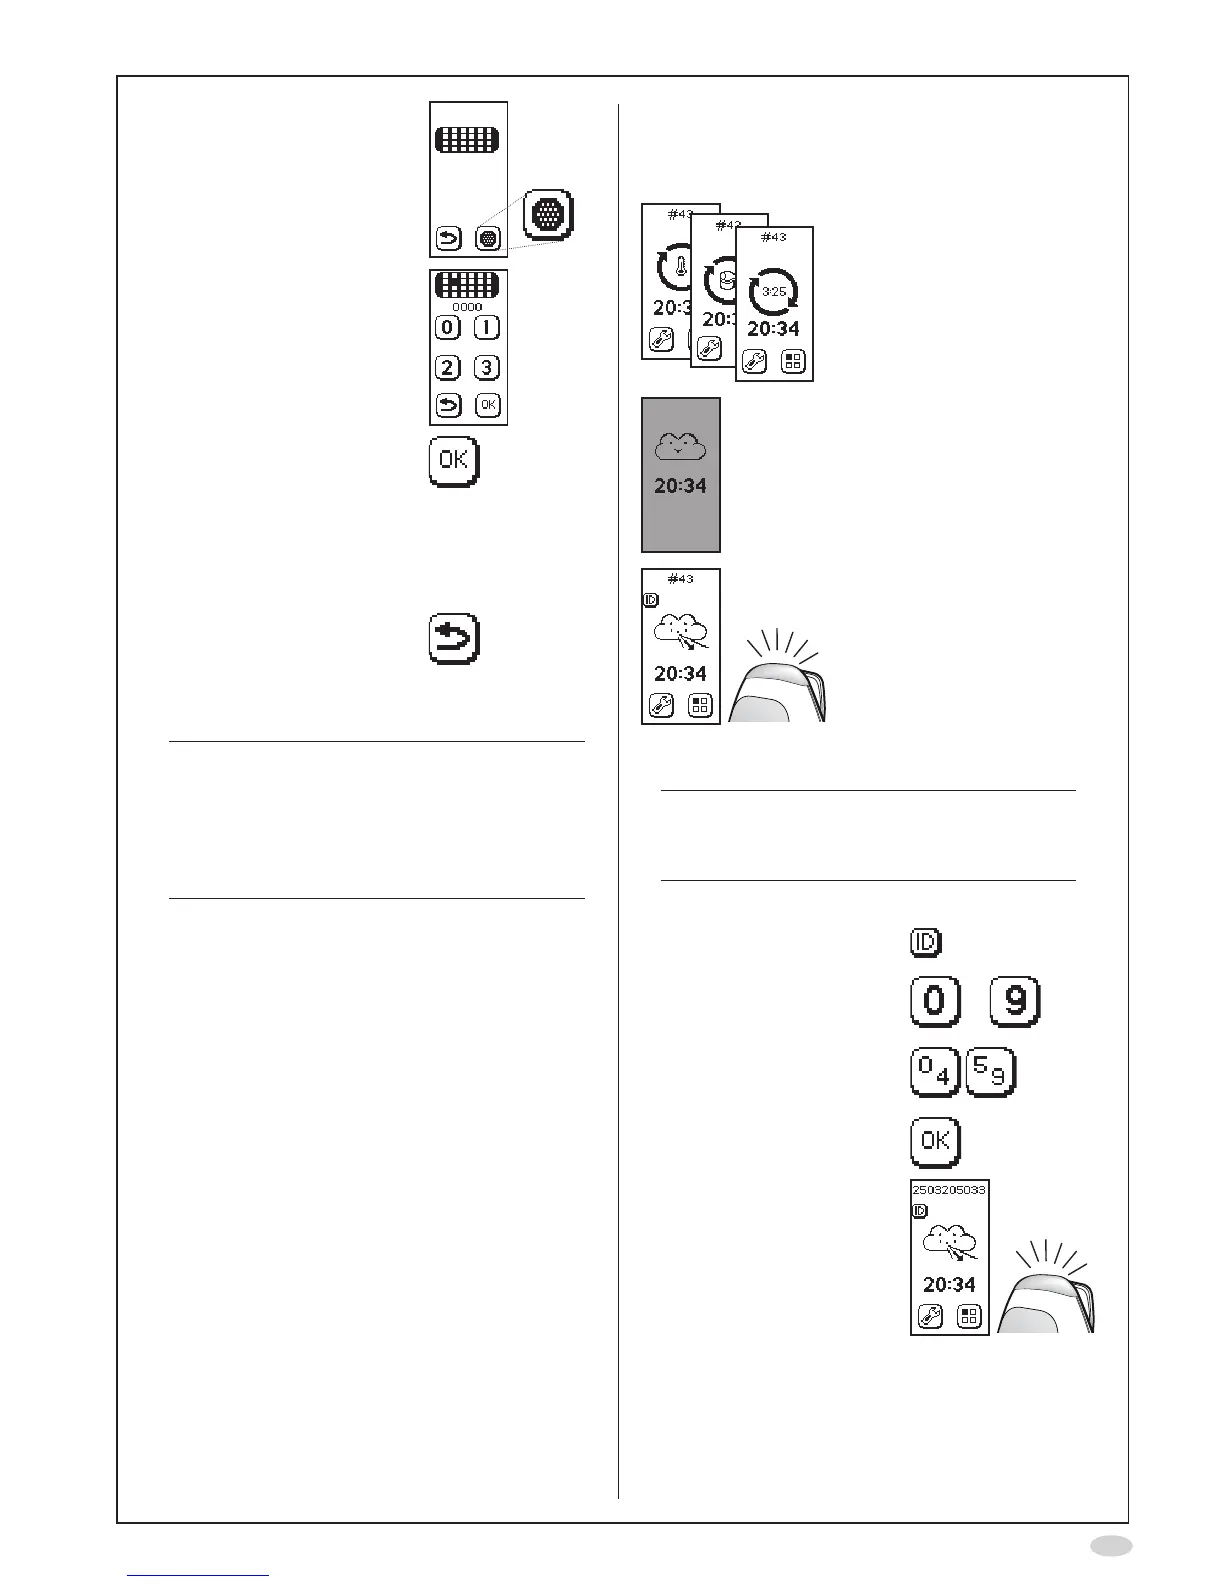
18.AgainselectNOscrubber
19.Inputthepasscode0000
usingthenumberbuttons
toconrmthatanew
NOscrubberisinstalled
20.SelectOKtoacceptthe
changes
21.Optional:Activate
Bluetoothforwireless
communicationwithPCor
connectaUSBcable,see
page18
22.SelectReturntogoback
to the Main screen
23.Allowtheinstrumentto
stabilize.
Note!
Stabilizationoftheinstrumentnormallymay
takeupto30minutesfollowingconnection
ofthepowersupplyunittothepoweroutlet.
However,itisrecommendedtoallowanew
NIOX MINO
®
Sensortobeconnectedfortwo
hoursbeforetherstmeasurementisdone.
Measurement
Dependingonwhatisshownonthedisplay,
proceedasfollows:
Stabilizationinprogress
Wait until ready
Instrument in sleep mode
Touchthedisplay
Readyforuse
Enter patient ID (optional)
Note!
If Patient ID is used, it has to be entered
before each measurement (even if it is the
same patient).
InputapatientspecicIDnumber,upto10digits.
1. SelecttheIDbuttonon
the main screen
2. Inputthepatientspecic
IDusingthenumber
buttons
to
Use the shift buttons to
changebetweendigits0
to4and5to9
3. SelectOKtoacceptthe
patient ID