Copyright © 2019 Nortek Security & Control LLC
15
Installation Steps
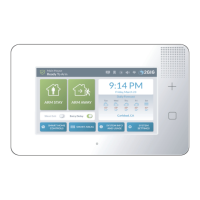
When installing the GC3 Security & Automation System, use the steps below as a general guideline. Before you begin,
make sure that you have created the Installation Plan. See “Create the Installation Plan.”
1. Unpack the System: Unpack the system and ensure you have all of the required tools and components.
2. Install the Cellular Radio Module: Ensure the Cellular Radio Module is properly installed. Verify cell coverage
with the proposed panel location in the home. See “Install the GC3 Cellular Radio Module.”
3. Mount the GC3 Panel’s Backplate: If you will be mounting the GC3 Panel on the wall, identify the best location
for the GC3 Panel near an unswitched power outlet. Then use the GC3 Panel’s backplate to mark the wiring cutout
locations and mount the backplate to the wall. See “Mount the GC3 Panel’s Backplate.”
NOTE: If mounting the GC3 Panel on a wall is not an option, the 2GIG Desktop Kit can be purchased for use with
the GC3 Security & Automation System. This is an accessory that lets one mount the GC3 Panel on a stand that
can be placed on a fl at surface, such as desk or counter. Use of this option may affect compliance with state or
regional codes.
4. Connect an External Alarm Sounder: If the property will be protected by an external alarm sounder, install the
alarm sounder following the instructions provided with the sounder. Once installed, route the sounder’s wiring to
the appropriate screw terminals on the GC3 Panel’s terminal block. See “Connect an External Alarm Sounder.”
5. Connect the Hardwire Loops: If the property will be protected by any wired sensors, route the hardwire loop
wiring to the appropriate screw terminals on the GC3 Panel’s terminal block. See “Connect the Hardwire Loops.”
6. Connect the Power Wires: There are two methods of connecting power to the GC3 Panel. Connect the power
cord using the barrel connector or connect a 2-conductor power wire (not supplied) to the appropriate screw
terminals on the GC3 Panel’s terminal block. See “Connect the Power Wires.”
7. Connect the Backup Battery: Before connecting the GC3 Panel to the AC power source, ensure the backup
battery is connected. See “Connect the Backup Battery.”
8. Install the Wall Bracket and AC Power Supply: After mounting the GC3 Panel on the wall, install the wall
bracket and then plug in the AC Power Supply. See “Install the Retaining Wall Bracket and Connect the AC Power
Supply.”
9. Install the Sensors and Peripheral Devices: Follow the Installation Instructions included with each sensor and
peripheral that you plan to install.
10. Program the Sensors & Peripherals: Program the system’s wireless and wired zones, as well as any keyfobs or
keypads. See “Programming Sensors & Peripherals.”
11. Complete the Panel Programming Steps: Program settings for the GC3 Panel and the rest of the system. See
“Panel Programming.”

 Loading...