Copyright © 2019 Nortek Security & Control LLC
41
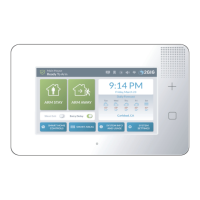
2. Under Sensor Reports, choose Enabled or
Disabled.
Wireless Zone <###>—Sensor Reports
3. Tap ▼.
Step 12: Enable or Disable Sensor Supervision
Next, turn the Sensor Supervised option ON or OFF.
When enabled, the feature is ON and the GC3 Panel
checks for regular, wireless transmissions from the
sensor or peripheral. If the GC3 Panel doesn’t receive a
transmission from the sensor after a set amount of time, the
system issues a loss of supervision trouble report. When
disabled, the feature is OFF.
Note: Because portable sensors (for example, the Panic
Button Remote) are frequently moved out of the system’s
range when users leave the premises, always disable the
Sensor Supervised for panic buttons. A sensor will still
report to the Central Station with supervision disabled.
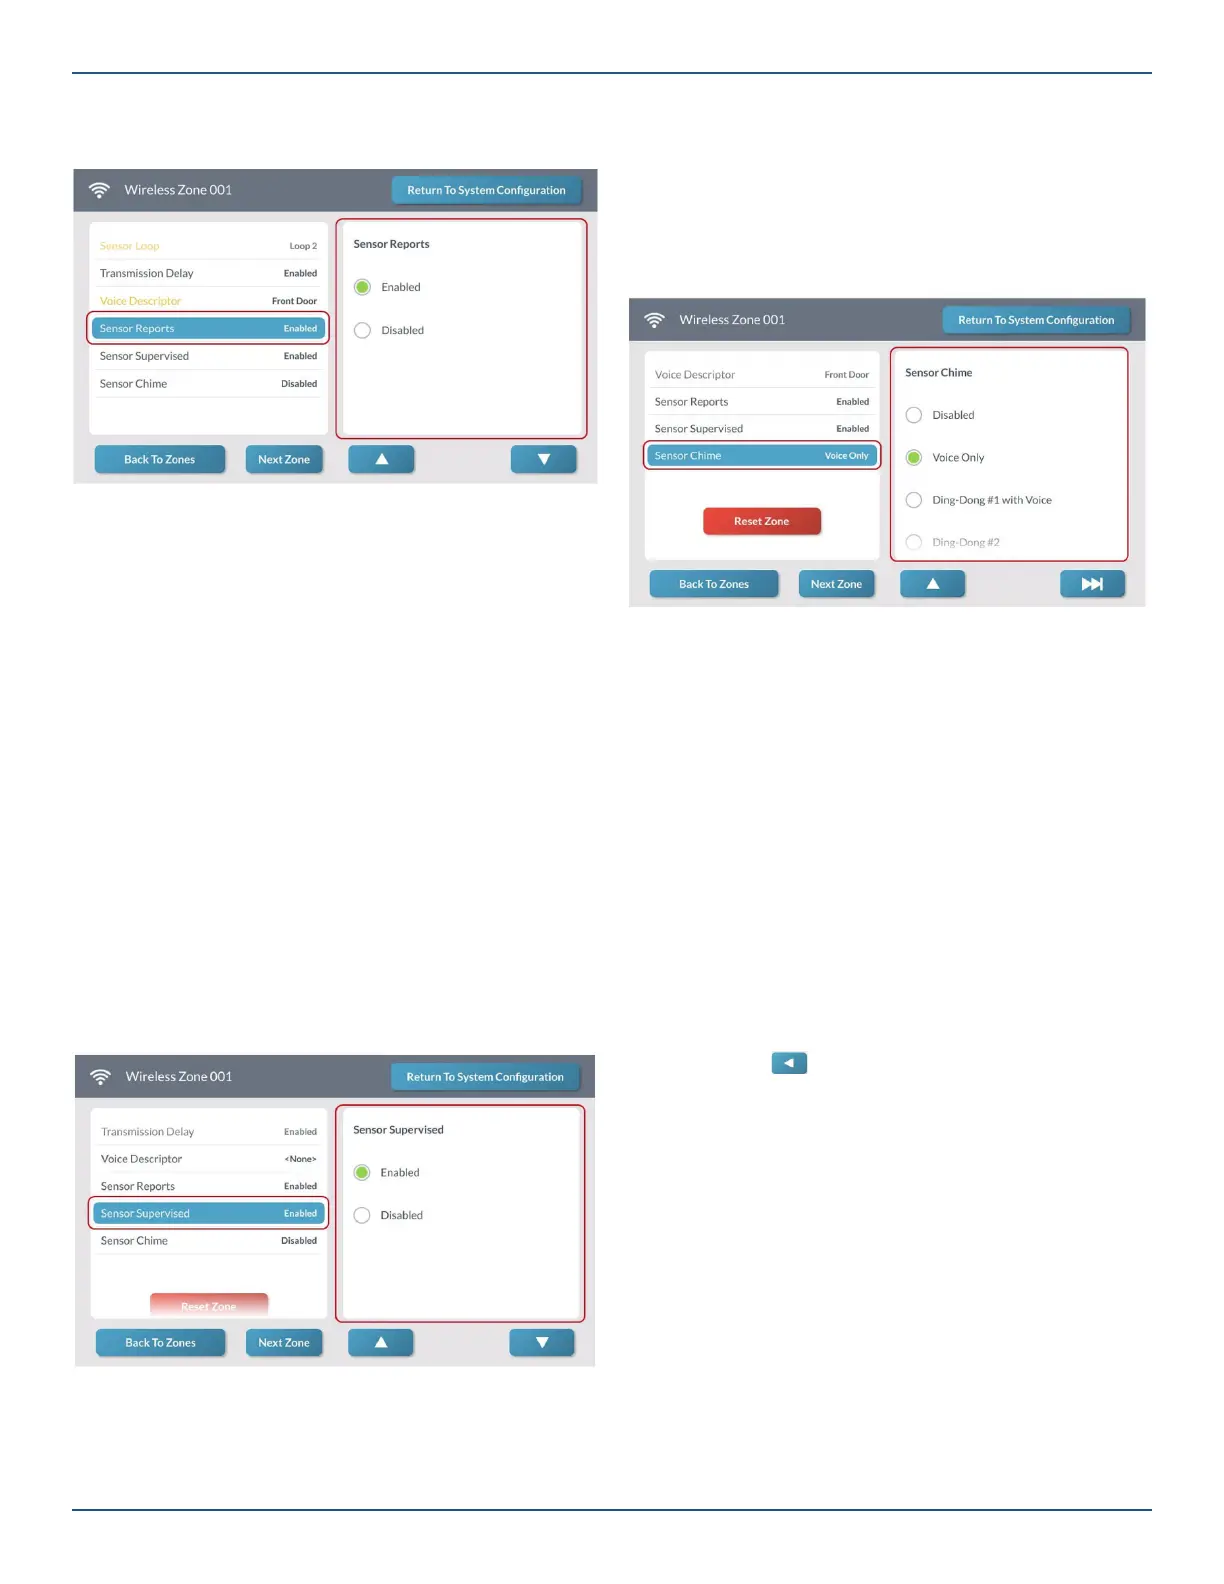
1. At the Wireless Zone <###> screen, highlight
Sensor Supervised.
2. Under Sensor Supervised, choose Enabled or
Disabled.
3. Tap ▼.
Wireless Zone <###>—Sensor Supervised
Step 13: Choose a Chime
Next, select the desired chime for the sensor or peripheral.
1. At the Wireless Zone <###> screen, highlight
Sensor Chime.
2. Choose the desired chime from the Sensor Chime
list. The default setting is Disabled.
Wireless Zone <###>—Sensor Chime
Next Steps
You have fi nished programming a wireless zone. You can
now choose one of these options:
»
To program the next wireless zone, tap Next
Zone and repeat the programming steps for
another sensor. The system keeps track of all
your programming changes and prompts you to
permanently save all your changes as a group when
you exit the System Confi guration menu.
»
To program the next wireless zone, tap uu|. This
button becomes visible and available only when
programming the last setting for a zone.
»
To erase all of the settings you just programmed for
the zone, tap Reset Zone.
»
To permanently save the settings you just
programmed, tap Return to System Confi guration.
Then tap . At the Confi rm Changes screen, tap
Save.
 Loading...