40
ML0044B December 1, 2017 Copyright 2017 Bitronics, LLC
To upload the new firmware, first obtain a copy of the firmware image. The firmware
image is a binary file, less than 2 MB in length, that can be attached to email,
distributed on a CD, or downloaded from an FTP site as circumstances dictate. Place
a copy of the firmware image on your computer then access the upload page from the
Firmware Upload link on the Configuration Settings page.
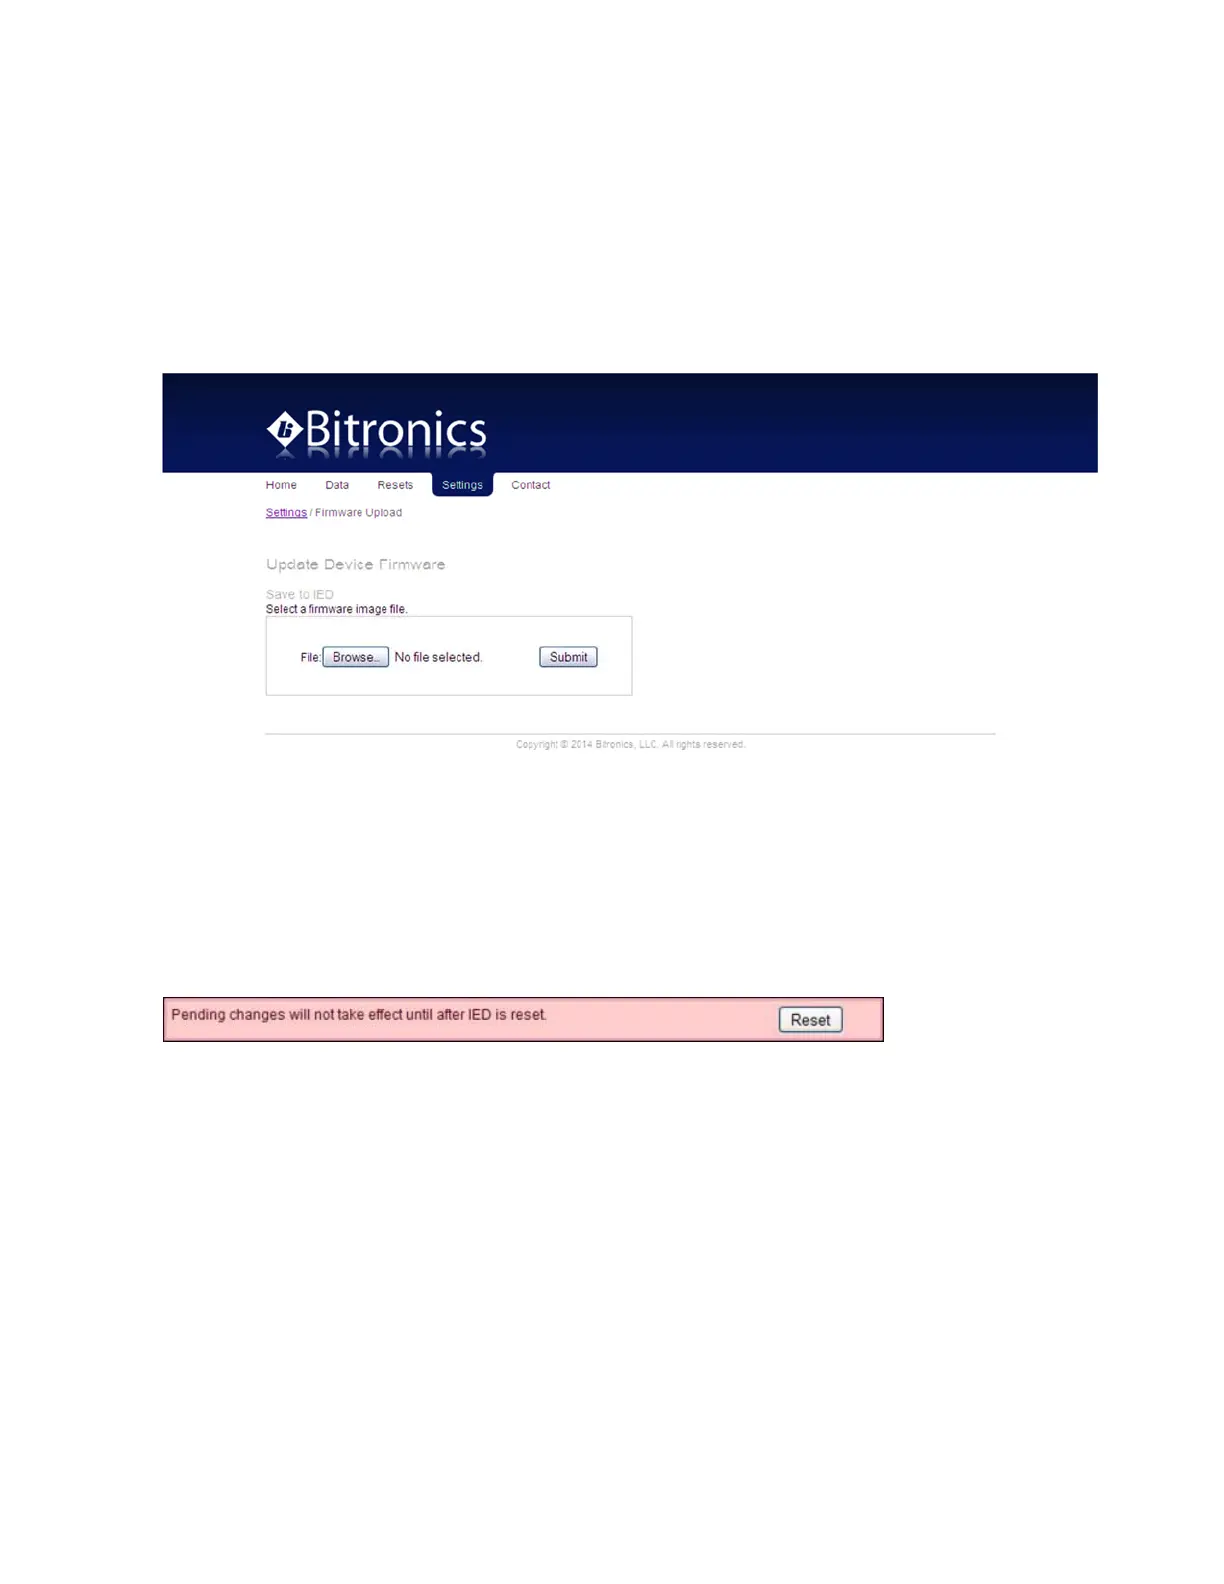
This will take you to the Firmware Upload page, which looks like the screen capture in
Figure 7.
Figure 7 – Bitronics PPX II Firmware Upload Page
Once the Firmware Upload page is visible, use the Browse button to locate the
firmware image on your computer. Next use the Submit button to initiate the file
transfer and installation process. The instrument must be rebooted to make the new
firmware active. At the completion of the file transfer and installation process, the
instrument will prompt you to reset the instrument remotely by displaying the dialog
box below after the firmware has been successfully installed.
It is strongly recommended that you clear your web browser’s cache (delete the
temporary internet files) after updating the firmware so that the new content will be
loaded into your browser. Please refer to your browser’s help file on how to clear the
cache. A useful keyboard shortcut common to Internet Explorer, Firefox and Chrome
is CONTROL + SHIFT + DELETE, which will take you directly to the relevant dialog
panel. Carefully select the items to be cleared. Be sure to check the boxes that clear
“temporary internet files”, “cache” or “website data” and uncheck any boxes that
preserve data.
If you had a previously saved configuration that you wish to now load to your PPX II,
you should now go back to the Load/Store Settings page and go to the top box “Select
a configuration file”. Click on the box “Load network settings from file” and then