39
ML0044B December 1, 2017 Copyright 2017 Bitronics, LLC
The inarp utility is Copyright (c) 2011 by Bitronics, LLC. All rights reserved.
Portions of inarp are
Copyright (c) 1999 - 2005 NetGroup, Politecnico di Torino (Italy), and
Copyright (c) 2005 - 2010 CACE Technologies, Davis (California)
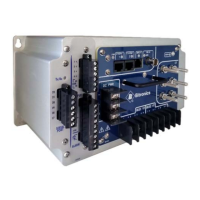
3.4.2 Indicators – Ethernet (ACT) LEDs
There are 2 LEDs on the front panel to indicate activity is occurring on the
communication ports. These LEDs are useful in determining that there is activity
occurring on the ports. The LEDs are labeled “Ethernet 1” and “Ethernet 2” to
correspond to each of the Ethernet ports. The appropriate LED will flash to indicate
there is activity on an Ethernet RJ45 port. It will also indicate that a link has been
established on the appropriate port.
A troubleshooting guide is found in Appendix A2, which may be useful in establishing
Ethernet connections.
3.4.3 Firmware upgrades and saving and loading configuration files – Ethernet
service port
New versions of firmware may be released by Bitronics from time to time, either to add
new functionality or to correct errors in code that may have escaped detection prior to
commercial release. Consult the factory for detailed information pertaining to the
availability of firmware upgrades. In cases such as this, it is desirable to support a
mechanism for new firmware to be installed remotely. The ability to upgrade Firmware
is done over the Ethernet port. The PPX II utilizes a page in the Web Server interface
to upload and install new firmware.
The complete PPX II configuration, which includes all user-configurable parameters,
can be saved in a single file on your computer. This allows you to save a backup of
your configuration and to restore it at a later time, as needed. This also allows you to
configure one PPX II and then transfer the configuration to multiple other PPX II’s.
Before initiating the firmware upgrade, if you are planning to use a configuration that
has already been setup in the PPX II, then you should first go to the Load/Store
Settings page and click on the Get File button to save the IED configuration to your
computer (if you will be using a default configuration this step is not necessary). Use
the File Save dialog window to select the location on your computer to save the
configuration file. Once you have saved the file, it is recommended that you load the
file back to the PPX II to validate that it was saved correctly. Click the Browse or
Choose File button and use the File Open dialog window to select the configuration file
you just saved. Click the Submit button. If the “Configuration upload success”
message appears, the configuration file is confirmed to have saved correctly. Once
the configuration file is saved to your computer, or even if you don’t need to save the
configuration, you should restore the meter to the factory defaults. On the Load/Store
settings page, select Restore All Defaults to bring the meter back to default settings.