19
Filter Changes
1. Close your feed water adapter to stop the flow of water to your system.
2. Unplug the system power supply from your wall outlet. If you have a UV filter disconnect the power supply
from your wall outlet.
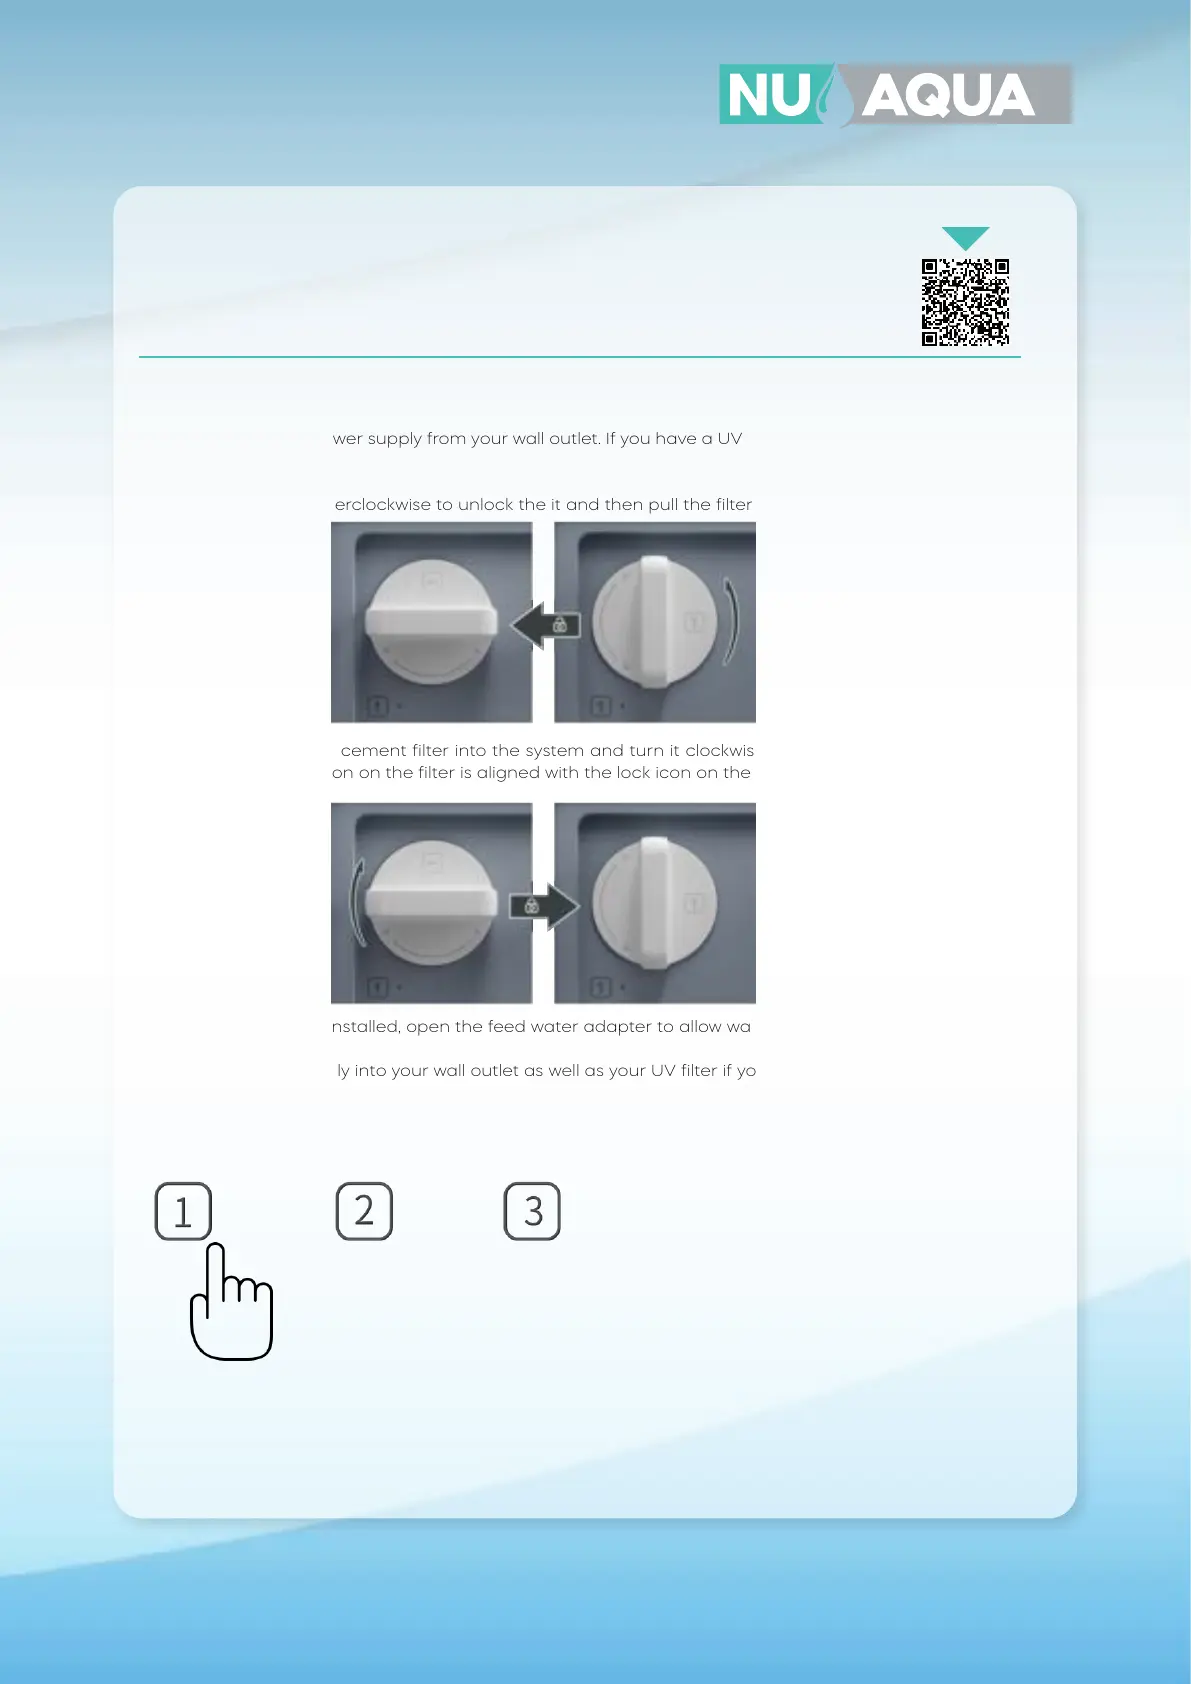
3. Rotate the filter counterclockwise to unlock the it and then pull the filter out from the system.
4. Insert your new replacement filter into the system and turn it clockwise to lock it into place. Rotate the
filter so that the lock icon on the filter is aligned with the lock icon on the system.
5. With your new filters installed, open the feed water adapter to allow water into the system.
6. Plug your power supply into your wall outlet as well as your UV filter if your system is equipped with one.
7. Now reset the filter reminder on the system. Hold the button for the corresponding filter number on the
system that you’ve replaced for 3 seconds until the light flashes. The icon light will now turn o indicating
the filter has been reset successfully.
8. Now that your filter has been replaced, you must flush your system again. Open the faucet and allow the
water to run for 30 minutes. Once completed, your system is ready for use.
WANT YOUR FILTERS DELIVERED AUTOMATICALLY?
JOIN THE FILTER CLUB AND GET YOUR FILTERS
AT A DISCOUNT.
Scan Me!