INSTALLATION, USE & CARE INSTRUCTIONS
INSTALLATION
11
INSTALL THE UNIT
1. Run house power cable between service panel and unit
location. Stub out a 2-foot length of power cable inside
the cabinet. Attach the power cable to the unit using an
appropriate 7/8” diameter strain relief (not included).
NOTE: The HCK44 cord connection kit (optional) can
be used instead of the house power cable. Refer to the
instruction packed with the HCK44 cord connection kit.
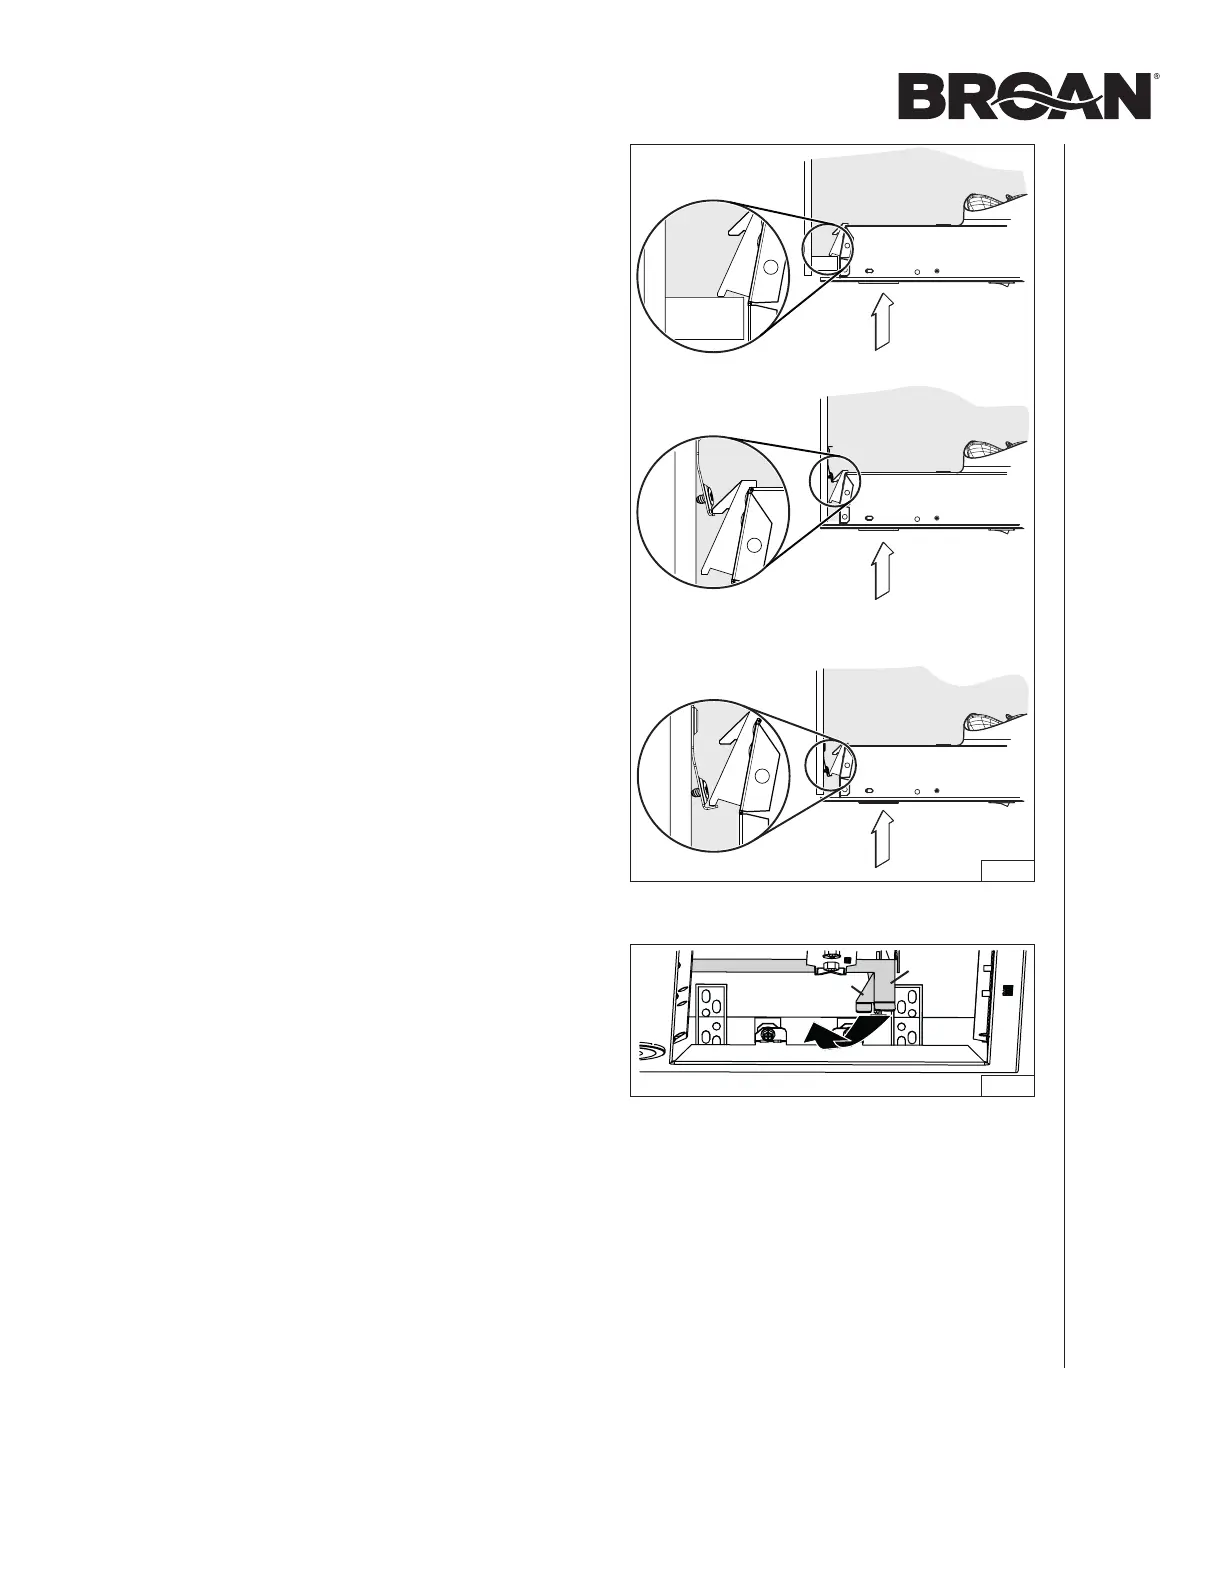
2. Insert the unit in the cabinet, until you feel a ‘click’ from
both sides of the unit, confirming that the Ease of Install
Hooks rest on the top of the cabinet bottom sides , or
cabinet brackets or (FIG. 16). Move the unit from
left to right, from rear to front and up to ensure the Ease
of Install Hooks are retaining the unit inside the cabinet.
NOTE: The unit will be protruding below the cabinetry until
tightened.
NOTE: If, for any reason, the unit has to be removed from the
cabinet, it is possible to disengage the Ease of Install
Hooks. To do so, while holding and pushing on
one
side of the unit, lift simultaneously the Ease of Install
hooks levers (1 and 2, grey parts in FIG. 17) in the
other side of the unit until the hooks are retracted.
FIG. 16
FIG. 17
1
2