INSTALLATION, USE & CARE INSTRUCTIONS
INSTALLATION
12
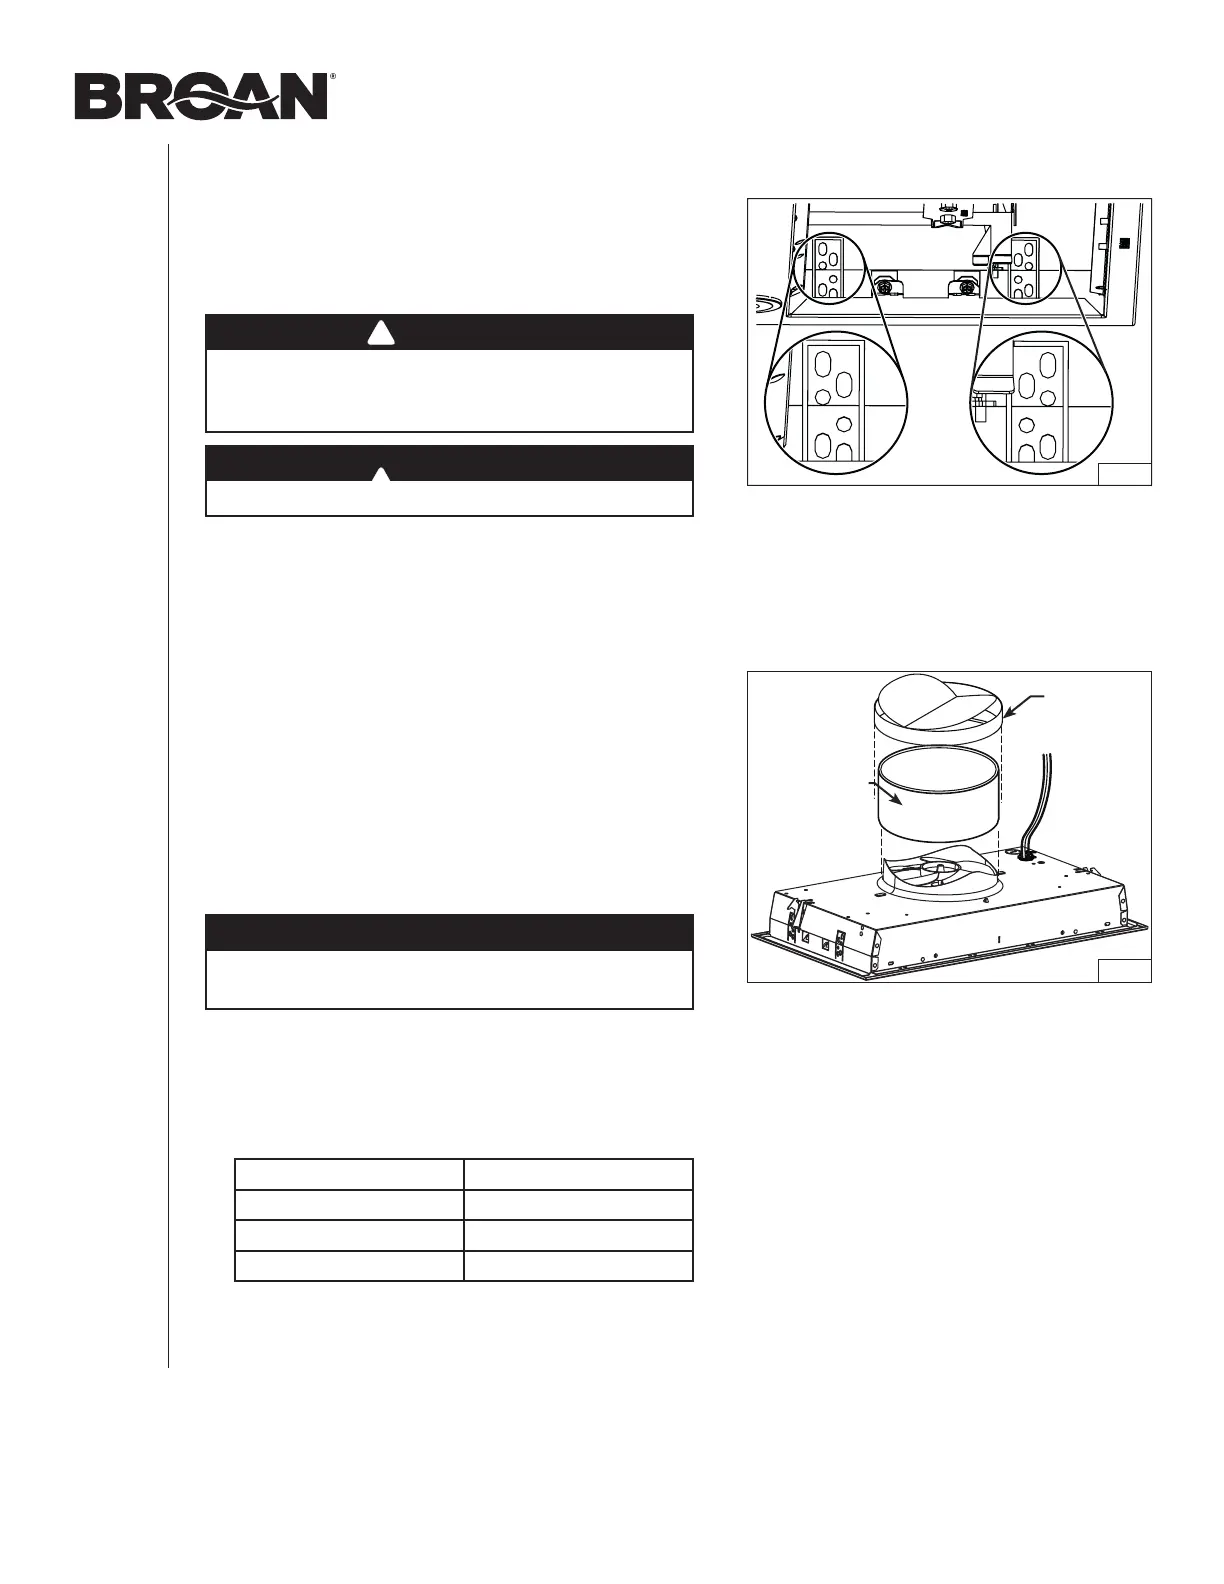
FIG. 18
DUCTED
INSTALLATION
ONLY
BP87Q
7” ROUND DUCT
SECTION,
12” MINIMUM
LENGTH
FIG. 19
CONNECT DUCTWORK
Ducted Installation
Use 7” round metal duct to connect the discharge collar on
the powerpack insert to the ductwork above. An optional
7” round damper, model BP87Q, may be used (purchase
separately).
NOTE: Due to its design, the BP87Q 7” round damper
cannot be installed directly over the unit discharge
collar; if this damper has to be installed, it must
be attached between two sections of 7” round
metal duct (FIG. 19). Use metal foil tape to make
all joints secure and air tight.
Non-Ducted Installation
A non-duct kit is required for this type of installation
(purchase separately). To install, follow the instructions
packed with the kit. Refer to table below to find the
appropriate non-duct kit according to the unit.
Unit model Non-Duct kit model
PM300SS HARKPM21
BBN1243SS HARKBN24
BBN1303SS HARKBN30
INSTALL THE UNIT (cont’d)
3. Lift the unit until contact is made between the unit
flange and cabinet. Secure the unit to the cabinet using
4 no. 8 x 5/8” wood screws included in parts bag
(2 screws per side). Use upper or lower holes (1, 2, 3, 4,
5, or 6) (FIG. 18).
WARNING
The Ease of Install Hooks TEMPORARILY hold the unit
in place. The unit MUST BE secured to the cabinet
using the included 4 screws.
CAUTION
Do not use screws to attach the BP87Q damper to
the duct sections.
WARNING
Never use this unit as a shelf.